Einleitung
This guide is intended to repair the internal power wire of the Rival 16131 Toaster.
If the toaster doesn't heat after pushing the lever, it could be caused by a damaged or disconnected wire inside the device housing. The wires connect the incoming outlet current to the heating element, so it must stay intact.
Before using this guide, verify you are not using a faulty power outlet. Sometimes the issue lies in the source being used instead of the device itself. This can be checked by plugging in another device and ensuring it functions as intended. Next, ensure that the browning dial is set to a high enough level to toast bread. Finally, if the lever is pushed but doesn't stay down, follow the toasting lever troubleshooting page to find and fix any issues involving the lever or spring mechanism.
Step 7 requires you to resolder the wire inside of the toaster housing. Please refer to the Soldering Skills page to learn more about this process. This page contains soldering instructions, a list of required tools, and important safety procedures.
Before disassembling, ensure the toaster is unplugged and that it has had enough time to cool down completely. Even when the heating element isn't glowing red, it could still cause serious burns if it is handled immediately after disconnecting from power.
Was du brauchst
-
-
Use a Phillips #2 screwdriver to remove four 12 mm screws at the base of the toaster shell.
-
-
-
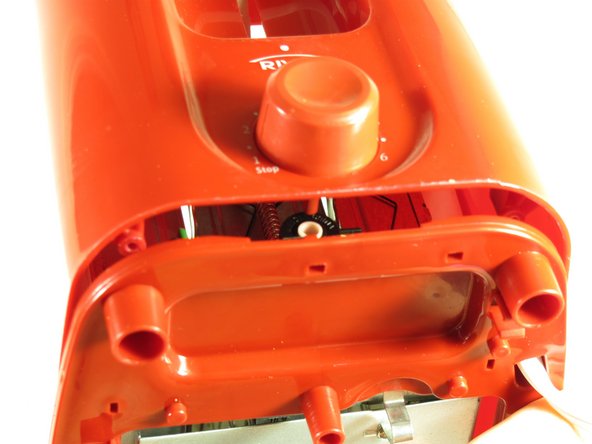
With the dial facing you, push the toaster base up and away until the base is just over the lip of the shell. This will disconnect the browning dial from the rest of the toaster.
-
-
-
-
Reach into the shell and grab the back white part of the lever.
-
Hold the grey lever with both your index finger and middle finger. Next, pull it.
-
Remove the shell.
-
-
-
The power wire connects to the toaster in the area highlighted.
-
To free the wire, unscrew the two .5 inch screws, and remove the white brace.
-
-
-
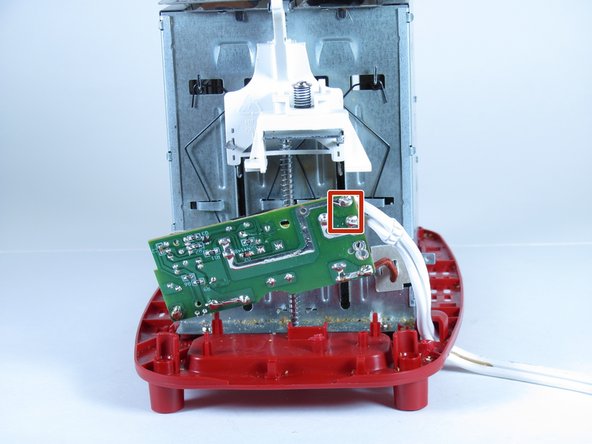
To solder the the wire, the circuit board has to be released.
-
To do this, unscrew the .5 inch screw located in the middle of the board.
-
Slowly lift the board up off the toaster, making sure that the red pegs that hold the board in place do not break.
-


To reassemble your device, follow these instructions in reverse order.
To reassemble your device, follow these instructions in reverse order.
Team

Cal Poly, Team 2-8, Propen Fall 2012 Mitglied von Cal Poly, Team 2-8, Propen Fall 2012
CPSU-PROPEN-F12S2G8
5 Mitglieder
6 Anleitungen geschrieben