Einleitung
This guide will show you how to properly replace the power cord in the Ryobi CSB135L. If the symptoms in our troubleshooting page for a damaged power cord align with the symptoms your Ryobi CSB135L are experiencing your power cord is most likely damaged.
Was du brauchst
-
-
Remove the six M4x16mm Phillips screws and the two M4.5x35mm screws using a Phillips #2 screwdriver.
-
Remove the front facing half of the handle assembly exposing the internals of the saw.
-
-
-
-
After removing the handle assembly locate the trigger switch and wire nut in the saw.
-
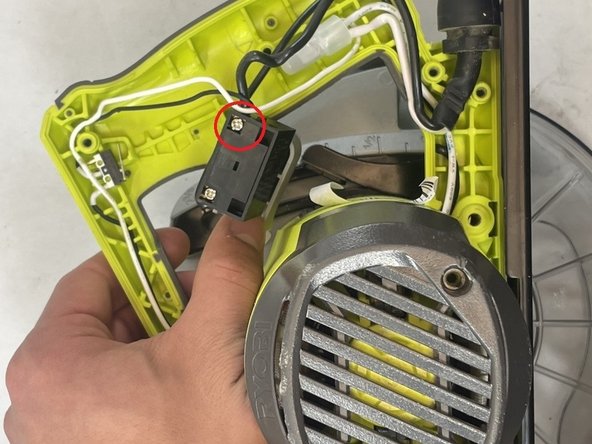
Remove the screw from the black wire of the power cord using a Phillips screwdriver. Then remove the wire.
-
Loosen the wire nut and remove the neutral wire from the power cord.
-


To reassemble your device, follow these instructions in reverse order.
To reassemble your device, follow these instructions in reverse order.
Team

UMass Dartmouth, Team 7-3, Ryckebusch Spring 2023 Mitglied von UMass Dartmouth, Team 7-3, Ryckebusch Spring 2023
UMASSD-RYCKEBUSCH-S23S7G3
3 Mitglieder
6 Anleitungen geschrieben