Zum Hauptinhalt wechseln

Samsubg Galaxy Tab A 10.1 S-Pen Home Button Replacement

Was du brauchst

  1. Samsubg Galaxy Tab A 10.1 S-Pen Home Button Replacement, Battery: Schritt 1, Bild 1 von 2 Samsubg Galaxy Tab A 10.1 S-Pen Home Button Replacement, Battery: Schritt 1, Bild 2 von 2
    • Remove all external power and turn off the tablet.

    • Insert a plastic opening tool between the screen and rear casing.

    • Pry the screen and rear casing apart.

  2. Samsubg Galaxy Tab A 10.1 S-Pen Home Button Replacement: Schritt 2, Bild 1 von 3 Samsubg Galaxy Tab A 10.1 S-Pen Home Button Replacement: Schritt 2, Bild 2 von 3 Samsubg Galaxy Tab A 10.1 S-Pen Home Button Replacement: Schritt 2, Bild 3 von 3
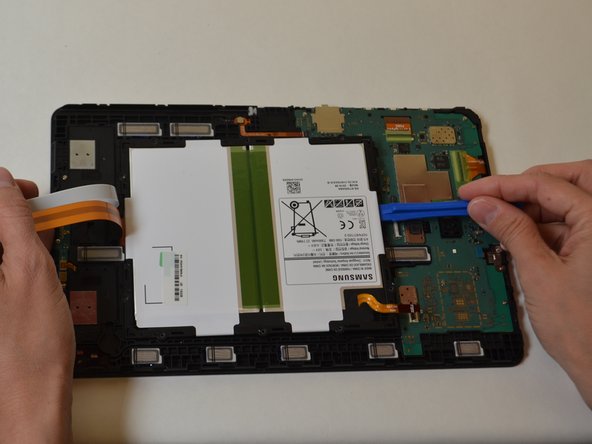
    • Remove the three green pieces of tape covering the white, black, and gold ribbon cables.

    • Use a spudger to flip up the retaining flap on the three ribbon cable ZIF sockets.

    • Pull the ribbon cables out of the sockets.

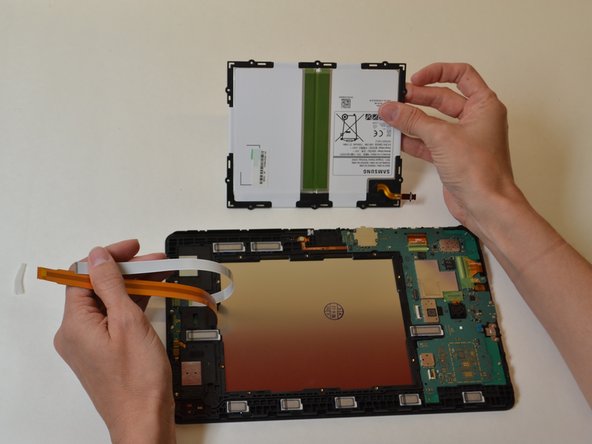
  3. Samsubg Galaxy Tab A 10.1 S-Pen Home Button Replacement: Schritt 3, Bild 1 von 3 Samsubg Galaxy Tab A 10.1 S-Pen Home Button Replacement: Schritt 3, Bild 2 von 3 Samsubg Galaxy Tab A 10.1 S-Pen Home Button Replacement: Schritt 3, Bild 3 von 3
    • Remove the ten 4mm Phillips #000 screws from the battery.

    • Use a plastic opening tool to pry up the battery.

    • Remove the battery.

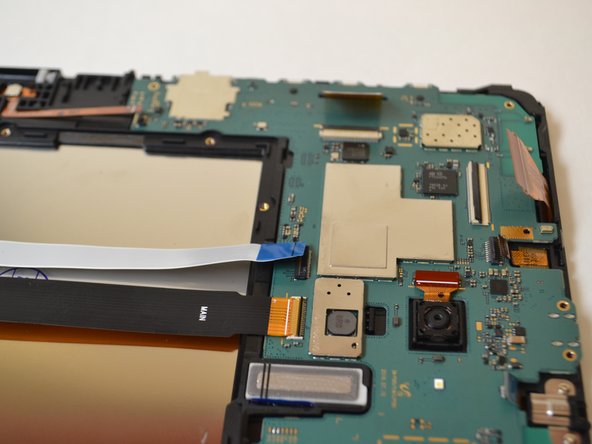
  4. Samsubg Galaxy Tab A 10.1 S-Pen Home Button Replacement, Home Button: Schritt 4, Bild 1 von 2 Samsubg Galaxy Tab A 10.1 S-Pen Home Button Replacement, Home Button: Schritt 4, Bild 2 von 2
    • Remove the green protective tape from the three ZIF connectors on the motherboard.

    • Use a spudger to flip up the retaining flap on the three ribbon cable ZIF sockets.

    • Pull the ribbon cables out of their sockets.

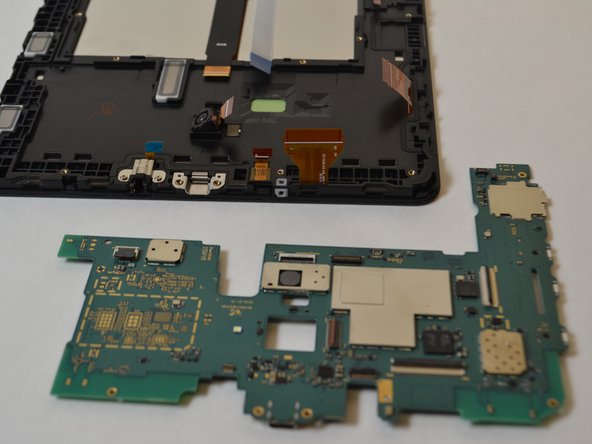
  5. Samsubg Galaxy Tab A 10.1 S-Pen Home Button Replacement: Schritt 5, Bild 1 von 2 Samsubg Galaxy Tab A 10.1 S-Pen Home Button Replacement: Schritt 5, Bild 2 von 2
    • Remove the six 4mm Phillips #000 screws from the motherboard.

    • Remove the motherboard.

  6. Samsubg Galaxy Tab A 10.1 S-Pen Home Button Replacement: Schritt 6, Bild 1 von 2 Samsubg Galaxy Tab A 10.1 S-Pen Home Button Replacement: Schritt 6, Bild 2 von 2
    • Insert a plastic opening tool between the screen and bezel.

    • Slide the plastic opening tool around the perimeter while applying a prying motion.

    • Remove the screen from the display.

    • Applying heat may be needed to loosed the glue.

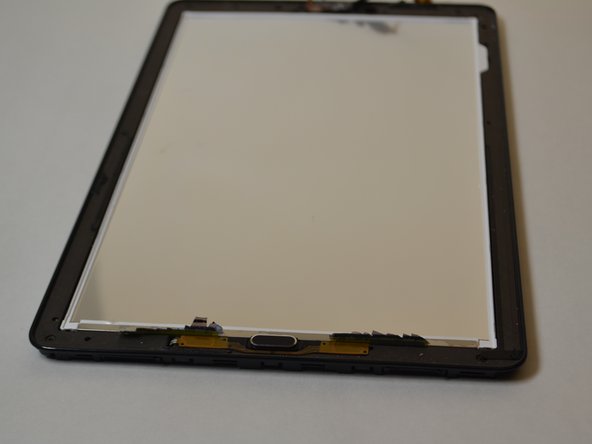
  7. Samsubg Galaxy Tab A 10.1 S-Pen Home Button Replacement: Schritt 7, Bild 1 von 2 Samsubg Galaxy Tab A 10.1 S-Pen Home Button Replacement: Schritt 7, Bild 2 von 2
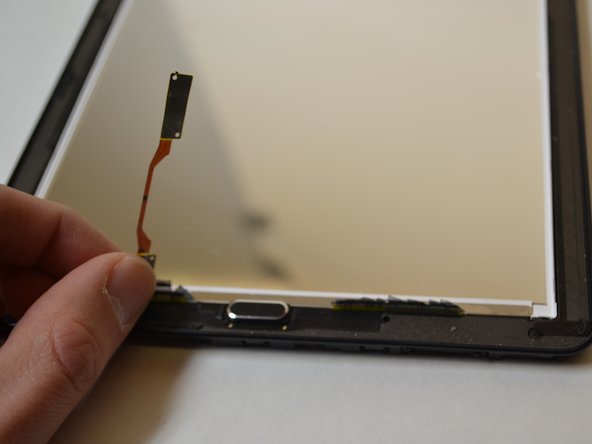
    • Locate the Home button on the front of the panel and carefully lift the gold ribbon surrounding it from RIGHT to LEFT.

  8. Samsubg Galaxy Tab A 10.1 S-Pen Home Button Replacement: Schritt 8, Bild 1 von 1
    • Using your Phillips #000 screwdriver Remove the two 4mm Phillips #000 screws from the home button.

  9. Samsubg Galaxy Tab A 10.1 S-Pen Home Button Replacement: Schritt 9, Bild 1 von 1
    • Remove the home button by sliding it to the left or right while pulling up.

Abschluss

To reassemble your device, follow these instructions in reverse order.

Ein:e weitere:r Nutzer:in hat diese Anleitung absolviert.
Guneet Bawa

Mitglied seit: 04/12/18

670 Reputation

4 Anleitungen geschrieben

Team

UW Tacoma, Team S1-G5, Liner Spring 2018 Mitglied von UW Tacoma, Team S1-G5, Liner Spring 2018

UWT-LINER-S18S1G5

5 Mitglieder

8 Anleitungen geschrieben

0 Kommentare

Kommentar hinzufügen

Seitenaufrufe:

Letzte 24 Stunden: 0

Letzte 7 Tage: 3

Letzte 30 Tage: 13

Insgesamt: 1,958