Zum Hauptinhalt wechseln
Gemeinsam reparieren - Jetzt registrieren

Samsung Galaxy Note 10.1 2014 Rear Camera Replacement

Was du brauchst

    1. Samsung Galaxy Note 10.1 2014 Rear Camera Replacement, Case: Schritt 1, Bild 1 von 2 Samsung Galaxy Note 10.1 2014 Rear Camera Replacement, Case: Schritt 1, Bild 2 von 2
      In diesem Schritt verwendetes Werkzeug:
      Spudger
      $2.99
      • Using the nylon spudger or plastic opening tool along the edges of the screen, separate the back case off of the device.

      • If possible, consider using the black nylon spudger for a gentler separation.

      Frag FixBot

      Kommentar hinzufügen

    1. Samsung Galaxy Note 10.1 2014 Rear Camera Replacement, Loudspeaker Modules: Schritt 2, Bild 1 von 2 Samsung Galaxy Note 10.1 2014 Rear Camera Replacement, Loudspeaker Modules: Schritt 2, Bild 2 von 2
      • Remove the three 3mm screws on the top right side of the device with the Phillips PH000 screw head.

      • Remove the one 3mm screw on the top left side of the device with the same method.

      Frag FixBot

      Kommentar hinzufügen

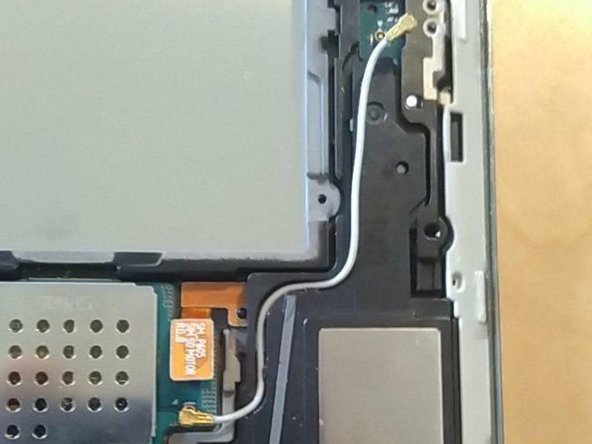
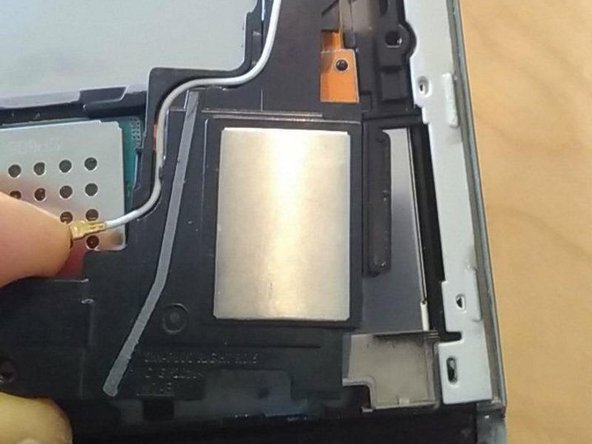
    2. Samsung Galaxy Note 10.1 2014 Rear Camera Replacement, loudspeaker  - remove right speaker: Schritt 3, Bild 1 von 3 Samsung Galaxy Note 10.1 2014 Rear Camera Replacement, loudspeaker  - remove right speaker: Schritt 3, Bild 2 von 3 Samsung Galaxy Note 10.1 2014 Rear Camera Replacement, loudspeaker  - remove right speaker: Schritt 3, Bild 3 von 3
      • Remove the gray rubber piece.

      • Use a spudger or fingernail to disconnect the blue antenna cable from the motherboard.

      • Remove the right speaker unit.

      Frag FixBot

      Kommentar hinzufügen

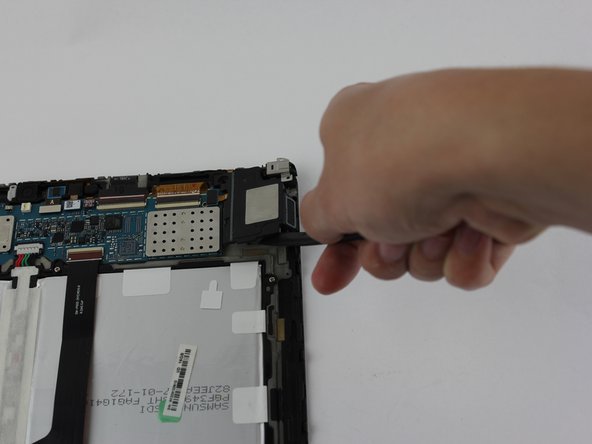
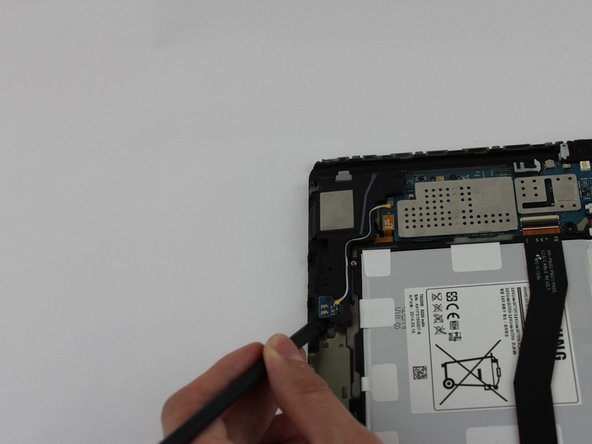
    3. Samsung Galaxy Note 10.1 2014 Rear Camera Replacement: Schritt 4, Bild 1 von 3 Samsung Galaxy Note 10.1 2014 Rear Camera Replacement: Schritt 4, Bild 2 von 3 Samsung Galaxy Note 10.1 2014 Rear Camera Replacement: Schritt 4, Bild 3 von 3
      • Remove the loudspeaker modules located on the parts where the screws were removed by using the black nylon spudger.

      • They are the black pieces at the top left and right corners of the device that have metal squares on them in the middle.

      Frag FixBot

      Kommentar hinzufügen

    1. Samsung Galaxy Note 10.1 2014 Rear Camera Replacement, Battery: Schritt 5, Bild 1 von 1
      • Place your finger on the thin black bar at the end of the ribbon tape and flip each one up.

      • Gently pull the ribbon tape on the battery away from the bar. Repeat this process for the second ribbon tape.

      Frag FixBot

      Kommentar hinzufügen

    2. Samsung Galaxy Note 10.1 2014 Rear Camera Replacement: Schritt 6, Bild 1 von 1
      In diesem Schritt verwendetes Werkzeug:
      Phillips #000 Screwdriver
      $5.49
      Frag FixBot

      Kommentar hinzufügen

    3. Samsung Galaxy Note 10.1 2014 Rear Camera Replacement: Schritt 7, Bild 1 von 2 Samsung Galaxy Note 10.1 2014 Rear Camera Replacement: Schritt 7, Bild 2 von 2
      In diesem Schritt verwendetes Werkzeug:
      Spudger
      $2.99
      • Lift up the battery from the bottom and situate the black nylon spudger underneath the battery.

      • Use the black nylon spudger to disconnect the multi-colored wires from the rest of the device.

      Frag FixBot

      Kommentar hinzufügen

    1. Samsung Galaxy Note 10.1 2014 Rear Camera Replacement, Motherboard: Schritt 8, Bild 1 von 3 Samsung Galaxy Note 10.1 2014 Rear Camera Replacement, Motherboard: Schritt 8, Bild 2 von 3 Samsung Galaxy Note 10.1 2014 Rear Camera Replacement, Motherboard: Schritt 8, Bild 3 von 3
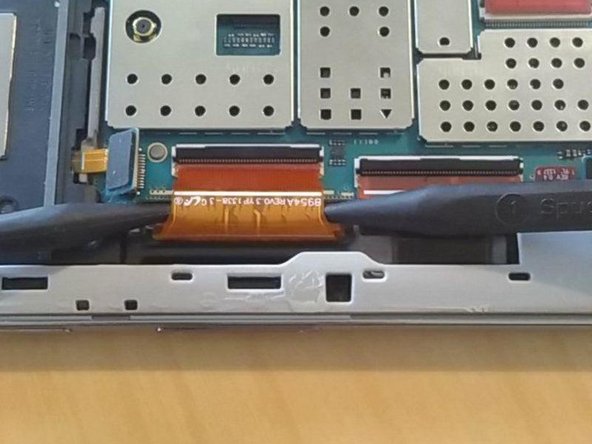
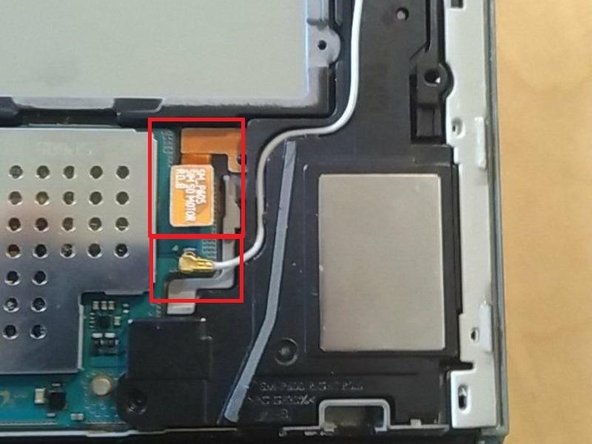
      • Disconnect all cables on the motherboard.

      • See our connector guide for help safely disconnecting various types of connectors.

      Frag FixBot

      Kommentar hinzufügen

    2. Samsung Galaxy Note 10.1 2014 Rear Camera Replacement: Schritt 9, Bild 1 von 3 Samsung Galaxy Note 10.1 2014 Rear Camera Replacement: Schritt 9, Bild 2 von 3 Samsung Galaxy Note 10.1 2014 Rear Camera Replacement: Schritt 9, Bild 3 von 3
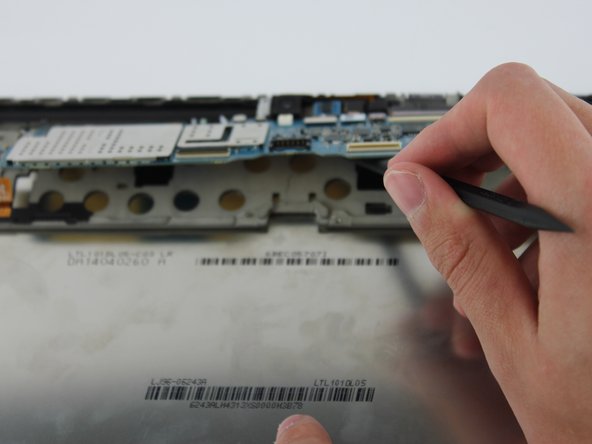
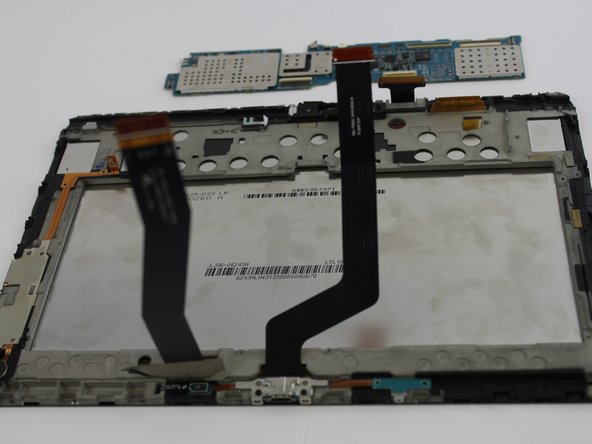
      • Use the black nylon spudger to gently lift the motherboard away from the frame.

      • Remove the motherboard.

      Frag FixBot

      Kommentar hinzufügen

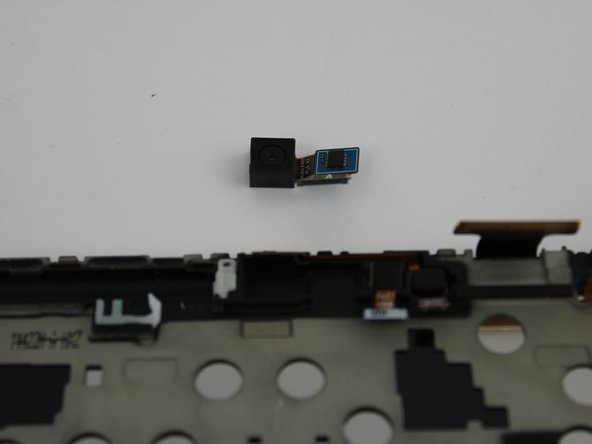
    1. Samsung Galaxy Note 10.1 2014 Rear Camera Replacement, Rear Camera: Schritt 10, Bild 1 von 2 Samsung Galaxy Note 10.1 2014 Rear Camera Replacement, Rear Camera: Schritt 10, Bild 2 von 2
      • Disconnect the camera piece from the motherboard.

      • The camera piece is shaped like an "L".

      Frag FixBot

      Kommentar hinzufügen

Abschluss

To reassemble your device, follow these instructions in reverse order.

Rückgängig: Ich habe diese Anleitung nicht absolviert.

Eine weitere Person hat diese Anleitung absolviert.

Team

USF Tampa, Team S1-G6, Leahy Spring 2017 Mitglied von USF Tampa, Team S1-G6, Leahy Spring 2017

USFT-LEAHY-S17S1G6

3 Mitglieder

31 Anleitungen geschrieben

0 Kommentare zur Anleitung

Kommentar hinzufügen

Seitenaufrufe:

Letzte 24 Stunden: 0

Letzte 7 Tage: 3

Letzte 30 Tage: 34

Insgesamt: 1,187