Einleitung
The display removal or replacement is a procedure of moderate difficulty. It involves the use of a few tools such as a guitar pick, and a heat gun. You should be aware of the hazards and safety procedures of these tools before starting the process.
Was du brauchst
-
-
Insert your fingernail or plastic opening tool into the divot at the top of the rear-facing camera.
-
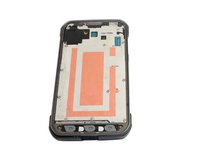
Gently pry and twist the flexible rear cover off the back of the phone.
-
-
-
Insert a fingernail or plastic opening tool into the recess in the bottom right corner of the battery and lift upward.
-
Remove the battery away from the phone.
-
-
-
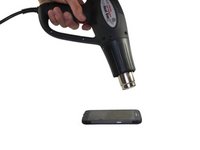
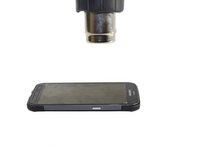
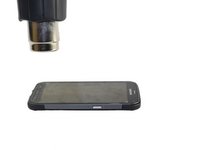
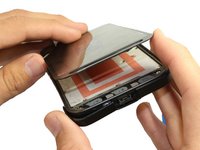
Use a heat gun at an approximate distance of 2-3 inches from the phone to apply heat to the phone and loosen up the adhesive in the display.
-
-
-
-
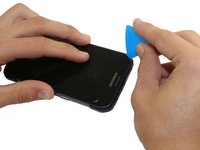
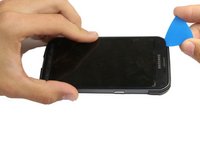
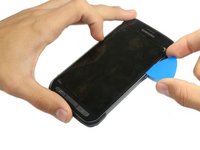
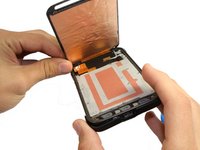
Starting from the upper left corner, insert a guitar pick in between the display and the phone case.
Steps 7 through 9 are redundant and should be removed.
First, starting the first edge is a huge pain. As soon as the thin guitar pick got near the warm phone, it softened up and wouldn't pry the edge up. I found it easier to use a thumbnail to get the first edge lifted and then get the tip of a pick in the opening. Second, this repair is essentially impossible if you are trying to replace an internal component without replacing the glass/digitizer/LCD. The adhesive holding the glass to the digitizer/LCD is released easier than the adhesive tape behind it. As such, the glass releases from the digitizer/LCD unevenly, shattering the digitizer/LCD. It almost seems like it would be better to put the whole phone in a warming oven to soften the adhesive evenly. Mine phone is already destroyed thanks, in part, to these instructions. Anyone else want to give it a try?
How can you blame the instructions on your incompatantcy you can clearly see the pictures of this "mechanically inclined" fellow disassembling his phone. He had nothing to do with you #<:(>,g yours up. (Check symbols on samsung galaxy keyboard to disifer).
I am a repair tech for phone repair shop, so I've repaired a ton of phones. Getting this glass to come up with the lcd was nearly impossible. The adhesive between the glass and the LCD is released much easier than the adhesive behind the LCD. Therefore, the LCD breaks about 99% of the time. I was extremely cautious and patient, and the lcd still cracked from being pulled on by the glass. Long story short, bgauch, you're not wrong about this.
Andrew -
You have obviously never tried this. If you had, or seen it done IRL then you'd know how hard it can be.
What you don't see in the video is how many phones were destroyed in training the tech and while shooting to get the finished product.
I'm an IT pro, Android developer, and fix all kinds of phones. Sign in my workshop.
I DON'T DO SCREEN REPLACEMENTS
(if you manage to talk me into it, and I fry it, U SHOULDA READ THE SIGN.
I'm not a factory trained tech. The only screens I'll do are ones not. bonded to the LCD. If you can successfully separate these, my hats off to you.
Rather than criticize, do it, then come back
Okay, I want to know who here was successful? I'm pretty mechanically inclined and I'm tempted to try it. I would think those of you cracking the screen just are not getting the adhesive warm enough! You've got to get it so it releases completely, that's why he keeps saying don't pry further if ANY resistance is felt. Any being the key word
I did it!
I carefully lift the edges and then cutting off the middle part of the adhesive with a tooth floss. It went very nice.
It is true that the phone still is not usable because it has fallen to the sea and is full of salt. I wanted to check if it makes sense to restore it but is too dirty.
Good luck, Matej
-
-
-
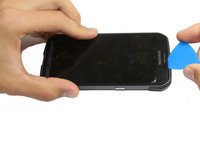
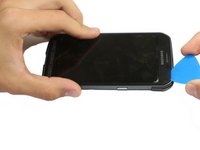
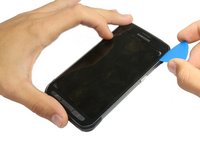
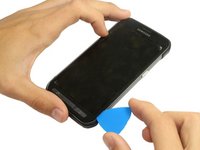
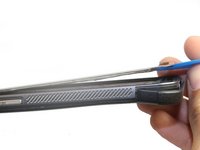
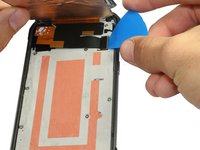
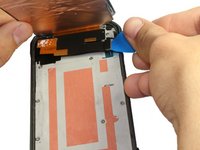
Use the pick to pry the sides and lower part of the display by sliding the pick through the phone.
-
-
-
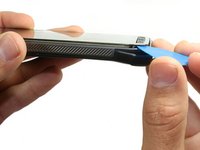
Slightly lift, but do not remove, the upper end of display assembly.
The Samsung Galaxy s 5 active does not have a finger print scanner
Nope thats the galaxy s 5 reg ,which should got instead same thing but less money
How can I even trust this when the Galaxy Active doesn't have a fingerprint scanner? %#*@... Sigh
-
-
-
Use the sharp tip of a guitar pick to lift the front panel assembly cable connector straight up off its socket on the motherboard.
-
Safely remove the front panel assembly from phone.
-


To reassemble your device, follow these instructions in reverse order.
To reassemble your device, follow these instructions in reverse order.
Rückgängig: Ich habe diese Anleitung nicht absolviert.
55 weitere Personen haben diese Anleitung absolviert.
Team

USF Tampa, Team 1-5, Hickman Fall 2014 Mitglied von USF Tampa, Team 1-5, Hickman Fall 2014
USFT-HICKMAN-F14S1G5
3 Mitglieder
7 Anleitungen geschrieben
11 Kommentare
If your screen is already broken you don't have to use so much heat. Once a corner is up and broken simply peel the screen off. Be aware that it will make a mess, so try to do this in a plastic bag or something
How do I just repare a cracked screen. Not the LCD
It's a really difficult and risky repair unless you have specialized tools. You can use a hot plate to separate the lcd from the glass and work it apart with a playing card, then use a special uv adhesive to attach the new one . Most skilled technicians and repair shops won't attempt this repair because of how fragile the lcd is. They make machines that automatically separate the lcd from the glass but it's still a risky repair. I wouldn't recommend trying it unless you want to do it as a learning experience. You'll most likely have to replace the entire screen.
Zach -
My question is can I use the LCD screen from Samsung Galaxy s5 to Samsung Galaxy s5 active? , I mean took out the glass just using lcd only
No its connector has 3 too many pins
Tom -
How do I put the screen back on? Do I need to buy any kind of adhesive? Glue, double sided tape, whatever? And will it still be waterproof?
Most repair kits come with a double sided adhesive tape that goes around the perimeter, or you could heat it up again and use the old adhesive. Can't attest to the waterproof factor.
Zach -
I have NEVER seen such a detailed, thorough, replacement guide! I mean this thing is absolutely incredible, you have all HD pictures and you can actually see what is going on in them, on every picture you have detailed instructions describing what is going on and what needs to be done to the phone to move onto the next step! I am extremely impressed with all this! Like seriously what you've done here is unheard of and I can't thank you enough for it! Most people just rush everything and mash some $@$* together as fast as they can so they can be done with it and upload immediately. I can tell that you have taken your time and put a whole lot into each category and even the sub category's! Anyway, thanks again..
-Drew
Very hard question that I haven't been able to get a straight forward answer with here. Please help. Are there phone assembly connectors on some phones that would fit the Samsung S5 active?
The instructions do not go far enough. What about the next step, cleaning off all leftover adhesive? I have seen to use acetone lightly for that? And what about using B-7000 glue around the edge to attach the new screen. Is that recommended? And which clear protective layers of the new LCD need to be removed? I assume all layers, but the instructions do not say.
Great looking guide with well lit pictures and very concise bullet points.
Rusbell Gonzalez - Antwort