Diese Version enthält möglicherweise inkorrekte Änderungen. Wechsle zur letzten geprüften Version.
Was du brauchst
-
Dieser Schritt ist noch nicht übersetzt. Hilf mit, ihn zu übersetzen!
-
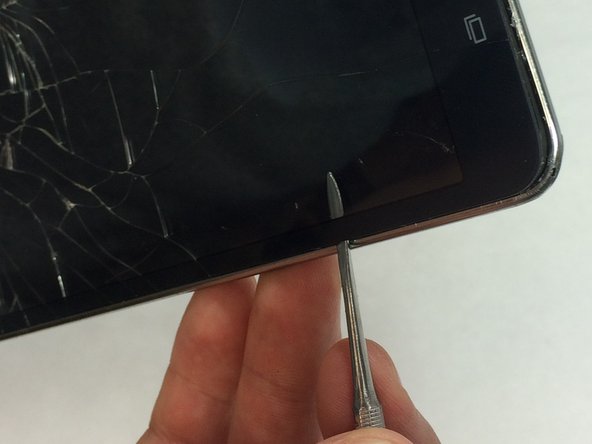
Starting at any corner, insert the pry tool between the chrome screen frame and black phone housing.
-
Slide the pry tool around the tablet while applying force to pry the screen away from the phone housing.
-
-
Dieser Schritt ist noch nicht übersetzt. Hilf mit, ihn zu übersetzen!
-
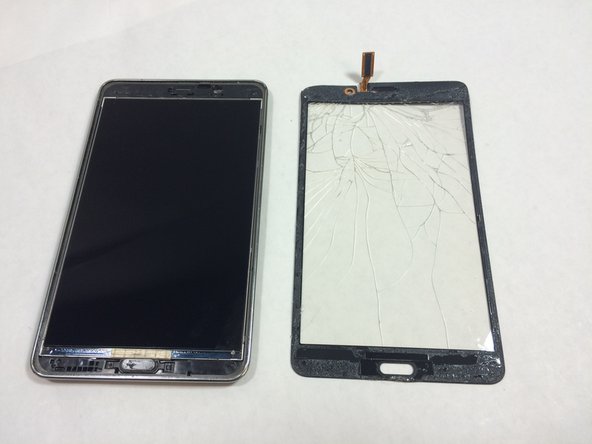
Carefully separate the rear housing from the front panel assembly.
-
-
Dieser Schritt ist noch nicht übersetzt. Hilf mit, ihn zu übersetzen!
-
Using the bent tweezers, carefully pull the flat cables away from the connectors.
-
-
Dieser Schritt ist noch nicht übersetzt. Hilf mit, ihn zu übersetzen!
-
Using the plastic opening tool, gently pry the chip connections away from the motherboard.
-
-
-
Dieser Schritt ist noch nicht übersetzt. Hilf mit, ihn zu übersetzen!
-
Use the Phillips 000 screwdriver to remove the remaining five 1.2 mm screws.
-
-
Dieser Schritt ist noch nicht übersetzt. Hilf mit, ihn zu übersetzen!
-
Remove the motherboard by rotating it away from the rest of the phone as shown in the first photo.
-
-
Dieser Schritt ist noch nicht übersetzt. Hilf mit, ihn zu übersetzen!
-
Work the spudger underneath the battery as shown and pry the battery away from the phone case.
-
-
Dieser Schritt ist noch nicht übersetzt. Hilf mit, ihn zu übersetzen!
-
Evenly heat the surface of the screen using your heating tool to loosen the adhesive that is holding the screen to the phone case.
-
-
Dieser Schritt ist noch nicht übersetzt. Hilf mit, ihn zu übersetzen!
-
Carefully insert the spudger between the glass and the chrome outer frame of the tablet.
-
Now, slowly pry your way around the screen to loosen the glass from the frame.
-
-
Dieser Schritt ist noch nicht übersetzt. Hilf mit, ihn zu übersetzen!
-
After you’ve removed the glass from the screen, feed the chip connection through the phone casing.
-


Rückgängig: Ich habe diese Anleitung nicht absolviert.
36 weitere Nutzer:innen haben diese Anleitung absolviert.
Team

USF Tampa, Team 1-3, Remmell Fall 2015 Mitglied von USF Tampa, Team 1-3, Remmell Fall 2015
USFT-REMMELL-F15S1G3
4 Mitglieder
12 Anleitungen geschrieben
11 Kommentare
Do you have to remove the battery to replace the screen?
This worked perfectly for me. I just bought the assembly instead of going through the full deal (which if I had it would have saved me about 30 bucks overall). But was easy enough to do anyway. I still intend to get the digitizer/glass and finish so I have a spare for future breaks. (I have kids and they are hard on these tablets)