Zum Hauptinhalt wechseln
Gemeinsam reparieren - Jetzt registrieren

Samsung RF28R7201SG Refrigerator Freezer Evaporator Components Replacement

Was du brauchst

  1. Samsung RF28R7201SG Refrigerator Freezer Evaporator Components Replacement, Unplug your refrigerator: Schritt 1, Bild 1 von 1
    • Unplug your refrigerator before you begin your repair.

    Frag FixBot

    Kommentar hinzufügen

  2. Samsung RF28R7201SG Refrigerator Freezer Evaporator Components Replacement, Open the freezer drawer: Schritt 2, Bild 1 von 1
    • Slide the freezer drawer fully open.

    Frag FixBot

    Kommentar hinzufügen

  3. Samsung RF28R7201SG Refrigerator Freezer Evaporator Components Replacement, Remove the freezer bins: Schritt 3, Bild 1 von 1
    • Lift and remove all the freezer bins from the drawer.

    • You should be left with a freezer door attached by two rails.

    Frag FixBot

    Kommentar hinzufügen

  4. Samsung RF28R7201SG Refrigerator Freezer Evaporator Components Replacement, Remove the freezer door: Schritt 4, Bild 1 von 3 Samsung RF28R7201SG Refrigerator Freezer Evaporator Components Replacement, Remove the freezer door: Schritt 4, Bild 2 von 3 Samsung RF28R7201SG Refrigerator Freezer Evaporator Components Replacement, Remove the freezer door: Schritt 4, Bild 3 von 3
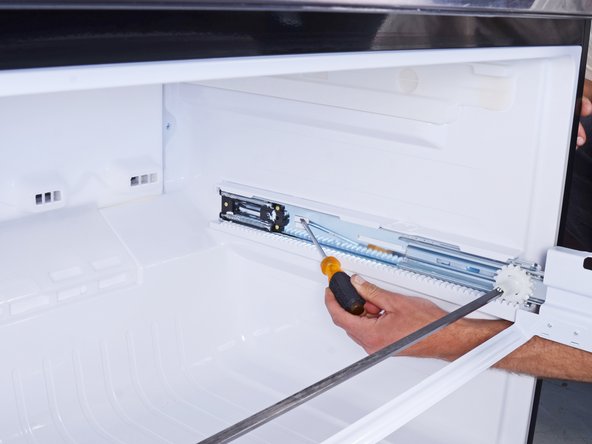
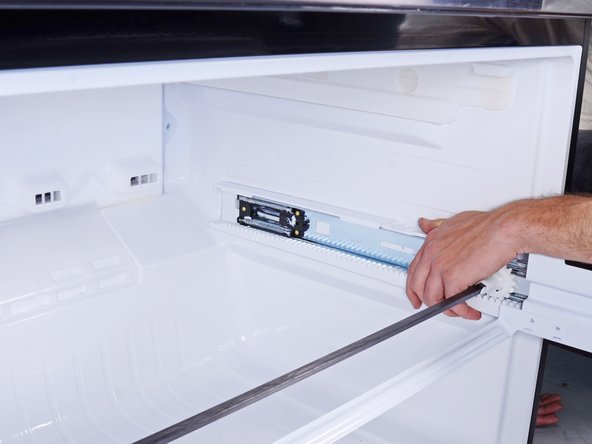
    • A plastic tab locks each drawer rail in place.

    • Use a flathead screwdriver to press in the plastic tab near the inner end of the drawer rail.

    • As you press the plastic tab, grasp the rail with your free hand and slide it towards you slightly to unlock the rail.

    Frag FixBot

    Kommentar hinzufügen

  5. Samsung RF28R7201SG Refrigerator Freezer Evaporator Components Replacement: Schritt 5, Bild 1 von 2 Samsung RF28R7201SG Refrigerator Freezer Evaporator Components Replacement: Schritt 5, Bild 2 von 2
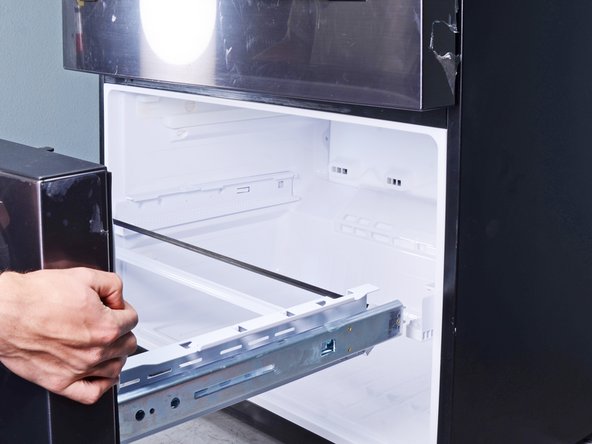
    • Repeat the rail unlock procedure on the other drawer rail.

    • Once both rails are unlocked, firmly pull both rails to slide them out of the refrigerator wall guides.

    • Remove the freezer drawer.

    • To install the freezer drawer:

    • Push the geared torsion bar until it rests at the very end of the rails.

    • Align the drawer rails to the refrigerator wall guides.

    • Close the freezer drawer until the rails lock back in place.

    Frag FixBot

    Kommentar hinzufügen

  6. Samsung RF28R7201SG Refrigerator Freezer Evaporator Components Replacement, Remove the freezer compartment evaporator cover: Schritt 6, Bild 1 von 1
    • Use a Phillips screwdriver to remove the two 16.2 mm-long screws securing the freezer evaporator cover.

    Frag FixBot

    Kommentar hinzufügen

  7. Samsung RF28R7201SG Refrigerator Freezer Evaporator Components Replacement: Schritt 7, Bild 1 von 3 Samsung RF28R7201SG Refrigerator Freezer Evaporator Components Replacement: Schritt 7, Bild 2 von 3 Samsung RF28R7201SG Refrigerator Freezer Evaporator Components Replacement: Schritt 7, Bild 3 von 3
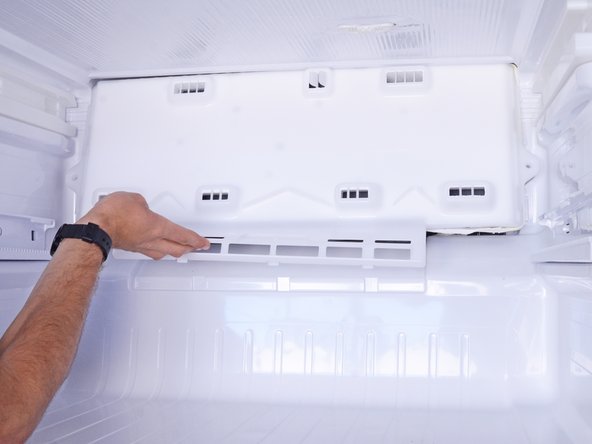
    • Don't try to fully remove the evaporator cover yet, as it's connected to the refrigerator by a few wires in the top right corner.

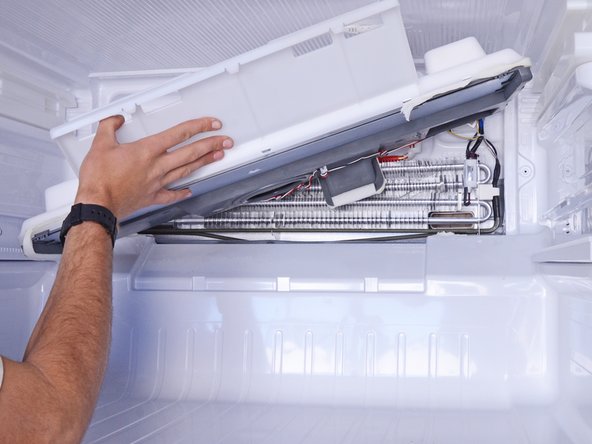
    • Use your hands to lift the bottom edge of the evaporator cover up to release the lower plastic tabs.

    • Swing the evaporator cover upwards to access the connected wires behind it.

    Frag FixBot

    Kommentar hinzufügen

  8. Samsung RF28R7201SG Refrigerator Freezer Evaporator Components Replacement: Schritt 8, Bild 1 von 2 Samsung RF28R7201SG Refrigerator Freezer Evaporator Components Replacement: Schritt 8, Bild 2 von 2
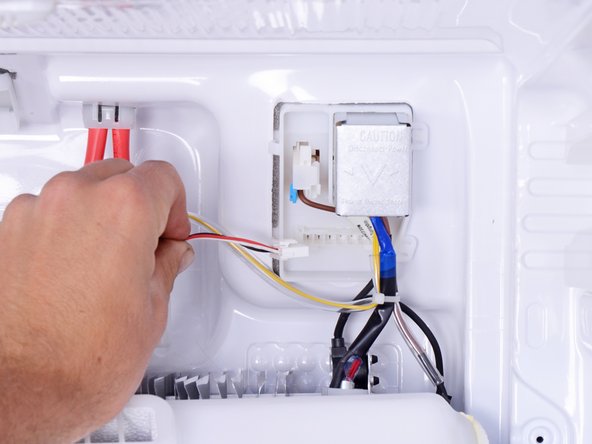
    • Use your fingers to squeeze and disconnect the fan cable connector from the back wall of the freezer.

    Frag FixBot

    Kommentar hinzufügen

  9. Samsung RF28R7201SG Refrigerator Freezer Evaporator Components Replacement: Schritt 9, Bild 1 von 1
    • Remove the evaporator cover.

    Frag FixBot

    Kommentar hinzufügen

  10. Samsung RF28R7201SG Refrigerator Freezer Evaporator Components Replacement, Disconnect the evaporator components: Schritt 10, Bild 1 von 2 Samsung RF28R7201SG Refrigerator Freezer Evaporator Components Replacement, Disconnect the evaporator components: Schritt 10, Bild 2 von 2
    • Remove the metal connector cover from the top right corner of the freezer back wall.

    Frag FixBot

    Kommentar hinzufügen

  11. Samsung RF28R7201SG Refrigerator Freezer Evaporator Components Replacement: Schritt 11, Bild 1 von 1
    • Use snips or scissors to cut any cable ties securing the wires.

    Frag FixBot

    Kommentar hinzufügen

  12. Samsung RF28R7201SG Refrigerator Freezer Evaporator Components Replacement: Schritt 12, Bild 1 von 2 Samsung RF28R7201SG Refrigerator Freezer Evaporator Components Replacement: Schritt 12, Bild 2 von 2
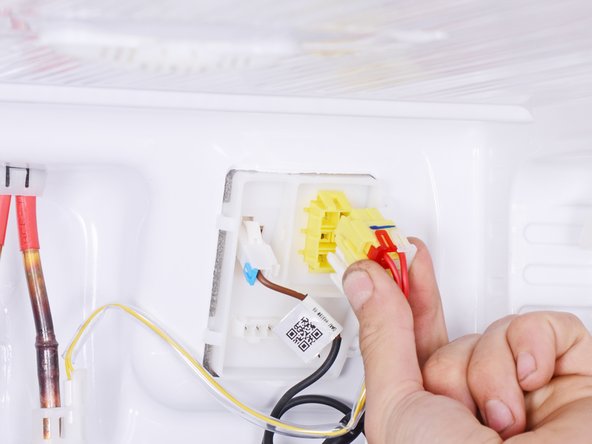
    • Use your fingers to squeeze and disconnect the harness connector from the refrigerator.

    Frag FixBot

    Kommentar hinzufügen

  13. Samsung RF28R7201SG Refrigerator Freezer Evaporator Components Replacement: Schritt 13, Bild 1 von 3 Samsung RF28R7201SG Refrigerator Freezer Evaporator Components Replacement: Schritt 13, Bild 2 von 3 Samsung RF28R7201SG Refrigerator Freezer Evaporator Components Replacement: Schritt 13, Bild 3 von 3
    • Use your fingers to pry and remove the red and white connector retaining clips from the harness connector. This will separate the connector into three individual connectors.

    • The three connectors are stacked on top of each other. The order from top to bottom is:

    • Defrost heater thermal fuse (yellow connector with two red wires)

    • One end of the defrost heater (yellow connector with brown wire in the left pin)

    • Evaporator coil thermistor (white connector with two yellow wires)

    Frag FixBot

    Kommentar hinzufügen

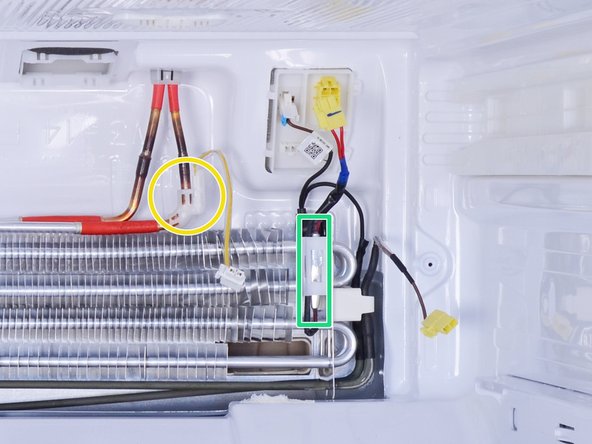
  14. Samsung RF28R7201SG Refrigerator Freezer Evaporator Components Replacement: Schritt 14, Bild 1 von 3 Samsung RF28R7201SG Refrigerator Freezer Evaporator Components Replacement: Schritt 14, Bild 2 von 3 Samsung RF28R7201SG Refrigerator Freezer Evaporator Components Replacement: Schritt 14, Bild 3 von 3
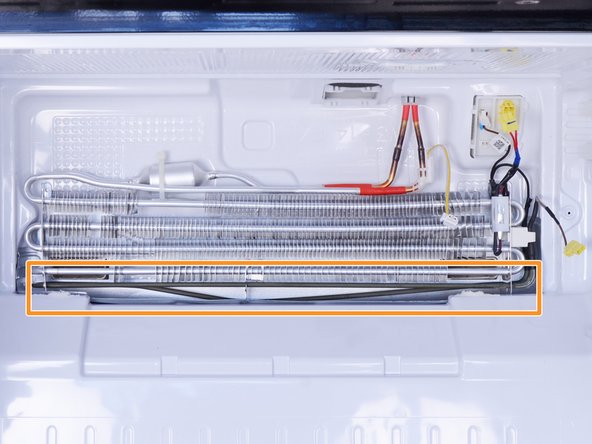
    • The freezer evaporator system includes these components:

    • Evaporator coil (filled with refrigerant and is non-removable)

    • Defrost heater

    • Evaporator coil thermister

    • Defrost heater thermal fuse

    • Depending on your repair, remove and replace the affected components.

    Frag FixBot

    Kommentar hinzufügen

Abschluss

To reassemble your device, follow these instructions in reverse order.

Take your e-waste to an R2 or e-Stewards certified recycler.

Repair didn’t go as planned? Ask our Answers community for help.

Rückgängig: Ich habe diese Anleitung nicht absolviert.

nicO

Mitglied seit: 04/14/15

15.990 Reputation

89 Anleitungen geschrieben

0 Kommentare zur Anleitung

Kommentar hinzufügen

Seitenaufrufe:

Letzte 24 Stunden: 2

Letzte 7 Tage: 7

Letzte 30 Tage: 56

Insgesamt: 652