Zum Hauptinhalt wechseln

Samsung Refrigerator Evaporator Fan (Refrigerator Compartment) Replacement

Was du brauchst

  1. Samsung Refrigerator Evaporator Fan (Refrigerator Compartment) Replacement, Unplug your refrigerator: Schritt 1, Bild 1 von 1
    • Unplug your refrigerator before you begin your repair.

  2. Samsung Refrigerator Evaporator Fan (Refrigerator Compartment) Replacement, Open the refrigerator doors: Schritt 2, Bild 1 von 2 Samsung Refrigerator Evaporator Fan (Refrigerator Compartment) Replacement, Open the refrigerator doors: Schritt 2, Bild 2 von 2
    • Open both French doors for the refrigerator compartment.

  3. Samsung Refrigerator Evaporator Fan (Refrigerator Compartment) Replacement, Remove the shelves: Schritt 3, Bild 1 von 2 Samsung Refrigerator Evaporator Fan (Refrigerator Compartment) Replacement, Remove the shelves: Schritt 3, Bild 2 von 2
    • Remove all the loose shelves and bins from the refrigerator compartment.

    • The bottom shelf is clipped in place. Follow the next step to remove it.

  4. Samsung Refrigerator Evaporator Fan (Refrigerator Compartment) Replacement: Schritt 4, Bild 1 von 3 Samsung Refrigerator Evaporator Fan (Refrigerator Compartment) Replacement: Schritt 4, Bild 2 von 3 Samsung Refrigerator Evaporator Fan (Refrigerator Compartment) Replacement: Schritt 4, Bild 3 von 3
    • Two stiff plastic tabs (one on each side) secure the bottom shelf in place.

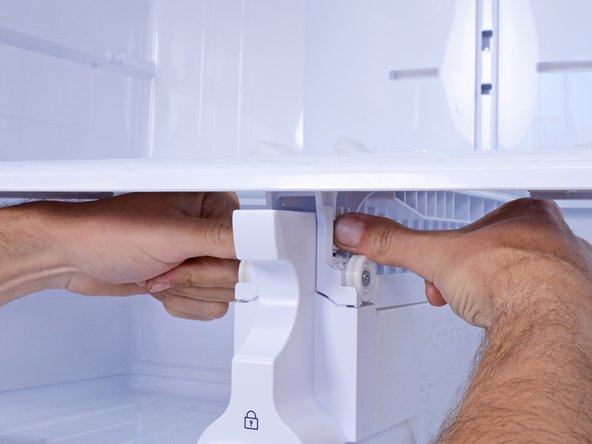
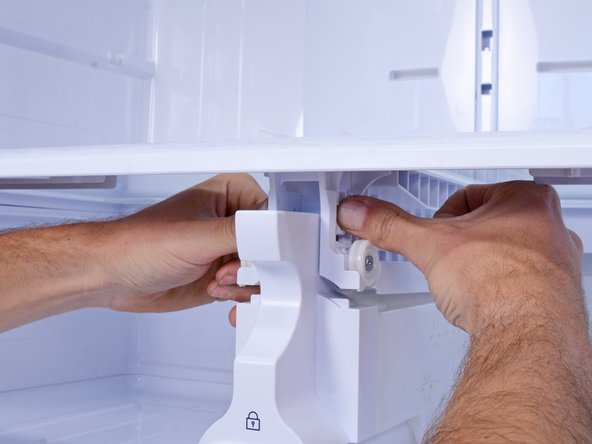
    • Press both plastic tabs firmly with your fingers and lift upward to unclip the bottom shelf.

    • If the shelf doesn't unclip, you can try using a flathead screwdriver to press each clip in.

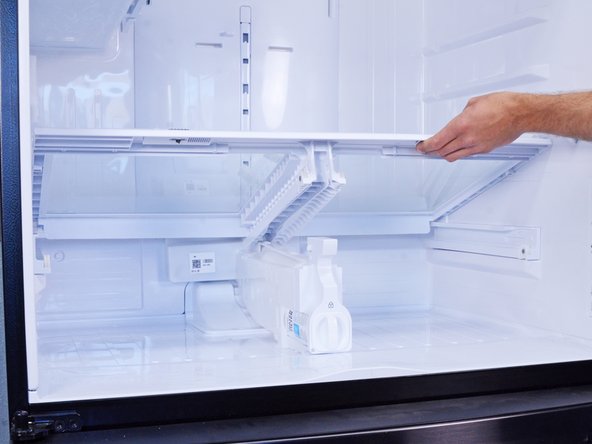
    • Remove the bottom shelf.

  5. Samsung Refrigerator Evaporator Fan (Refrigerator Compartment) Replacement, Remove the refrigerator evaporator cover: Schritt 5, Bild 1 von 3 Samsung Refrigerator Evaporator Fan (Refrigerator Compartment) Replacement, Remove the refrigerator evaporator cover: Schritt 5, Bild 2 von 3 Samsung Refrigerator Evaporator Fan (Refrigerator Compartment) Replacement, Remove the refrigerator evaporator cover: Schritt 5, Bild 3 von 3
    • Use a flathead screwdriver to pry and remove the top screw cover on the evaporator cover.

  6. Samsung Refrigerator Evaporator Fan (Refrigerator Compartment) Replacement: Schritt 6, Bild 1 von 1
    • Remove the screws securing the evaporator cover.

  7. Samsung Refrigerator Evaporator Fan (Refrigerator Compartment) Replacement: Schritt 7, Bild 1 von 3 Samsung Refrigerator Evaporator Fan (Refrigerator Compartment) Replacement: Schritt 7, Bild 2 von 3 Samsung Refrigerator Evaporator Fan (Refrigerator Compartment) Replacement: Schritt 7, Bild 3 von 3
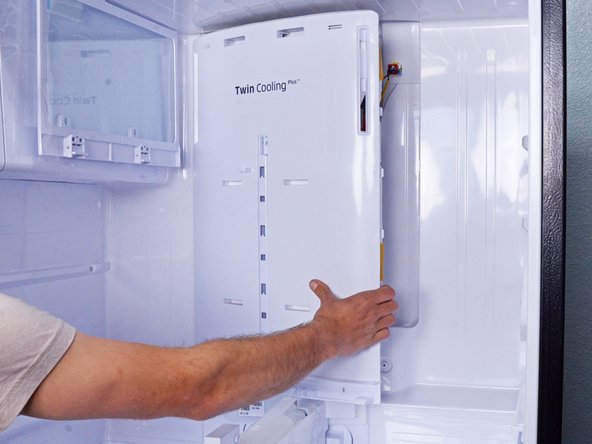
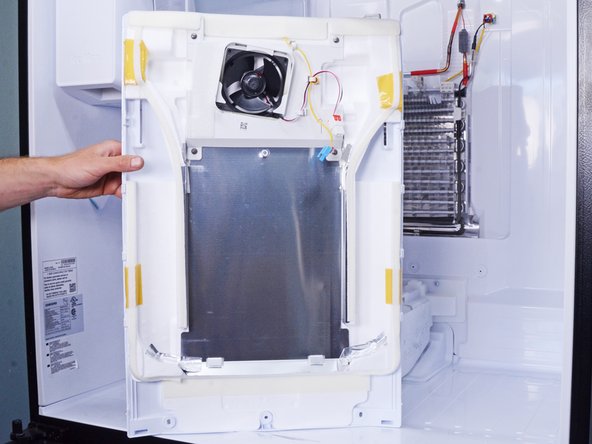
    • Grasp the right edge of the evaporator cover with your hands and swing it outwards toward you.

    • Don't try to fully remove the cover in this step, as it's connected by several wires.

  8. Samsung Refrigerator Evaporator Fan (Refrigerator Compartment) Replacement: Schritt 8, Bild 1 von 1
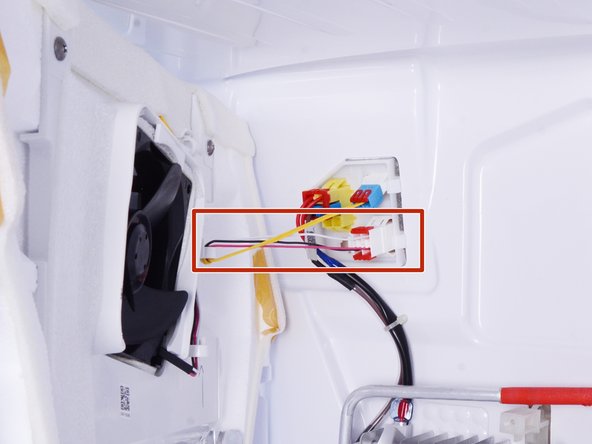
    • Squeeze and disconnect all the wire connectors connecting the evaporator cover to the refrigerator.

  9. Samsung Refrigerator Evaporator Fan (Refrigerator Compartment) Replacement: Schritt 9, Bild 1 von 2 Samsung Refrigerator Evaporator Fan (Refrigerator Compartment) Replacement: Schritt 9, Bild 2 von 2
    • Pull the evaporator cover towards you and remove it.

  10. Samsung Refrigerator Evaporator Fan (Refrigerator Compartment) Replacement, Remove the evaporator fan: Schritt 10, Bild 1 von 1
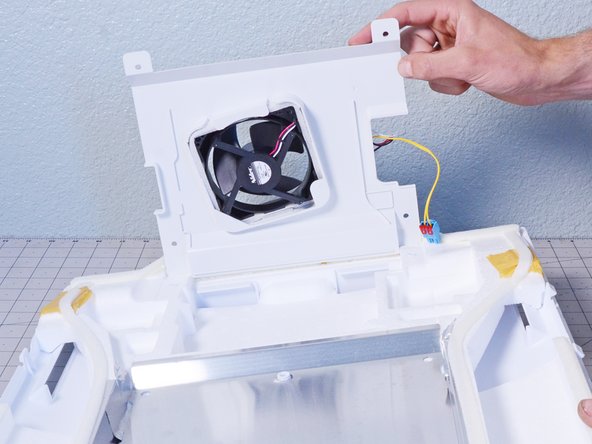
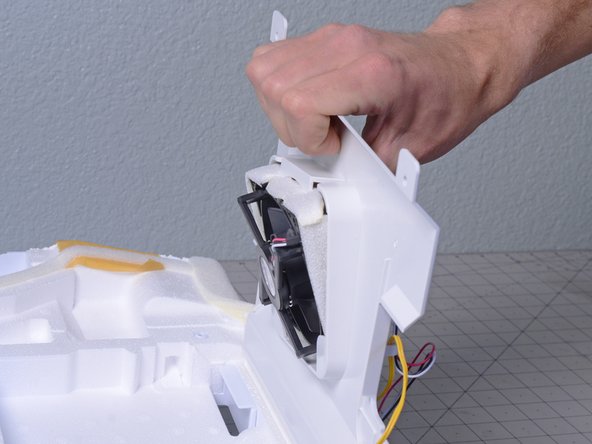
    • Remove the screws securing the fan bracket to the evaporator cover.

  11. Samsung Refrigerator Evaporator Fan (Refrigerator Compartment) Replacement: Schritt 11, Bild 1 von 2 Samsung Refrigerator Evaporator Fan (Refrigerator Compartment) Replacement: Schritt 11, Bild 2 von 2
    • Remove the fan cable from the cover clips.

    • If you have trouble getting the cable out of the clips, squeeze the clips with pliers to create a wider gap.

  12. Samsung Refrigerator Evaporator Fan (Refrigerator Compartment) Replacement: Schritt 12, Bild 1 von 2 Samsung Refrigerator Evaporator Fan (Refrigerator Compartment) Replacement: Schritt 12, Bild 2 von 2
    • Lift the loose edge of the fan bracket up.

  13. Samsung Refrigerator Evaporator Fan (Refrigerator Compartment) Replacement: Schritt 13, Bild 1 von 2 Samsung Refrigerator Evaporator Fan (Refrigerator Compartment) Replacement: Schritt 13, Bild 2 von 2
    • The fan is pressure-fit in place with some foam insulation.

    • Use your fingers to press the fan out of its recess.

  14. Samsung Refrigerator Evaporator Fan (Refrigerator Compartment) Replacement: Schritt 14, Bild 1 von 1
    • Remove the fan.

    • During reassembly, be sure to install the fan in the right orientation: the side with the center label should face down, towards the evaporator cover.

Abschluss

To reassemble your device, follow these instructions in reverse order.

Take your e-waste to an R2 or e-Stewards certified recycler.

Repair didn’t go as planned? Ask our Answers Community for help.

nicO

Mitglied seit: 04/14/15

15.885 Reputation

88 Anleitungen geschrieben

Team

Global Fixers Mitglied von Global Fixers

Community

33 Mitglieder

549 Anleitungen geschrieben

0 Kommentare

Kommentar hinzufügen

Seitenaufrufe:

Letzte 24 Stunden: 0

Letzte 7 Tage: 30

Letzte 30 Tage: 136

Insgesamt: 922