Einleitung
You will use this guide to replace the USB connector in a Skullcandy Crusher Wireless headphones. The replacement USB connector can be bought online.
Follow this guide if the USB connector has been damaged or is malfunctioning (or maybe you just want to see the internal components of your Skullcandy Crusher Wireless).
Also, for more information about soldering and desoldering, please use this guide.
Was du brauchst
-
-
Take your headphones and hold them upside down for better control with your hands.
-
-
-
Grab the ear cushion firmly between your thumb and forefinger with a tight grip.
-
Pull the ear cushion away from the plastic, covering the speaker, by sliding the ear cushion down to release it.
-
-
-
Continue pulling it away from the edges of the plastic covering until the cushion is fully removed.
-
-
-
-
Remove three 12 mm Phillips #1 screws located underneath the left ear cushion.
-
-
-
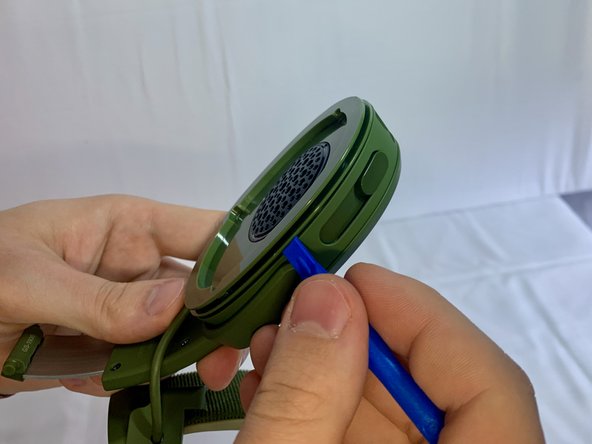
Slide a plastic opening tool between the plastic frame and speaker assembly of the headphones.
-
Gently pry the speaker away from the frame of the headphones.
-
-
-
Inspect the USB port and ensure that it is connected correctly. If necessary, desolder the USB port and replace it with the new port.
-


To reassemble your device, follow these instructions in reverse order.
To reassemble your device, follow these instructions in reverse order.
Team

UMass Dartmouth, Team 1-33, Gurgel Spring 2022 Mitglied von UMass Dartmouth, Team 1-33, Gurgel Spring 2022
UMASSD-GURGEL-S22S1G33
1 Mitglied
12 Anleitungen geschrieben