Einleitung
This guide will help you remove the battery in the Sony Xperia XA2 Ultra.
Before using this guide, review the troubleshooting page to see if any battery management tips could help.
Before taking any steps to open the phone, make sure that it is completely turned off.
Be aware that when using a heat gun (or something similar) that the device will heat up. Continue with caution.
Was du brauchst
-
-
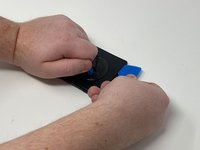
Remove the SIM card tray on the left side of the phone using a SIM card eject tool.
-
-
-
Heat the edge of the phone with the heat gun (recommended) for 30 seconds.
-
Use the hair dryer on the highest setting, constantly going around the phone to heat all of the edges.
-
-
-
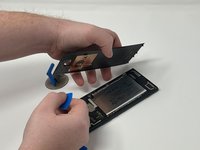
Apply the suction handle near an edge of the phone and pull upwards while trying to get an opening large enough for an iFixit opening pick.
-
-
-
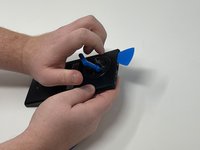
Pry upwards with the pick to start pulling the rear cover off the adhesive it’s attached to.
-
Insert a second pick once there is enough room.
-
-
-
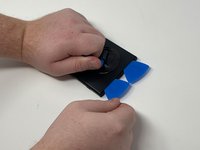
Take one of the picks and try to slide it down the side of the phone, pulling more of the cover off the adhesive.
-
The iFixit opening tool may also be used to gain better leverage.
-
The rear cover will pop off.
-
-
-
-
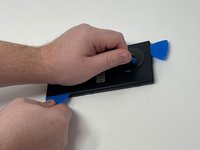
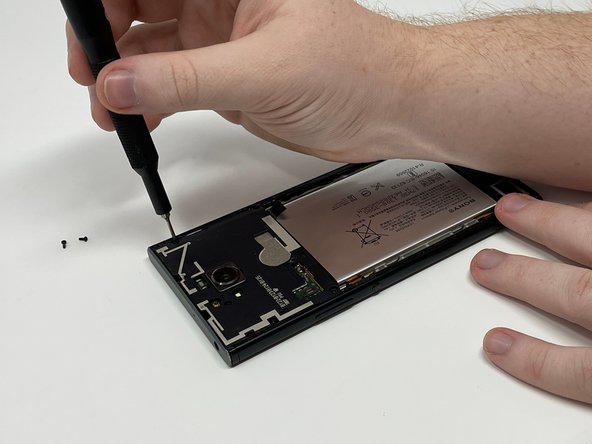
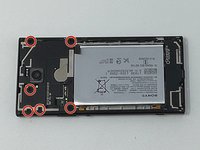
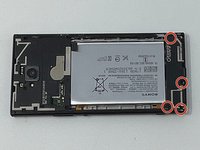
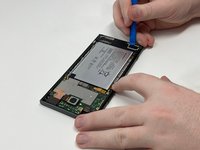
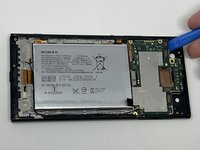
Once the rear cover is off, use the iFixit opening tool to detach the flex cable.
-
-
In diesem Schritt verwendetes Werkzeug:Tweezers$4.99
-
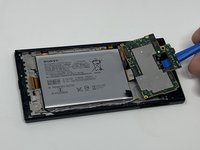
Use a pair of tweezers to remove the rear-facing camera.
-
Use a pair of tweezers to remove the magnetic tape covering the front-facing camera.
-
Use a pair of tweezers to remove the front-facing camera.
-
-
In diesem Schritt verwendetes Werkzeug:Tweezers$4.99
-
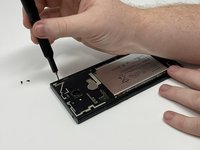
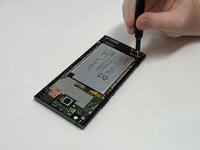
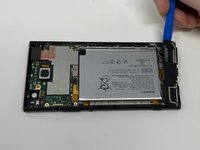
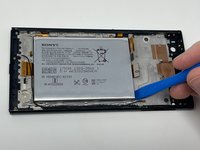
Grab and twist the black battery tab with a pair of precision tweezers.
-
Do this again with the black tab under the power button flex cable.
-


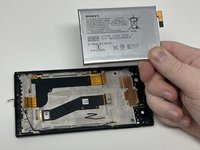
To reassemble your device, follow these instructions in reverse order.
To reassemble your device, follow these instructions in reverse order.
Rückgängig: Ich habe diese Anleitung nicht absolviert.
2 weitere Personen haben diese Anleitung absolviert.

Team

Utah Tech University, Team 1-1, Randazzo Fall 2023 Mitglied von Utah Tech University, Team 1-1, Randazzo Fall 2023
UTAHTECH-RANDAZZO-F23S1G1
1 Mitglied
8 Anleitungen geschrieben