Diese Version enthält möglicherweise inkorrekte Änderungen. Wechsle zur letzten geprüften Version.
Was du brauchst
-
Dieser Schritt ist noch nicht übersetzt. Hilf mit, ihn zu übersetzen!
-
Firmly grasp Ollie in one hand.
-
Remove the blue rubber tire in a peeling motion with your opposite hand.
-
-
Dieser Schritt ist noch nicht übersetzt. Hilf mit, ihn zu übersetzen!
-
Continue to firmly hold Ollie in one hand.
-
Use a Plastic Opening Tool to gently pry off the hubcap.
-
-
Dieser Schritt ist noch nicht übersetzt. Hilf mit, ihn zu übersetzen!
-
Loosen and remove the 10mm screw on each side of the device using a JIS 1 screwdriver tip.
-
Remove the plastic tire frame from the device
-
-
-
Dieser Schritt ist noch nicht übersetzt. Hilf mit, ihn zu übersetzen!
-
Loosen and remove the four 10mm Screws on the underside of the device using a JIS 1 tip.
-
Firmly grasp the bottom of the device and pull the top half of the outer case off of the bottom.
-
-
Dieser Schritt ist noch nicht übersetzt. Hilf mit, ihn zu übersetzen!
-
Loosen and remove the 10mm screws holding the blue tooth connector as well as the two 1 10 screws holding the motherboard to the case using the JIS #1 screwdriver
-
Loosen and remove the 10mm screws holding the antenna to the case.
-
Gently remove mother board from the case with an upward motion.
-
-
Dieser Schritt ist noch nicht übersetzt. Hilf mit, ihn zu übersetzen!
-
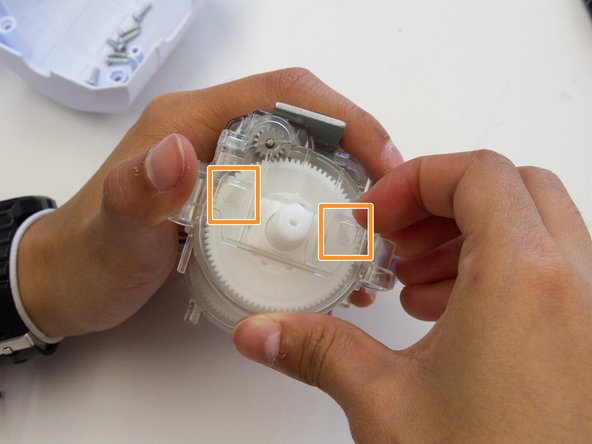
After you have removed the motherboard, use a JIS #1 screwdriver to remove the four 10mm screws holding in the cog shields.
-
Next, you want to pull apart the clips (two on each side) holding the top piece of the shield to the frame.
-
Then, once you have freed the cogs, you can lift the cog and remove it from the frame.
-
Then, gently remove the wheels from the case
-
-
Dieser Schritt ist noch nicht übersetzt. Hilf mit, ihn zu übersetzen!
-
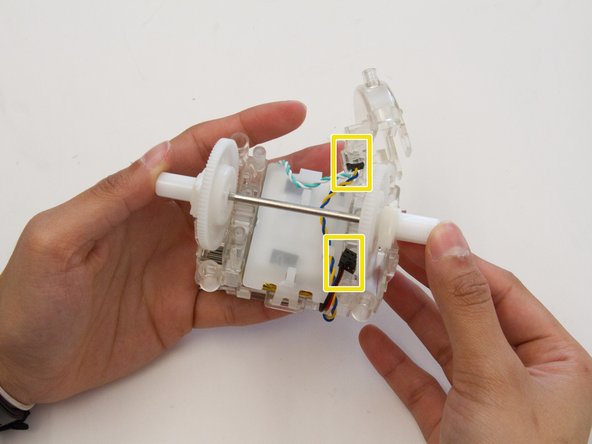
Once you have removed the cog out of the way, you can then pinch the clip on both sides to remove the cover protecting the battery
-
-
Dieser Schritt ist noch nicht übersetzt. Hilf mit, ihn zu übersetzen!
-
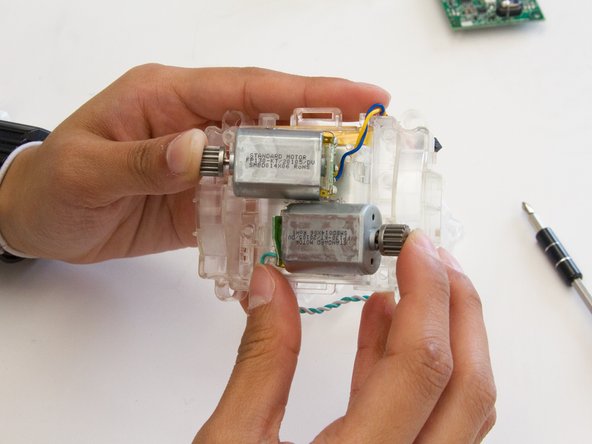
After you have removed the battery cover, flip the device around to view the motors
-
Loosen and use a JIS #1 screwdriver to remove the two 10mm Screws holding the clear case of the motors
-
Next, gently push the clip (on both sides) with a screwdriver to release the clear case
-
To remove the motors, simply pull on it with slight force
-


Rückgängig: Ich habe diese Anleitung nicht absolviert.
Ein:e weitere:r Nutzer:in hat diese Anleitung absolviert.
Team

UW Tacoma, Team S1-G3, Rose Fall 2017 Mitglied von UW Tacoma, Team S1-G3, Rose Fall 2017
UWT-ROSE-F17S1G3
4 Mitglieder
10 Anleitungen geschrieben