Zum Hauptinhalt wechseln

SuperSonic Matrix Mid SC-999 Motherboard Replacement

Was du brauchst

  1. SuperSonic Matrix Mid SC-999 Motherboard Replacement, Back Cover: Schritt 1, Bild 1 von 1
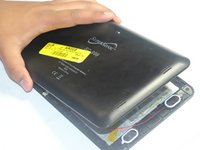
    • Wedge the plastic opening tool between the back cover of the device and the front panel.

    • You will hear a snapping sound as the cover is separated from the body of the device.

  2. SuperSonic Matrix Mid SC-999 Motherboard Replacement: Schritt 2, Bild 1 von 1
    • Slide the opening tool along the seam between the front panel and the back cover to un-clip the remaining connections around the device.

    • Again, you will hear a snapping sound as the cover is separated from the body of the device.

  3. SuperSonic Matrix Mid SC-999 Motherboard Replacement: Schritt 3, Bild 1 von 2 SuperSonic Matrix Mid SC-999 Motherboard Replacement: Schritt 3, Bild 2 von 2
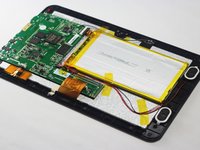
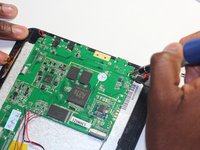
    • Lift the back cover from the body of the device to expose the internal components.
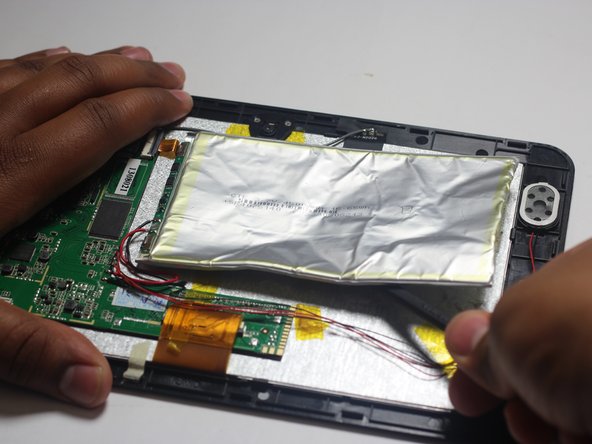
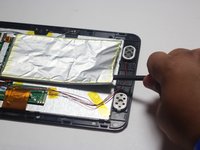
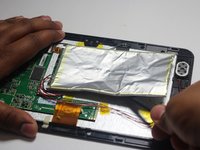
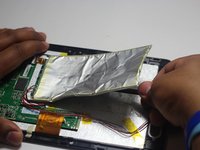
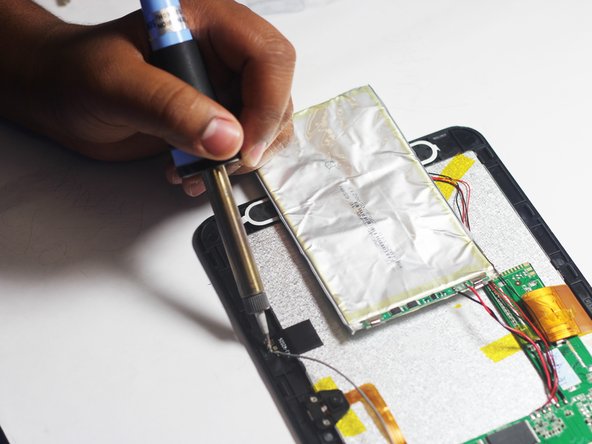
  4. SuperSonic Matrix Mid SC-999 Motherboard Replacement, Battery: Schritt 4, Bild 1 von 3 SuperSonic Matrix Mid SC-999 Motherboard Replacement, Battery: Schritt 4, Bild 2 von 3 SuperSonic Matrix Mid SC-999 Motherboard Replacement, Battery: Schritt 4, Bild 3 von 3
    • Remove the Battery

    • The battery is secured to the back panel with tape and glue.

    • Peel back the tape around the battery and discard it.

    • Tear through the adhesive holding the battery by using the spudger tool.

  5. SuperSonic Matrix Mid SC-999 Motherboard Replacement: Schritt 5, Bild 1 von 3 SuperSonic Matrix Mid SC-999 Motherboard Replacement: Schritt 5, Bild 2 von 3 SuperSonic Matrix Mid SC-999 Motherboard Replacement: Schritt 5, Bild 3 von 3
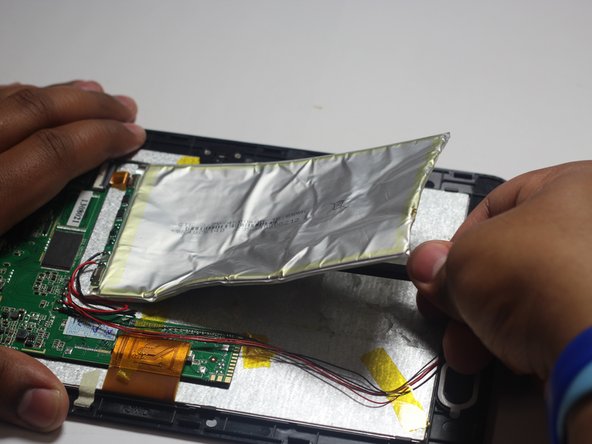
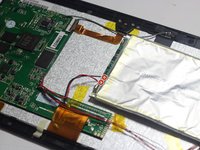
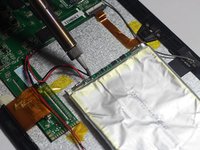
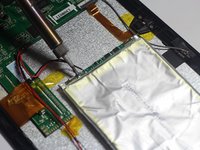
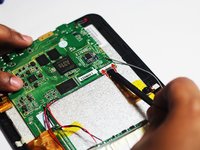
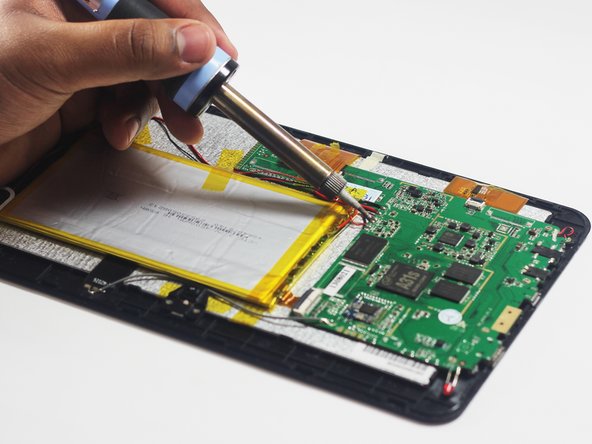
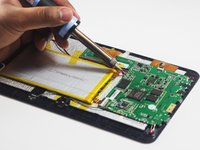
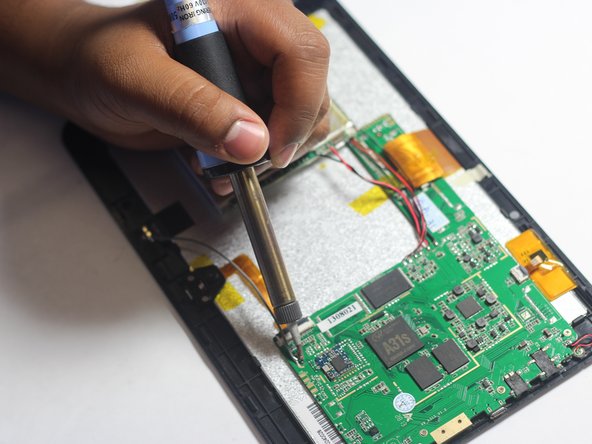
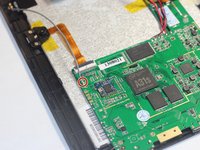
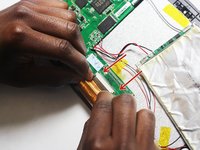
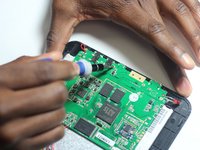
    • Desolder the 2 Battery Wires

    • The Battery has two wires connected to the motherboard (one black and one red).

    • If you're unfamiliar with soldering or desoldering check out this guide.

    • Be sure to wear protective eye wear. The soldering iron will become extremely hot and a potential danger, so make sure you are aware of your surroundings.

  6. SuperSonic Matrix Mid SC-999 Motherboard Replacement, Rear Facing Camera: Schritt 6, Bild 1 von 2 SuperSonic Matrix Mid SC-999 Motherboard Replacement, Rear Facing Camera: Schritt 6, Bild 2 von 2
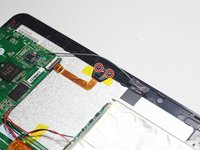
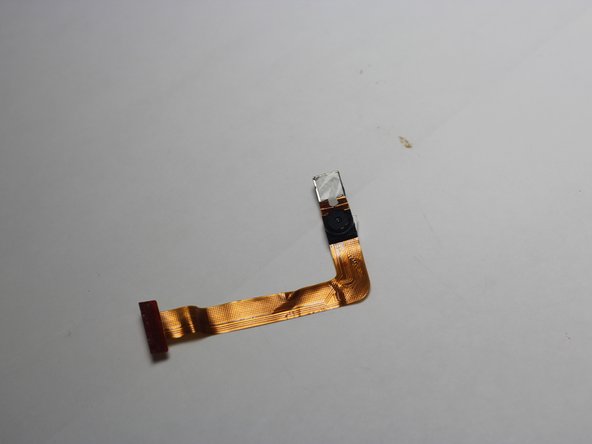
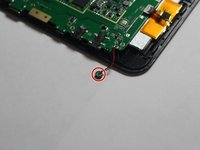
    • Remove the two Phillips #00 screws attaching the housing of the camera to the device.

  7. SuperSonic Matrix Mid SC-999 Motherboard Replacement: Schritt 7, Bild 1 von 1
    • With the screws removed you should easily be able to remove the camera unit.

  8. SuperSonic Matrix Mid SC-999 Motherboard Replacement: Schritt 8, Bild 1 von 2 SuperSonic Matrix Mid SC-999 Motherboard Replacement: Schritt 8, Bild 2 von 2
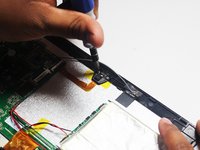
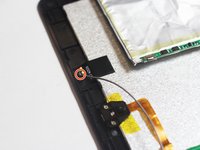
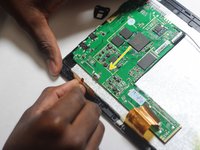
    • Follow the camera unit back to the motherboard.

    • Use the spudger tool to remove the camera.

  9. SuperSonic Matrix Mid SC-999 Motherboard Replacement, Speaker: Schritt 9, Bild 1 von 1
    • Remove the Speakers

    • Use the tweezers to remove the speakers from their compartments.

  10. SuperSonic Matrix Mid SC-999 Motherboard Replacement: Schritt 10, Bild 1 von 2 SuperSonic Matrix Mid SC-999 Motherboard Replacement: Schritt 10, Bild 2 von 2
    • Desolder the 4 Speaker Wires

    • These wires connect the speakers to the motherboard. They are the thinnest wires.

    • If you're unfamiliar with soldering or desoldering check out this guide.

    • Be sure to wear protective eye wear. Also, keep in mind that the soldering iron will become extremely hot.

  11. SuperSonic Matrix Mid SC-999 Motherboard Replacement, Microphone: Schritt 11, Bild 1 von 1
    • Remove the microphone from its compartment.

    • The microphone is located toward the bottom left corner of the device (assuming the speakers are located on the right side of you).

  12. SuperSonic Matrix Mid SC-999 Motherboard Replacement: Schritt 12, Bild 1 von 2 SuperSonic Matrix Mid SC-999 Motherboard Replacement: Schritt 12, Bild 2 von 2
    • Use the soldering iron to remove the wires connected to the microphone.

    • If you're unfamiliar with soldering or desoldering, check out this guide.

    • Be sure to wear protective eye wear. Also, keep in mind that the soldering iron will become extremely hot.

  13. SuperSonic Matrix Mid SC-999 Motherboard Replacement, FM Antenna: Schritt 13, Bild 1 von 2 SuperSonic Matrix Mid SC-999 Motherboard Replacement, FM Antenna: Schritt 13, Bild 2 von 2
    • Use a soldering iron to desolder the region circled in red.

    • If you're unfamiliar with soldering or desoldering check out this guide.

    • Be sure to wear protective eye wear. The soldering iron will become extremely hot and a potential danger, so be aware of your surroundings.

  14. SuperSonic Matrix Mid SC-999 Motherboard Replacement: Schritt 14, Bild 1 von 2 SuperSonic Matrix Mid SC-999 Motherboard Replacement: Schritt 14, Bild 2 von 2
    • Desolder the FM antenna from the motherboard.

  15. SuperSonic Matrix Mid SC-999 Motherboard Replacement, Motherboard: Schritt 15, Bild 1 von 2 SuperSonic Matrix Mid SC-999 Motherboard Replacement, Motherboard: Schritt 15, Bild 2 von 2
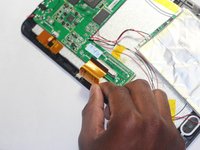
    • Remove the large ribbon cable from the socket that attaches it to the motherboard.

    • Pull down on the dark grey sliders located on both sides of the ribbon cable to release it.

  16. SuperSonic Matrix Mid SC-999 Motherboard Replacement: Schritt 16, Bild 1 von 2 SuperSonic Matrix Mid SC-999 Motherboard Replacement: Schritt 16, Bild 2 von 2
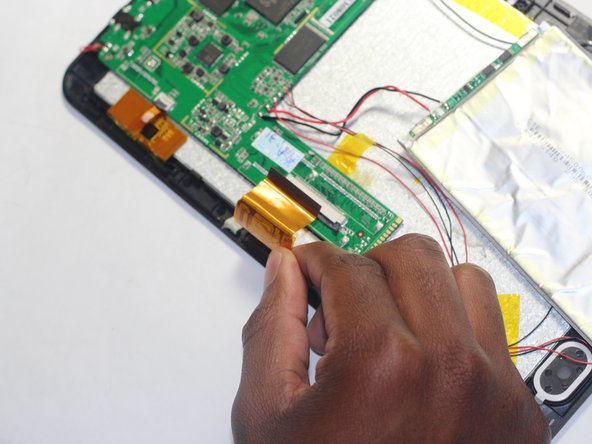
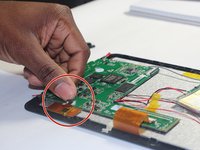
    • Remove the small ribbon cable from the socket that attaches it to the motherboard.

    • Flip the dark grey latch to release the ribbon cable from the motherboard.

  17. SuperSonic Matrix Mid SC-999 Motherboard Replacement: Schritt 17, Bild 1 von 3 SuperSonic Matrix Mid SC-999 Motherboard Replacement: Schritt 17, Bild 2 von 3 SuperSonic Matrix Mid SC-999 Motherboard Replacement: Schritt 17, Bild 3 von 3
    • Remove the four Phillips #00 screws attaching the motherboard to the device.

Abschluss

To reassemble your device, follow these instructions in reverse order.

Ein:e weitere:r Nutzer:in hat diese Anleitung absolviert.

Harris Dagha

Mitglied seit: 03/26/15

866 Reputation

7 Anleitungen geschrieben

Team

Dr Shaverz boyz Mitglied von Dr Shaverz boyz

Community

3 Mitglieder

14 Anleitungen geschrieben

0 Kommentare

Kommentar hinzufügen

Seitenaufrufe:

Letzte 24 Stunden: 0

Letzte 7 Tage: 0

Letzte 30 Tage: 0

Insgesamt: 315