Zum Hauptinhalt wechseln
Gemeinsam reparieren - Jetzt registrieren

SuperSonic Matrix Mid SC-999 Rear Facing Camera Replacement

Was du brauchst

  1. SuperSonic Matrix Mid SC-999 Rear Facing Camera Replacement, Back Cover: Schritt 1, Bild 1 von 1
    • Wedge the plastic opening tool between the back cover of the device and the front panel.

    • You will hear a snapping sound as the cover is separated from the body of the device.

  2. SuperSonic Matrix Mid SC-999 Rear Facing Camera Replacement: Schritt 2, Bild 1 von 1
    • Slide the opening tool along the seam between the front panel and the back cover to un-clip the remaining connections around the device.

    • Again, you will hear a snapping sound as the cover is separated from the body of the device.

  3. SuperSonic Matrix Mid SC-999 Rear Facing Camera Replacement: Schritt 3, Bild 1 von 2 SuperSonic Matrix Mid SC-999 Rear Facing Camera Replacement: Schritt 3, Bild 2 von 2
    • Lift the back cover from the body of the device to expose the internal components.

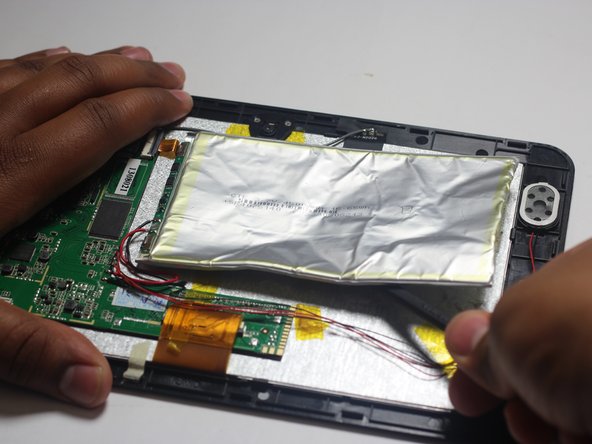
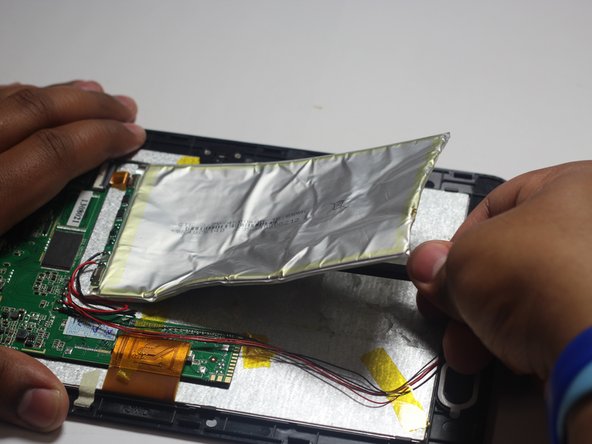
  4. SuperSonic Matrix Mid SC-999 Rear Facing Camera Replacement, Battery: Schritt 4, Bild 1 von 3 SuperSonic Matrix Mid SC-999 Rear Facing Camera Replacement, Battery: Schritt 4, Bild 2 von 3 SuperSonic Matrix Mid SC-999 Rear Facing Camera Replacement, Battery: Schritt 4, Bild 3 von 3
    • Remove the Battery

    • The battery is secured to the back panel with tape and glue.

    • Peel back the tape around the battery and discard it.

    • Tear through the adhesive holding the battery by using the spudger tool.

  5. SuperSonic Matrix Mid SC-999 Rear Facing Camera Replacement: Schritt 5, Bild 1 von 3 SuperSonic Matrix Mid SC-999 Rear Facing Camera Replacement: Schritt 5, Bild 2 von 3 SuperSonic Matrix Mid SC-999 Rear Facing Camera Replacement: Schritt 5, Bild 3 von 3
    • Desolder the 2 Battery Wires

    • The Battery has two wires connected to the motherboard (one black and one red).

    • If you're unfamiliar with soldering or desoldering check out this guide.

    • Be sure to wear protective eye wear. The soldering iron will become extremely hot and a potential danger, so make sure you are aware of your surroundings.

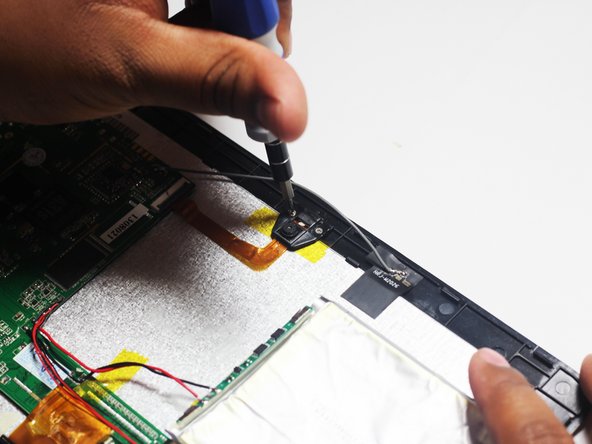
  6. SuperSonic Matrix Mid SC-999 Rear Facing Camera Replacement, Rear Facing Camera: Schritt 6, Bild 1 von 2 SuperSonic Matrix Mid SC-999 Rear Facing Camera Replacement, Rear Facing Camera: Schritt 6, Bild 2 von 2
    • Remove the two Phillips #00 screws attaching the housing of the camera to the device.

  7. SuperSonic Matrix Mid SC-999 Rear Facing Camera Replacement: Schritt 7, Bild 1 von 1
    • With the screws removed you should easily be able to remove the camera unit.

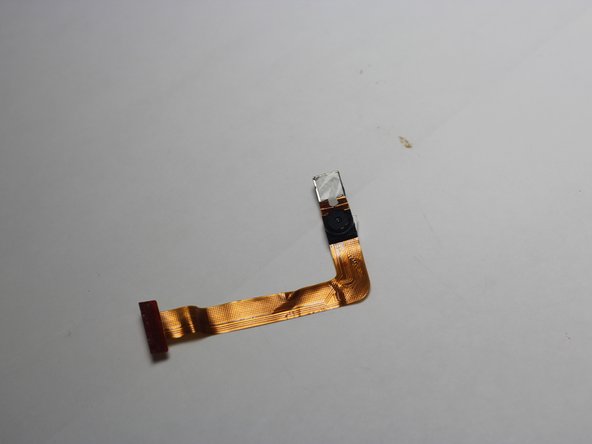
  8. SuperSonic Matrix Mid SC-999 Rear Facing Camera Replacement: Schritt 8, Bild 1 von 2 SuperSonic Matrix Mid SC-999 Rear Facing Camera Replacement: Schritt 8, Bild 2 von 2
    • Follow the camera unit back to the motherboard.

    • Use the spudger tool to remove the camera.

Abschluss

To reassemble your device, follow these instructions in reverse order.

Eine weitere Person hat diese Anleitung absolviert.

Team

Dr Shaverz boyz Mitglied von Dr Shaverz boyz

Community

3 Mitglieder

14 Anleitungen geschrieben

0 Kommentare zur Anleitung

Kommentar hinzufügen

Seitenaufrufe:

Letzte 24 Stunden: 0

Letzte 7 Tage: 8

Letzte 30 Tage: 26

Insgesamt: 394