Einleitung
If the battery on your Trio Stealth-10 is no longer functioning, replacement isn't difficult and this guide will give you the step by step procedure to do so.
Was du brauchst
-
-
To remove the back panel, you will need to use a plastic opening tool and slowly separate the back panel from the device.
-
-
-
-
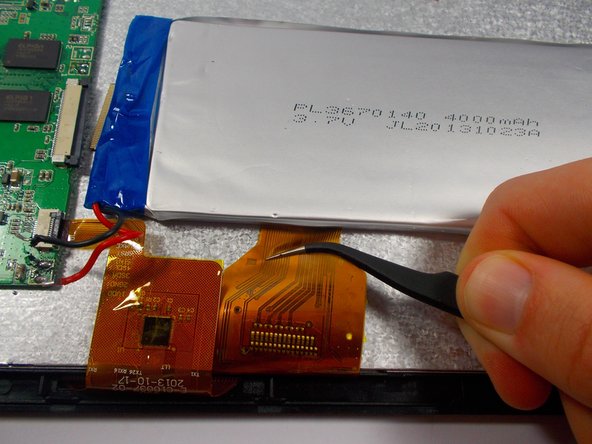
Disconnect the screen/digitizer connection. Use tweezers and pull each grey end of the connection until there is a small gap between the grey and white on the connector to the motherboard. The connection should be easily removable.
-
Pull the cable away and clear from under the battery to avoid damage to the connection.
-
-
-
Pry battery up from adhesive. Use a type of adhesive remover. Nail polish remover works well.
-


To reassemble your device, follow these instructions in reverse order.
To reassemble your device, follow these instructions in reverse order.
Rückgängig: Ich habe diese Anleitung nicht absolviert.
6 weitere Personen haben diese Anleitung absolviert.

Team

UMass Dartmouth, Team 1-4, Miles Fall 2015 Mitglied von UMass Dartmouth, Team 1-4, Miles Fall 2015
UMASSD-MILES-F15S1G4
3 Mitglieder
12 Anleitungen geschrieben