Zum Hauptinhalt wechseln

WRS315SDHW Dispenser Assembly Replacement

Was du brauchst

  1. WRS315SDHW Dispenser Assembly Replacement, Safety precautions: Schritt 1, Bild 1 von 1
    • Before you begin your repair, perform the following:

    • Turn off your main water supply

    • Unplug your device

  2. WRS315SDHW Dispenser Assembly Replacement, Unfasten the dispenser panels: Schritt 2, Bild 1 von 2 WRS315SDHW Dispenser Assembly Replacement, Unfasten the dispenser panels: Schritt 2, Bild 2 von 2
    • The dispenser panel screws are located under the dispenser as if you're looking up into the dispenser tube (where the ice cubes and water come out).

    • Use a 1/4 inch socket wrench to remove the two 15.6 mm-long screws securing the two dispenser panels.

  3. WRS315SDHW Dispenser Assembly Replacement, Remove the dispenser panels: Schritt 3, Bild 1 von 3 WRS315SDHW Dispenser Assembly Replacement, Remove the dispenser panels: Schritt 3, Bild 2 von 3 WRS315SDHW Dispenser Assembly Replacement, Remove the dispenser panels: Schritt 3, Bild 3 von 3
    • Pull the dispenser panels straight down to separate them from the chassis.

    • Remove the dispenser panels.

  4. WRS315SDHW Dispenser Assembly Replacement, Unfasten the control board: Schritt 4, Bild 1 von 1
    • Use a 1/4 inch socket wrench to remove the two 15.6 mm-long screws securing the control board.

  5. WRS315SDHW Dispenser Assembly Replacement: Schritt 5, Bild 1 von 3 WRS315SDHW Dispenser Assembly Replacement: Schritt 5, Bild 2 von 3 WRS315SDHW Dispenser Assembly Replacement: Schritt 5, Bild 3 von 3
    • Tilt the bottom of the control board away from the chassis to release its clips.

    • Pull straight down to separate the control board enough to access its connectors.

  6. WRS315SDHW Dispenser Assembly Replacement, Disconnect the control board: Schritt 6, Bild 1 von 3 WRS315SDHW Dispenser Assembly Replacement, Disconnect the control board: Schritt 6, Bild 2 von 3 WRS315SDHW Dispenser Assembly Replacement, Disconnect the control board: Schritt 6, Bild 3 von 3
    • Disconnect the large connector attached to the right edge of the control board.

  7. WRS315SDHW Dispenser Assembly Replacement: Schritt 7, Bild 1 von 2 WRS315SDHW Dispenser Assembly Replacement: Schritt 7, Bild 2 von 2
    • Disconnect the small connector attached to the left edge of the control board.

  8. WRS315SDHW Dispenser Assembly Replacement, Remove the control board: Schritt 8, Bild 1 von 1
    • Remove the control board.

  9. WRS315SDHW Dispenser Assembly Replacement, Remove the plastic clip: Schritt 9, Bild 1 von 3 WRS315SDHW Dispenser Assembly Replacement, Remove the plastic clip: Schritt 9, Bild 2 von 3 WRS315SDHW Dispenser Assembly Replacement, Remove the plastic clip: Schritt 9, Bild 3 von 3
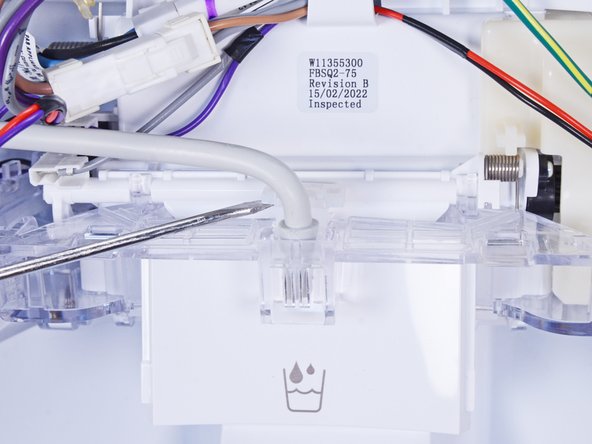
    • Use a flathead screwdriver, or a similar tool, to pry up the plastic clip securing the water hose.

    • Remove the plastic clip.

  10. WRS315SDHW Dispenser Assembly Replacement, Disconnect the water hose: Schritt 10, Bild 1 von 3 WRS315SDHW Dispenser Assembly Replacement, Disconnect the water hose: Schritt 10, Bild 2 von 3 WRS315SDHW Dispenser Assembly Replacement, Disconnect the water hose: Schritt 10, Bild 3 von 3
    • Use a flathead screwdriver, or a similar tool, to pry up the water hose enough to grip it with your fingers.

    • Pull the water hose straight up to disconnect it.

  11. WRS315SDHW Dispenser Assembly Replacement, Reposition the cables: Schritt 11, Bild 1 von 2 WRS315SDHW Dispenser Assembly Replacement, Reposition the cables: Schritt 11, Bild 2 von 2
    • Reposition the cables so they lay in front of the top plastic clip.

  12. WRS315SDHW Dispenser Assembly Replacement, Unclip the dispenser assembly: Schritt 12, Bild 1 von 3 WRS315SDHW Dispenser Assembly Replacement, Unclip the dispenser assembly: Schritt 12, Bild 2 von 3 WRS315SDHW Dispenser Assembly Replacement, Unclip the dispenser assembly: Schritt 12, Bild 3 von 3
    • There are two plastic clips that secure the dispenser assembly in the chassis.

    • Use a flathead screwdriver, or a similar tool, to press the plastic clip toward the dispenser assembly.

    • Repeat for the other plastic clip to completely separate the dispenser assembly from the chassis.

  13. WRS315SDHW Dispenser Assembly Replacement, Reposition the dispenser assembly: Schritt 13, Bild 1 von 3 WRS315SDHW Dispenser Assembly Replacement, Reposition the dispenser assembly: Schritt 13, Bild 2 von 3 WRS315SDHW Dispenser Assembly Replacement, Reposition the dispenser assembly: Schritt 13, Bild 3 von 3
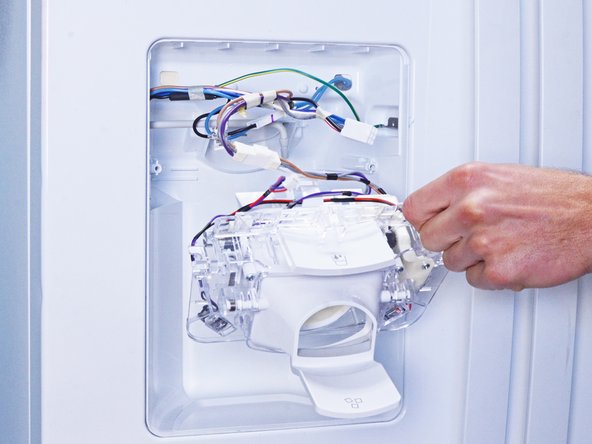
    • Pull the dispenser assembly away from the chassis enough to access its connectors.

  14. WRS315SDHW Dispenser Assembly Replacement, Disconnect the dispenser assembly: Schritt 14, Bild 1 von 3 WRS315SDHW Dispenser Assembly Replacement, Disconnect the dispenser assembly: Schritt 14, Bild 2 von 3 WRS315SDHW Dispenser Assembly Replacement, Disconnect the dispenser assembly: Schritt 14, Bild 3 von 3
    • While performing this step, support the dispenser assembly so it doesn't fall.

    • Disconnect the connector attached to the dispenser assembly.

  15. WRS315SDHW Dispenser Assembly Replacement, Remove the dispenser assembly: Schritt 15, Bild 1 von 1
    • Remove the dispenser assembly.

Abschluss

To reassemble your device, follow these instructions in reverse order.

Take your e-waste to an R2 or e-Stewards certified recycler.

Repair didn’t go as planned? Ask our Answers community for help.

Ein:e weitere:r Nutzer:in hat diese Anleitung absolviert.

nicO

Mitglied seit: 04/14/15

15.885 Reputation

88 Anleitungen geschrieben

Team

Global Fixers Mitglied von Global Fixers

Community

33 Mitglieder

545 Anleitungen geschrieben

0 Kommentare

Kommentar hinzufügen

Seitenaufrufe:

Letzte 24 Stunden: 1

Letzte 7 Tage: 3

Letzte 30 Tage: 4

Insgesamt: 132