Einleitung
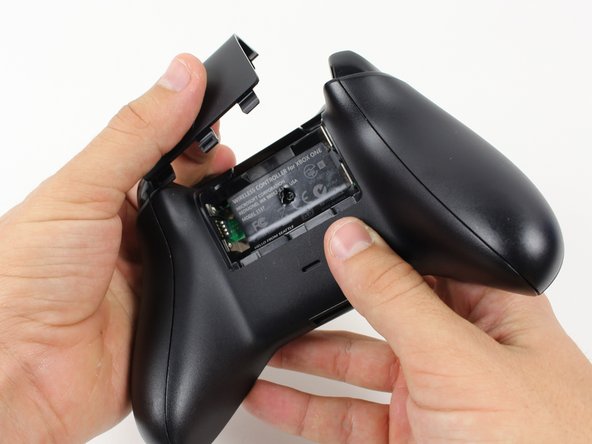
Du musst verschiedene Schrauben auf der Rückseite des Controllers entfernen, wenn du die Frontplatte abnehmen willst.
Was du brauchst
-
-
Nimm den Controller fest in die Hand um die Seitenteile abzunehmen. Heble mit einem Spudger in die Naht zwischen Front- und Seitenteil.
-
Ziehe das Seitenteil ab indem du den Spudger vor und zurück bewegst. Das musst du entlang der ganzen Naht durchführen.
One you take it off, is it possible to click it back in?
As long as you don’t exceed the couple tons you need to take it off you should be able to put it back.
Brandon -
I don’t have a squdger
getting those handles back on seems impossible, they just dont fit as well, a gap remains even after snapping into place.
Dont think ill be doing this in the future
edit: wiggled the bo9ttom middlewith the handles off and somethign finally “clicked” into place for that extra 1/4 mm for the down arrow on my D-Pad to click back up into place!.
-
-
-
-
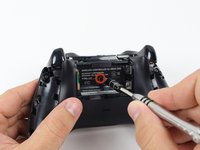
Mit einem Schraubendreher kannst du ein Loch direkt in die Mitte des Aufklebers stoßen.
-
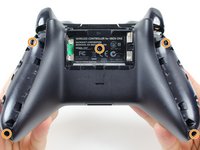
Entferne die fünf 10 mm Torx TR8 Sicherheitsschrauben auf der Rückseite.
It's a t8 or t9 security bit btw, I got the top two out with a regular T8, but the bottom two and middle needed a T9 Security bit.
All five faceplate/backplate screws in the controller I disassembled were T8 security fasteners.
The T8 is only good for the middle screw on my One S controller. The others require something bigger
These requires SECURITY Torx bits (they have a cannulated hole in the driver). I don't believe the iFixIt branded driver is cannulated but you can buy a set of bits from DeWalt DWAX200 which is overkill but has what you need.
The driver that iFixIt sells is cannulated.
where do you get this dumb ass screw driver
You can bypass it with a 1.5mm flathead.
thank you for this. worked for me
TR9. A $10 kit from Walmart has the bit/driver in it and extra goodies to make life simple.
As weird as it sounds, the top 2 came out for me with a flathead- but the bottom two and the middle one wont
-
Um dein Gerät wieder zusammen zu setzen folge den Schritten in umgekehrter Reihenfolge.
Um dein Gerät wieder zusammen zu setzen folge den Schritten in umgekehrter Reihenfolge.
Rückgängig: Ich habe diese Anleitung nicht absolviert.
87 weitere Personen haben diese Anleitung absolviert.
Besonderer Dank geht an diese Übersetzer:innen:
100%
VauWeh hilft uns, die Welt in Ordnung zu bringen! Wie kann ich mithelfen?
Hier starten ›
11 Kommentare
It was a good tutorial, but i have two plastic rings that stay after my instervention... Anyone knows where are-they ?
It was a good tutorial, but i have two plastic rings that stay after my instervention... Anyone knows where are-they ?
Note before starting. You need a T8 security bit (with a hole in the middle), not a standard T8 bit.
I took mine a part because it was looking dirty, gave it a good clean, putting it back together was easy but it wont work with the batteries anymore just the power core, there is nothing broken or cracked, any ideas?
Maybe you forced the battery contact on the wrong side of the case?
Alex is probably right. It's easy to let the two battery contacts on one side get covered by the bottom plate. Take battery cover off and compare the metal bits you see to a known good one.
Are the steps the same with the Xbox One Elite Controller as well?
This is a great tutorial for people wanting to replace the boring black or white faceplate with one with a skin. It’s a shame they didn’t make the controllers easily customizable. They could’ve done a lot more with this console.
Is this for the standard Xbox One controller or the Xbox One S Controller, or does the same exact steps apply to both?
I did this only using a glasses repair kit


