Zum Hauptinhalt wechseln

YCCTEAM YCC-SW4001 Shoulder Buttons Replacement

Was du brauchst

  1. YCCTEAM YCC-SW4001 Shoulder Buttons Replacement, Front Case: Schritt 1, Bild 1 von 1
    • Use a Phillips screwdriver to remove the eight 9.15 mm screws that secure the rear case.

  2. YCCTEAM YCC-SW4001 Shoulder Buttons Replacement: Schritt 2, Bild 1 von 3 YCCTEAM YCC-SW4001 Shoulder Buttons Replacement: Schritt 2, Bild 2 von 3 YCCTEAM YCC-SW4001 Shoulder Buttons Replacement: Schritt 2, Bild 3 von 3
    • Use an opening pick to pry the back cover off of the controller.

  3. YCCTEAM YCC-SW4001 Shoulder Buttons Replacement: Schritt 3, Bild 1 von 1
    • Use a Phillips screwdriver to remove the three 9.15 mm screws from the back of the controller.

  4. YCCTEAM YCC-SW4001 Shoulder Buttons Replacement: Schritt 4, Bild 1 von 3 YCCTEAM YCC-SW4001 Shoulder Buttons Replacement: Schritt 4, Bild 2 von 3 YCCTEAM YCC-SW4001 Shoulder Buttons Replacement: Schritt 4, Bild 3 von 3
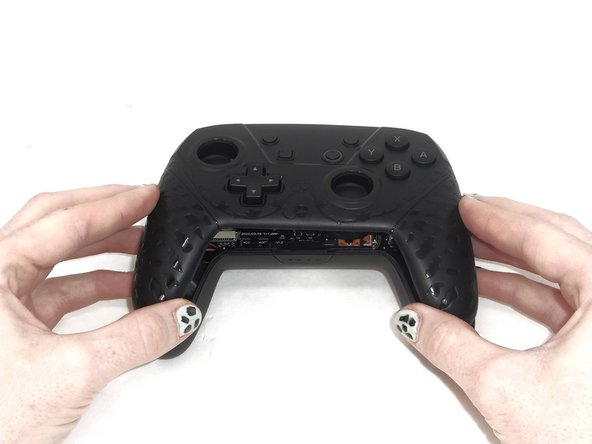
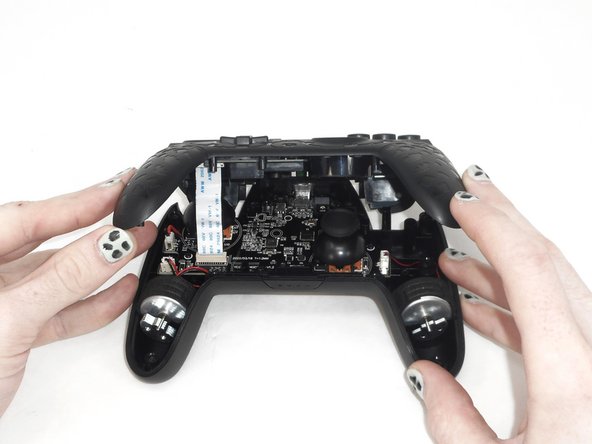
    • Slightly lift the front case.

    • Do not remove the front cover completely; it is still attached to the motherboard by a white ribbon cable.

  5. YCCTEAM YCC-SW4001 Shoulder Buttons Replacement: Schritt 5, Bild 1 von 3 YCCTEAM YCC-SW4001 Shoulder Buttons Replacement: Schritt 5, Bild 2 von 3 YCCTEAM YCC-SW4001 Shoulder Buttons Replacement: Schritt 5, Bild 3 von 3
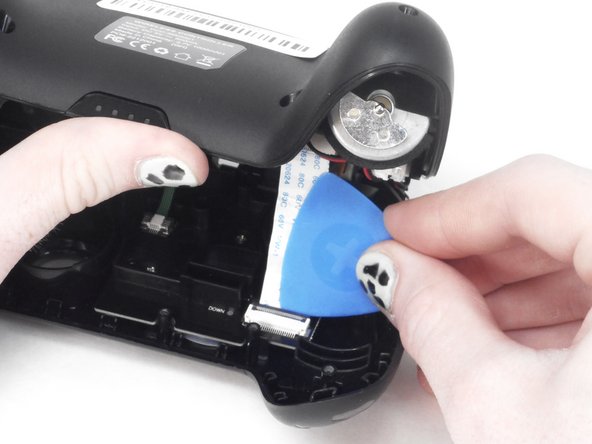
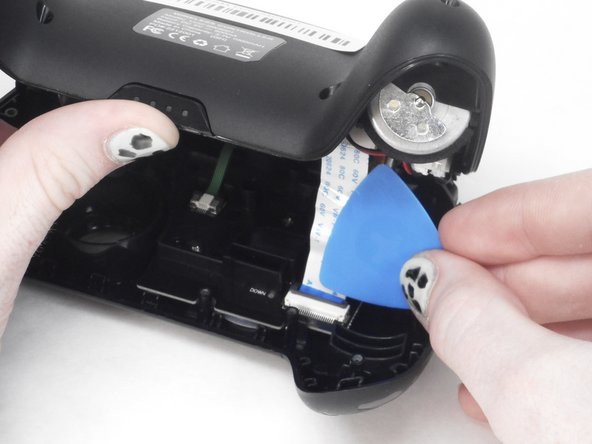
    • Use the tip of the opening pick to flip up the black locking flap of the ZIF connector.

    • The black flap holds the white ribbon cable in place.

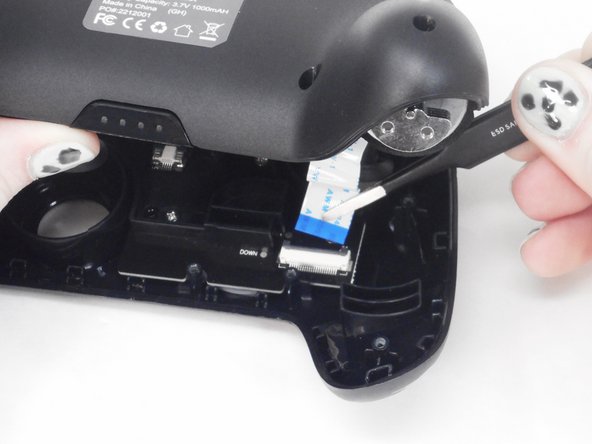
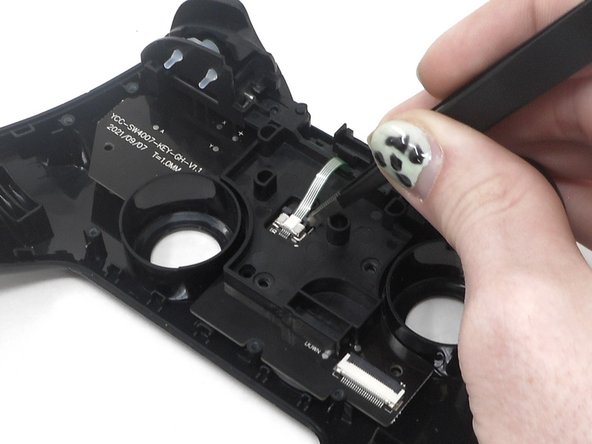
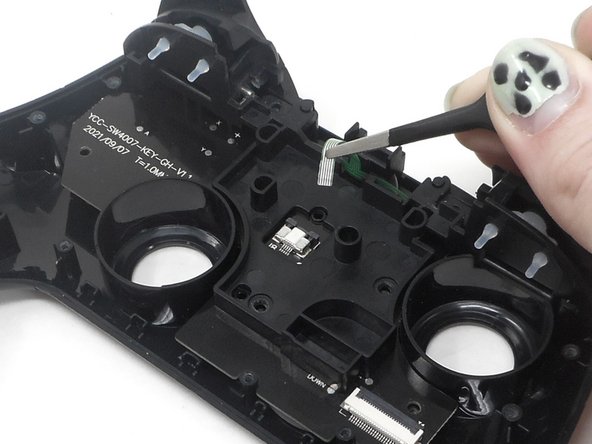
  6. YCCTEAM YCC-SW4001 Shoulder Buttons Replacement: Schritt 6, Bild 1 von 2 YCCTEAM YCC-SW4001 Shoulder Buttons Replacement: Schritt 6, Bild 2 von 2
    • Use tweezers to disconnect the white ribbon cable from the ZIF connector.

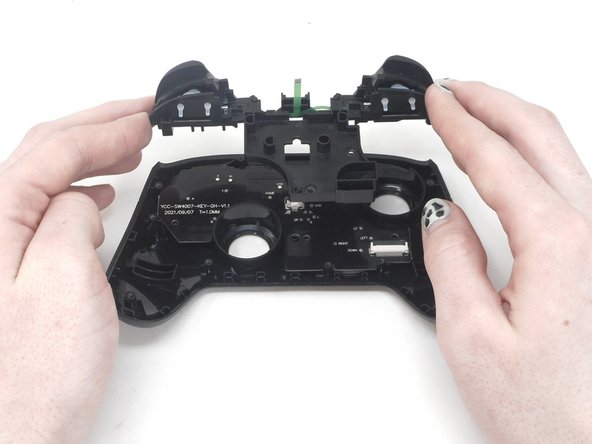
  7. YCCTEAM YCC-SW4001 Shoulder Buttons Replacement: Schritt 7, Bild 1 von 1
    • Remove the front case.

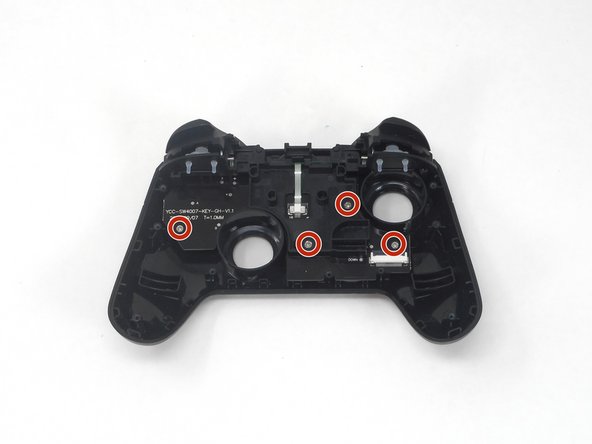
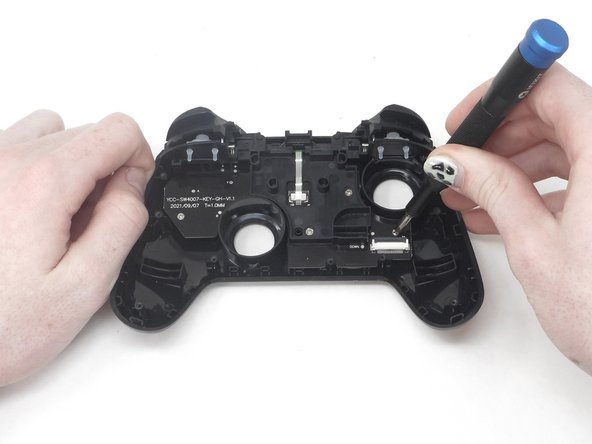
  8. YCCTEAM YCC-SW4001 Shoulder Buttons Replacement, Shoulder Buttons: Schritt 8, Bild 1 von 3 YCCTEAM YCC-SW4001 Shoulder Buttons Replacement, Shoulder Buttons: Schritt 8, Bild 2 von 3 YCCTEAM YCC-SW4001 Shoulder Buttons Replacement, Shoulder Buttons: Schritt 8, Bild 3 von 3
    • Flip over the front cover and remove the four 5.8 mm screws from the rear of the front cover using a Phillips screwdriver.

  9. YCCTEAM YCC-SW4001 Shoulder Buttons Replacement: Schritt 9, Bild 1 von 3 YCCTEAM YCC-SW4001 Shoulder Buttons Replacement: Schritt 9, Bild 2 von 3 YCCTEAM YCC-SW4001 Shoulder Buttons Replacement: Schritt 9, Bild 3 von 3
    • Flip up the ZIF locking flap.

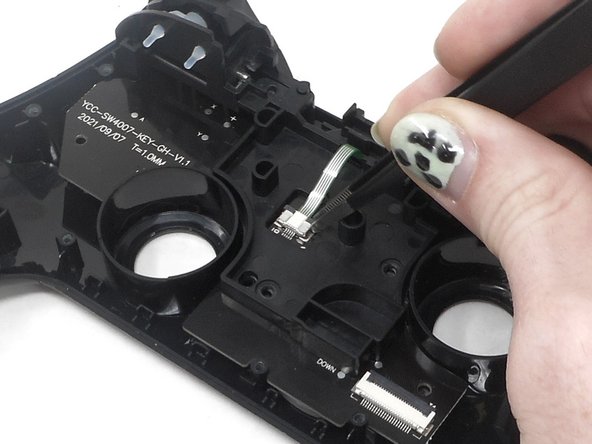
  10. YCCTEAM YCC-SW4001 Shoulder Buttons Replacement: Schritt 10, Bild 1 von 2 YCCTEAM YCC-SW4001 Shoulder Buttons Replacement: Schritt 10, Bild 2 von 2
    • Disconnect the cable from the ZIF connector using tweezers or by hand.

  11. YCCTEAM YCC-SW4001 Shoulder Buttons Replacement: Schritt 11, Bild 1 von 2 YCCTEAM YCC-SW4001 Shoulder Buttons Replacement: Schritt 11, Bild 2 von 2
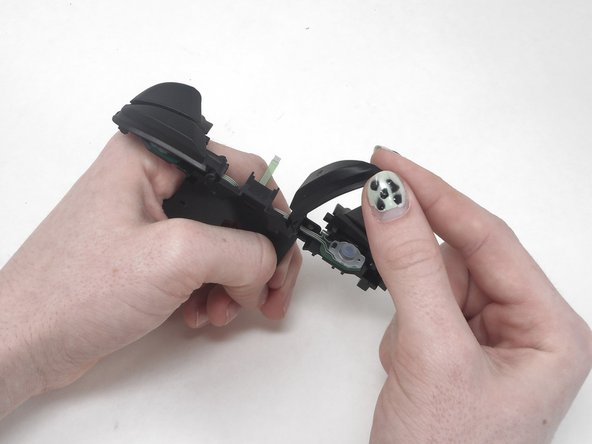
    • Remove the circuit board and shoulder buttons assembly from the front cover.

  12. YCCTEAM YCC-SW4001 Shoulder Buttons Replacement: Schritt 12, Bild 1 von 3 YCCTEAM YCC-SW4001 Shoulder Buttons Replacement: Schritt 12, Bild 2 von 3 YCCTEAM YCC-SW4001 Shoulder Buttons Replacement: Schritt 12, Bild 3 von 3
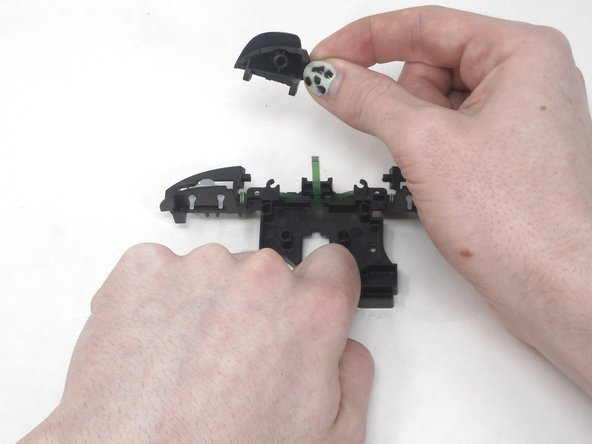
    • Remove the R button by hand.

  13. YCCTEAM YCC-SW4001 Shoulder Buttons Replacement: Schritt 13, Bild 1 von 3 YCCTEAM YCC-SW4001 Shoulder Buttons Replacement: Schritt 13, Bild 2 von 3 YCCTEAM YCC-SW4001 Shoulder Buttons Replacement: Schritt 13, Bild 3 von 3
    • Remove the L button by hand.

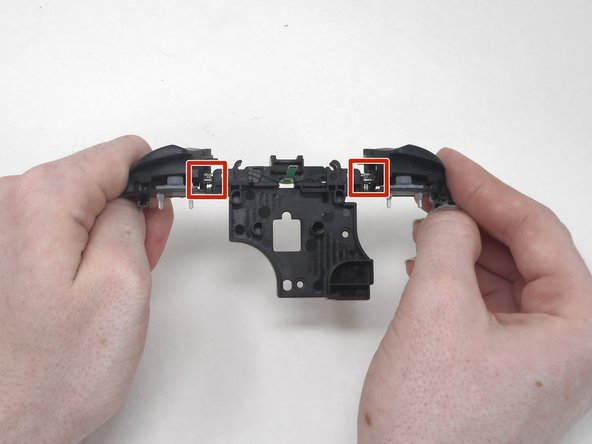
    • Flip the shoulder buttons attachment and look at the metal rods.

  14. YCCTEAM YCC-SW4001 Shoulder Buttons Replacement: Schritt 14, Bild 1 von 3 YCCTEAM YCC-SW4001 Shoulder Buttons Replacement: Schritt 14, Bild 2 von 3 YCCTEAM YCC-SW4001 Shoulder Buttons Replacement: Schritt 14, Bild 3 von 3
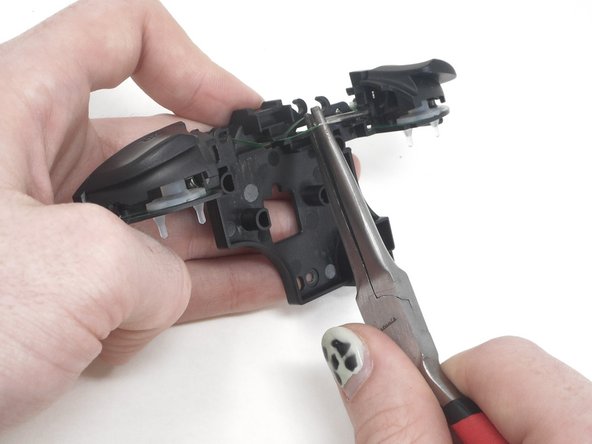
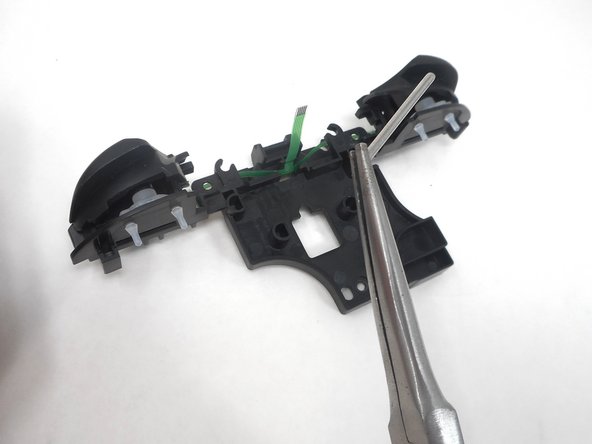
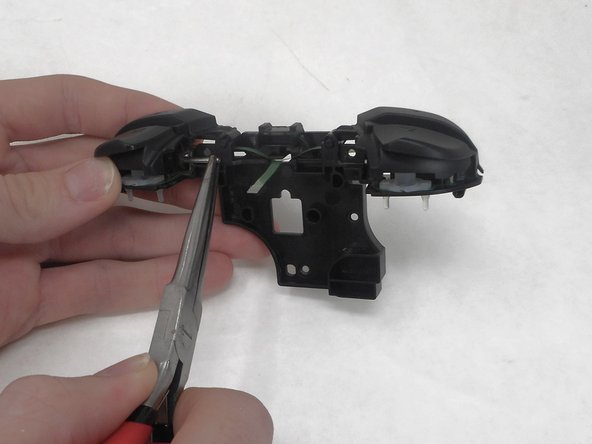
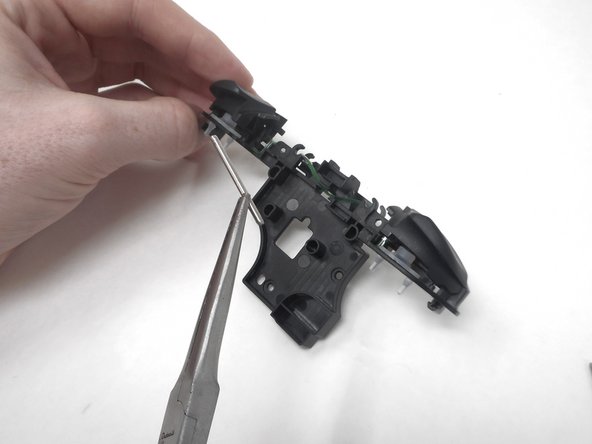
    • Remove the metal rod under "ZL" using the small needle nose pliers.

  15. YCCTEAM YCC-SW4001 Shoulder Buttons Replacement: Schritt 15, Bild 1 von 3 YCCTEAM YCC-SW4001 Shoulder Buttons Replacement: Schritt 15, Bild 2 von 3 YCCTEAM YCC-SW4001 Shoulder Buttons Replacement: Schritt 15, Bild 3 von 3
    • Remove the metal rod under "ZR" using small needle nose pliers.

  16. YCCTEAM YCC-SW4001 Shoulder Buttons Replacement: Schritt 16, Bild 1 von 3 YCCTEAM YCC-SW4001 Shoulder Buttons Replacement: Schritt 16, Bild 2 von 3 YCCTEAM YCC-SW4001 Shoulder Buttons Replacement: Schritt 16, Bild 3 von 3
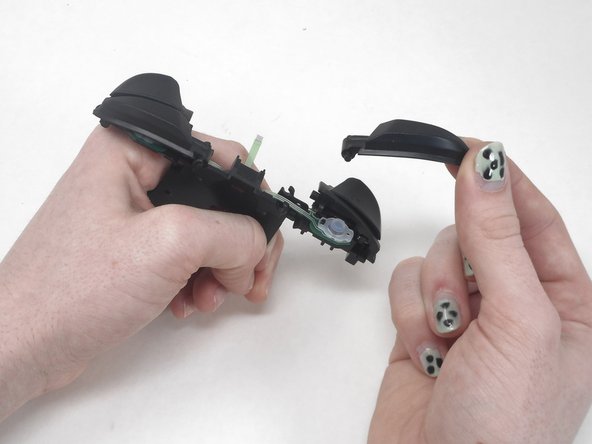
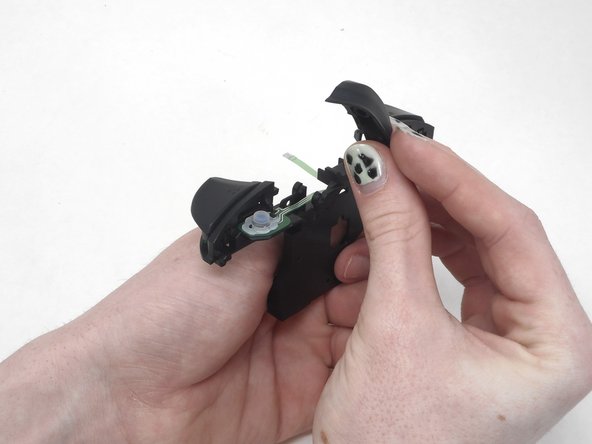
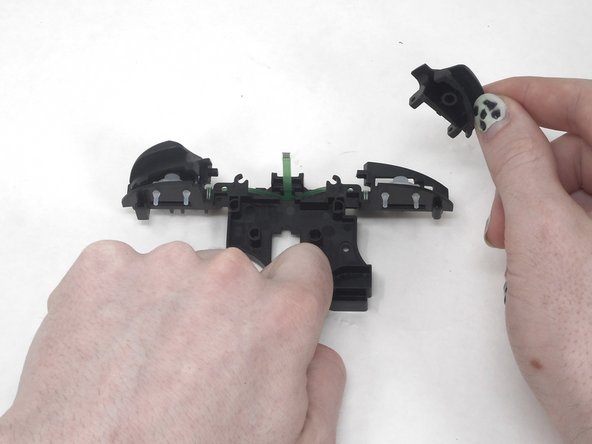
    • Remove the ZL and ZR buttons by hand.

Abschluss

To reassemble your device, follow these instructions in reverse order.

Sam Borwick

Mitglied seit: 02/15/24

315 Reputation

2 Anleitungen geschrieben

Team

University of Memphis, Team 1-1, Sneed Spring 2024 Mitglied von University of Memphis, Team 1-1, Sneed Spring 2024

UM-SNEED-S24S1G1

3 Mitglieder

6 Anleitungen geschrieben

0 Kommentare

Kommentar hinzufügen

Seitenaufrufe:

Letzte 24 Stunden: 0

Letzte 7 Tage: 1

Letzte 30 Tage: 13

Insgesamt: 57