Zum Hauptinhalt wechseln

HP ENVY x360 - 15-cn0003ca CPU Fan Replacement

Englisch
Deutsch
Schritt 6
HP ENVY x360 - 15-cn0003ca CPU Fan Replacement: Schritt 0, Bild 1 von 3 HP ENVY x360 - 15-cn0003ca CPU Fan Replacement: Schritt 0, Bild 2 von 3 HP ENVY x360 - 15-cn0003ca CPU Fan Replacement: Schritt 0, Bild 3 von 3
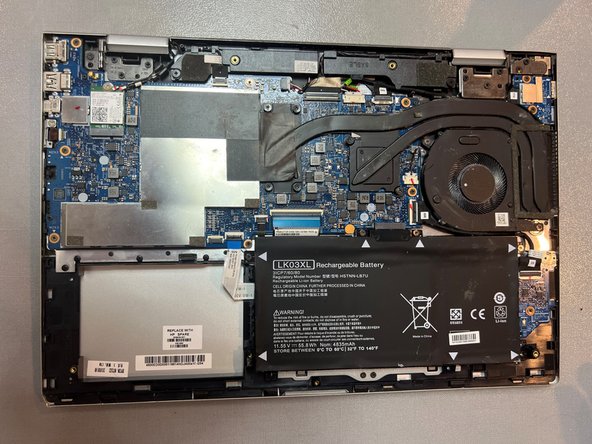
  • Attaching the Replacement Fan: Position the replacement fan so that it aligns correctly with the screw holes and fits snugly into place. The fan should sit flush with the housing and not have any loose or uneven parts.

  • Using the appropriate screws (provided with the replacement fan), fasten the new fan securely to the laptop's internal structure. Tighten the screws evenly.

  • Avoid over-tightening the screws as this could damage the fan or the laptop's internal components.

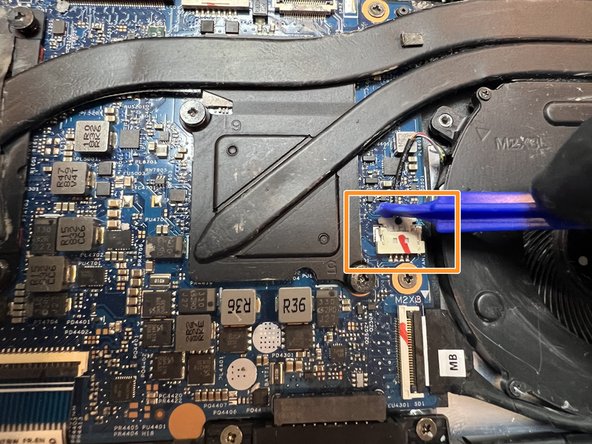
  • Reconnecting Power: Locate the power connector. This is a small, multi-pin connector. Align the connector with the corresponding socket and push in.

  • Take your time and ensure that the replacement fan is securely attached and that the power connector is correctly plugged in.

Hier Übersetzung einfügen

Hier Übersetzung einfügen

Hier Übersetzung einfügen

Hier Übersetzung einfügen

Hier Übersetzung einfügen

Deine Beiträge sind lizenziert unter der Open-Source Creative Commons Lizenz.