Zum Hauptinhalt wechseln

Gateway LT2514u Keyboard Replacement

Hinweis: Du bearbeitest eine grundständige Anleitung. Alle Änderungen, die du vornimmst, betreffen alle 4 Anleitungen, die diese beinhalten.

Englisch
Deutsch

Schritt 2 übersetzen

Schritt 2
Gateway LT2514u Keyboard Replacement: Schritt 0, Bild 1 von 3 Gateway LT2514u Keyboard Replacement: Schritt 0, Bild 2 von 3 Gateway LT2514u Keyboard Replacement: Schritt 0, Bild 3 von 3
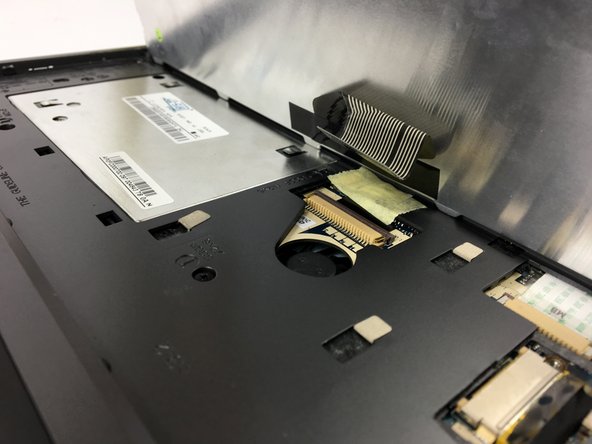
  • After releasing all 5 tabs, carefully lift the keyboard along its top edge until you see the ribbon that connects the keyboard to the motherboard.

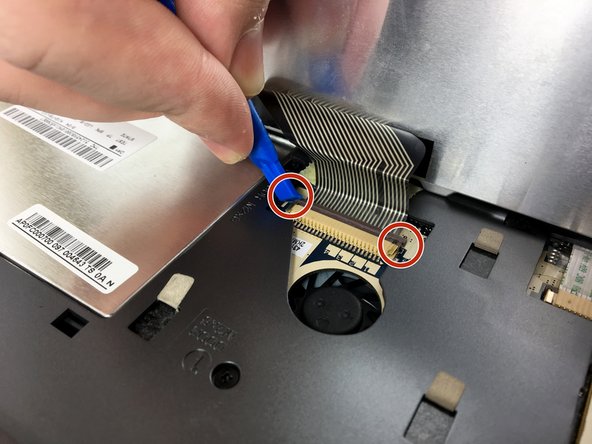
  • Using a plastic opening tool, slide the 2 clips that hold the keyboard ribbon in place outward.

  • Carefully slide the ribbon out and you can now pull the keyboard away from the netbook.

Hier Übersetzung einfügen

Hier Übersetzung einfügen

Hier Übersetzung einfügen

Deine Beiträge sind lizenziert unter der Open-Source Creative Commons Lizenz.