Schritt 4 übersetzen
Schritt 4


-
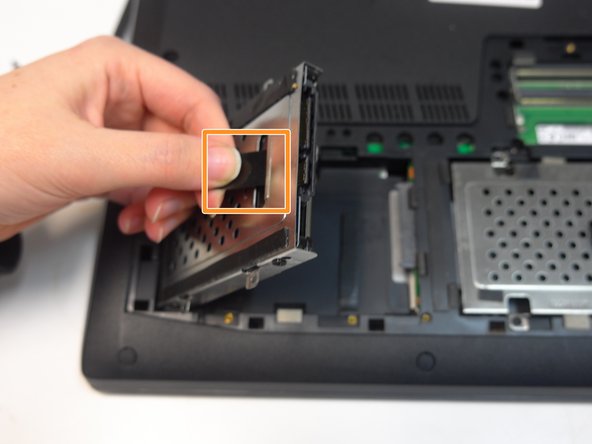
Use the black tab as leverage to slide the metal hard drive casing all the way to the left.
-
Still holding the black tab, pull the hard drive casing up to remove it from the laptop.
Deine Beiträge sind lizenziert unter der Open-Source Creative Commons Lizenz.