Einleitung
This is the guide for replacing the face buttons on the iNNEXT N64 Classic Controller.
Before you begin this repair, make sure the controller is disconnected from the console.
Was du brauchst
-
-
Turn the controller face down.
-
Use a Phillips #00 screwdriver to remove the eight screws on the back of the controller.
-
-
-
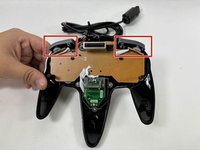
Insert an opening tool into the seam between the top and bottom case.
-
Work your way around edge of the controller to release the tabs connecting the top and bottom of the controller.
-
Remove the bottom case from the controller.
-
-
-
-
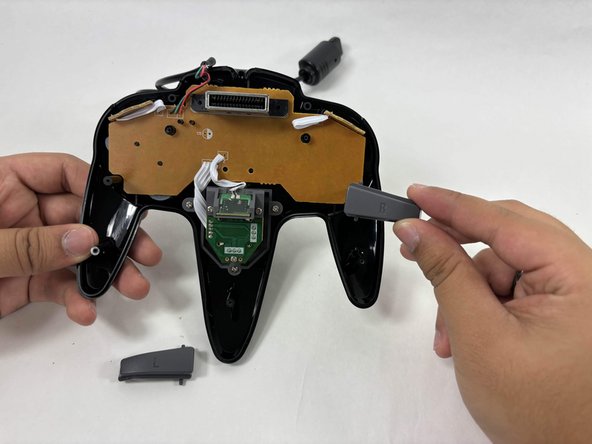
To remove the shoulder buttons, lift the buttons labelled with "L" and "R" upwards and out of the controller. There should not be any resistance coming out.
-
-
-
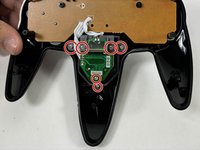
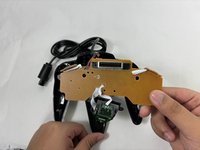
Use a Phillips screwdriver to remove the 6 screws securing the joystick assembly to the top of the controller.
-
Gently lift the control panel and joystick assembly from the top cover of the controller.
-
-
-
Remove the old buttons by either pulling them out or pushing lightly from the front of the top case.
-


To reassemble your device, follow these instructions in reverse order. Take your e-waste to an R2 or e-Stewards certified recycler.
To reassemble your device, follow these instructions in reverse order. Take your e-waste to an R2 or e-Stewards certified recycler.
Team

UMass Dartmouth, Team 3-4, Santin Fall 2024 Mitglied von UMass Dartmouth, Team 3-4, Santin Fall 2024
UMASSD-SANTIN-F24S3G4
4 Mitglieder
5 Anleitungen geschrieben