Zum Hauptinhalt wechseln

iPad mini 4 LTE Battery Connector Replacement

Grundständige Anleitung
Dies ist eine grundständige Anleitung, die nur als Teil einer anderen Anleitung verwendet werden sollte.

Was du brauchst

  1. iPad mini 4 LTE Battery Connector Replacement, Battery Connector: Schritt 1, Bild 1 von 1
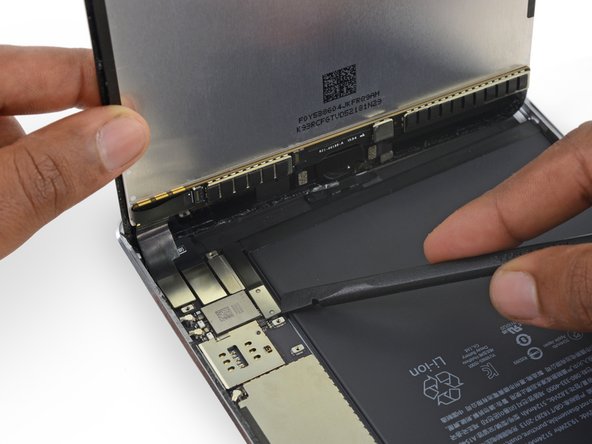
    • To avoid stressing any cables, hold the display assembly perpendicular to the body of the iPad until it is disconnected.

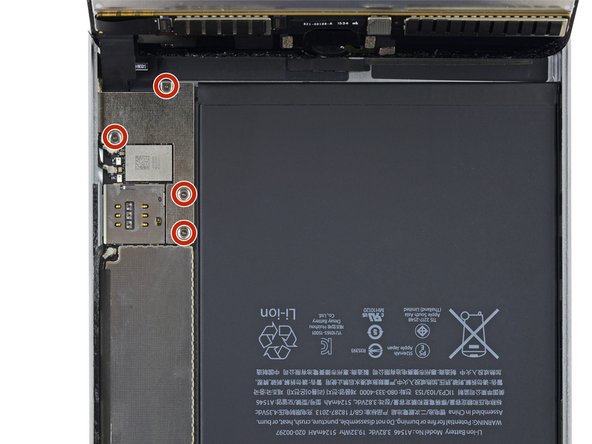
    • Remove the four 1.2 mm Phillips screws over the battery/display connector bracket.

  2. iPad mini 4 LTE Battery Connector Replacement: Schritt 2, Bild 1 von 1
    • Remove the battery/display cable bracket.

  3. iPad mini 4 LTE Battery Connector Replacement: Schritt 3, Bild 1 von 2 iPad mini 4 LTE Battery Connector Replacement: Schritt 3, Bild 2 von 2
    • When disconnecting any press connectors from the logic board, be sure to lift the connector straight up to avoid ripping the socket off the board.

    • Use the flat tip of a spudger to disconnect the battery connector from its socket on the logic board.

    • Bend the battery connector ribbon cable up slightly to prevent it from making contact and powering on the iPad.

Abschluss

To reassemble your device, follow these instructions in reverse order.
Evan Noronha

Mitglied seit: 02/05/15

223.466 Reputation

168 Anleitungen geschrieben

0 Kommentare

Kommentar hinzufügen

Seitenaufrufe:

Letzte 24 Stunden: 0

Letzte 7 Tage: 0

Letzte 30 Tage: 0

Insgesamt: 201