Diese Übersetzung enthält möglicherweise noch nicht die neuesten Änderungen der Original-Anleitung. Hilf mit, die Übersetzung zu aktualisieren oder sieh dir die Original-Anleitung an.
Was du brauchst
Einführungsvideo
-
-
Falls das Displayglas gesprungen ist, halte die Bruchstücke zusammen und vermeide Verletzungen während des Reparaturvorgangs, indem du das Glas mit Tape zusammenhälst.
-
Lege sich überlappende Streifen von durchsichtigen Klebestreifen über das Display des iPhones, bis die gesamte Vorderseite bedeckt ist.
-
-
-
Entferne die beiden Kreuzschlitzschrauben #00 vom Dock-Anschluss Ende des iPhones.
-
-
-
Entferne den Metallgriff vom Saugnapf. Es ist einfacher und sicherer, die Saugnapf-Unterseite statt des Metallgriffs zu packen.
-
Verwende einen kleinen Saugnapf bei dem Home Button, um vorsichtig den unteren Teil der Display Einheit zu ziehen.
-
-
-
Halte die Display Einheit weiter mit einer Hand und trenne mit dem Spudger in der anderen Hand das schwarze Flachbandkabel mit dem Label "1".
-
Das Flachbandkabel "1" ist mit einem Steckverbinder verbunden. Der Block am Ende des Kabels ist der Stecker, der einfach in die Buchse auf der Platine gesteckt wird. Es wird kein anderer Verriegelungsmechanismus verwendet.
-
-
-
Klappe das Display nach oben, so dass es ungefähr vertikal steht. Dies erlaubt leichteren Zugang zu den übrigen Kabeln, die getrennt werden müssen.
-
Trenne das schwarze Flachbandkabel, das mit einer "2" gekennzeichnet ist, mit einem Spudger.
-
-
-
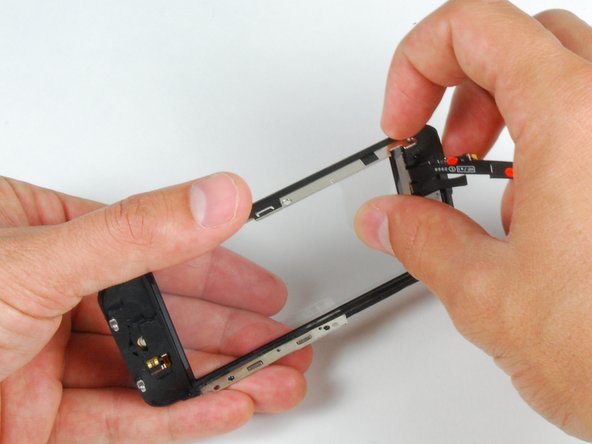
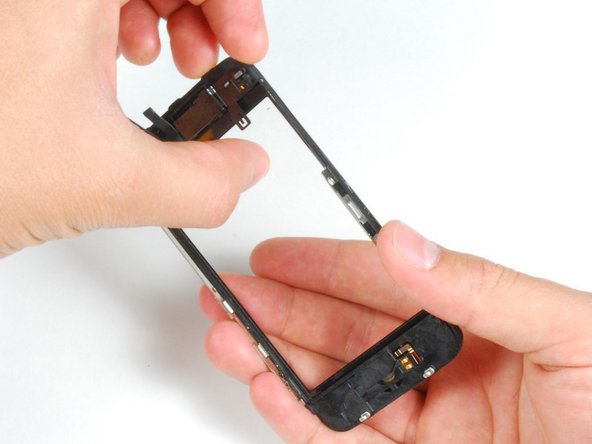
Hole das Flachbandkabel aus der Buchse und entferne die Display Einheit vom iPhone.
-
-
-
Entferne die beiden Kreuzschlotzschrauben von der rechten Seite der Display Einheit.
-
-
-
-
Drehe das Display herum. Wenn sich ein dünner Streifen von schwarzem Tape am Rand der Display Einheit befindet, löse dieses vorsichtig ab.
-
-
-
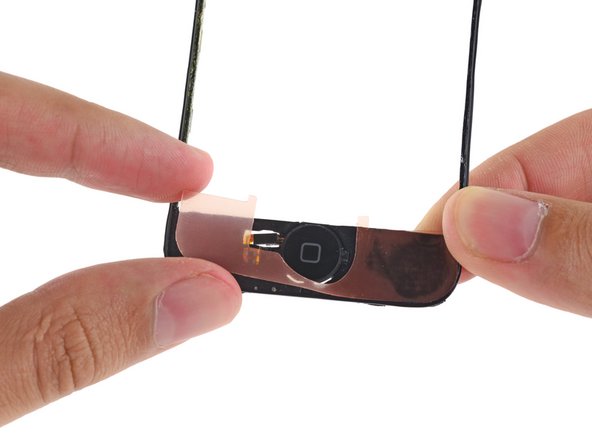
Entferne die drei Kreuzschlitzschrauben von der linken Seite der Display Einheit.
-
-
-
Drehe die Display Einheit herum und führe vorsichtig einen metallenen Spudger zwischen die beiden Schienen, die entlang der Seitenwand der Display Einheit laufen. Drehe den Spudger vorsichtig, um das LCD vom Glas anzuheben.
-
-
-
Trenne das LCD und Glas, indem du das LCD Panel weg von den Flachbandkabeln auf dem Glasd schiebst.
-
-
Dieser Schritt ist noch nicht übersetzt. Hilf mit, ihn zu übersetzen!
-
If the glass has shattered at the top or bottom be especially patient and gentle when removing fragments. In extreme cases you may have to pick off any glass shards that remain glued to the plastics.
-
Using a heat gun or hairdryer, heat the top left area of the touch screen.
-
Use your fingernails to slowly lift up the left corner. The touch screen plastics are held to the touch screen with adhesive. It may take some work to free the corners.
-
Heat and repeat for the right side.
-
-
Dieser Schritt ist noch nicht übersetzt. Hilf mit, ihn zu übersetzen!
-
Once the top is free, use the heat gun to heat the sides of the touch screen.
-
Use a spudger to free the sides of the touch screen plastics.
-
-
Dieser Schritt ist noch nicht übersetzt. Hilf mit, ihn zu übersetzen!
-
Heat the bottom corners with the heat gun.
-
Again, use your fingernails to free the corners.
-
Remove the touch screen plastics from the touch screen.
-
-
Dieser Schritt ist noch nicht übersetzt. Hilf mit, ihn zu übersetzen!
-
In order to adhere the new panel, peel as much of the existing adhesive off of the front panel frame as you can.
-
-
Dieser Schritt ist noch nicht übersetzt. Hilf mit, ihn zu übersetzen!
-
Place custom fit adhesive strips or double stick tape on the upper area of the front panel plastics.
-
Use the flat end of a spudger to press the adhesive strips to the plastic frame.
-
-
Dieser Schritt ist noch nicht übersetzt. Hilf mit, ihn zu übersetzen!
-
Place the second adhesive strip or double stick tape on the home button end of the front panel frame.
-
Run the flat end of a spudger over the strip to stick it down and push bubbles out from under the sticker.
-
-
Dieser Schritt ist noch nicht übersetzt. Hilf mit, ihn zu übersetzen!
-
Using the tip of a spudger to start, peel the adhesive backings off of the strips on the front panel plastic.
-
-
Dieser Schritt ist noch nicht übersetzt. Hilf mit, ihn zu übersetzen!
-
Peel the protective plastic off of the inside of the front panel glass.
-
-
Dieser Schritt ist noch nicht übersetzt. Hilf mit, ihn zu übersetzen!
-
Fold the front panel cables down toward the home button recess to get them out of the way.
-
-
Dieser Schritt ist noch nicht übersetzt. Hilf mit, ihn zu übersetzen!
-
Ensuring that the upper cables are folded clear, align the top of the front glass with the front panel frame.
-
-
Dieser Schritt ist noch nicht übersetzt. Hilf mit, ihn zu übersetzen!
-
Press the front panel and front panel frame together, ensuring the the home button ends are aligned.
-
-
Dieser Schritt ist noch nicht übersetzt. Hilf mit, ihn zu übersetzen!
-
Firmly press both ends of the phone to ensure the attachment of the adhesive.
-


Um dein Gerät wieder zusammenzubauen, folge der Anleitung in umgekehrter Reihenfolge.
Um dein Gerät wieder zusammenzubauen, folge der Anleitung in umgekehrter Reihenfolge.
Rückgängig: Ich habe diese Anleitung nicht absolviert.
479 weitere Nutzer:innen haben diese Anleitung absolviert.
Besonderer Dank geht an diese Übersetzer:innen:
29%


Diese Übersetzer:innen helfen uns, die Welt zu reparieren! Wie kann ich mithelfen?
Hier starten ›


17 Kommentare
Success! It took me quite abit longer than some of those above, but in under 3hrs, it was complete. I am totally satisfied; the only potential problem I've found is that the rubber originally covering the front panel glass and the front panel plastic on the side--i.e., the rubber filling in the gap between the glass and the metal bevel/bezel?sp?--had been partially destroyed during the repair. Now there are spots at the top and bottom where dust could potentially get into the internals more easily. As it is, I opened my phone and it was extremely dusty, so that if it worked well with that kind of dust, I suppose it'll be alright with some more. Besides, now I know how to open it up and clean it! Thanks iFixit! You saved me $140, which is what Apple would have charged to fix my screen.
Zitat von Chelsea:
Everything worked except now my home button does not work, help please.
Is the front panel completely snapped into place? I believe there are some contacts on the front panel that have to touch contacts on the inside of the phone for the home button to work.
I have followed all the steps and the phone has turned on, BUT it wont let me slide to open. HELP!!
I'm assuming Sally found the problem to this issue of the phone working but I just had the same problem of no touch screen even though the phone and screen were working otherwise.
Re-open the phone and ensure Cable #2 just isn't attached properly. If this is loose or not correctly connected then the screen will come on but the touch screen won't work.
andrew -