Was du brauchst
-
Dieser Schritt ist noch nicht übersetzt. Hilf mit, ihn zu übersetzen!
-
Features:
-
Sweat and Water Resistant
-
Bluetooth® 5.0
-
Spatial vent for in-ear pressure reduction and spatial awareness
-
Dual beamforming microphones / Voice detecting accelerometer
-
Up to 5 hours of listening time and up to 2.5 hours of talk time
-
Capacitive touch sensors / Dual IR proximity sensors
-
-
Dieser Schritt ist noch nicht übersetzt. Hilf mit, ihn zu übersetzen!
-
What is in the box:
-
Buds Carrying / Charging Case
-
USB 'C' Cable
-
Ear bud rubber tips for different sizes of ears
-
User's Manual
-
-
Dieser Schritt ist noch nicht übersetzt. Hilf mit, ihn zu übersetzen!
-
Open the Google Pixel Buds Charging / Carrier case to locate the Buds
-
Once the Google Pixel Buds have been removed, and we can get a closer look at the Buds.
-
-
Dieser Schritt ist noch nicht übersetzt. Hilf mit, ihn zu übersetzen!
-
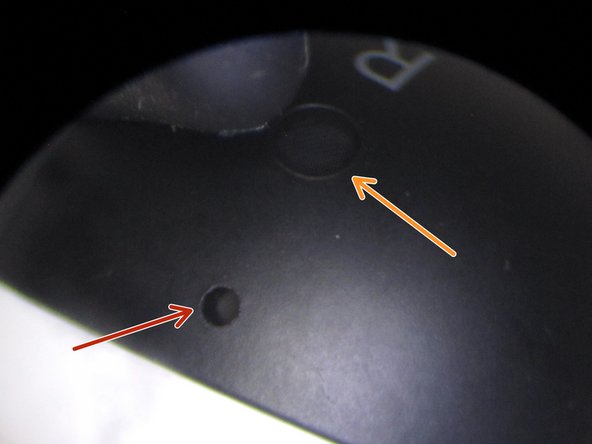
Back View of the Buds
-
Spatial Vent
-
Connectors for Charging the Battery when in the carrier / charging case
-
IR Detector for detecting when the buds are in the charging case or in the ear
-
IR Detector for detecting when the bud is in the ear
-
Grounded Metal Grid sound chamber cover
-
Closeup view of the Grounded Metal Grid
-
-
Dieser Schritt ist noch nicht übersetzt. Hilf mit, ihn zu übersetzen!
-
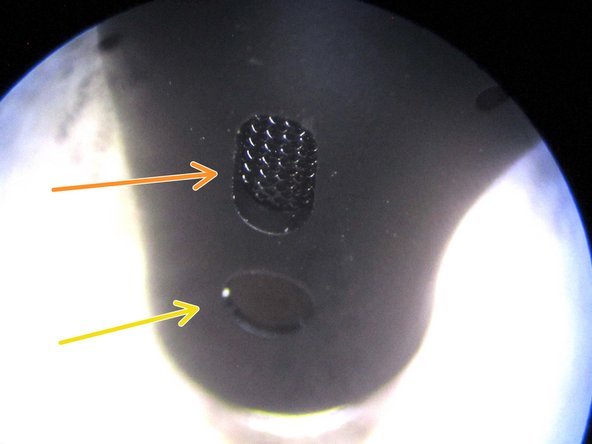
Microphone port. One on each side, and opposite one another.
-
Spatial vent / grounded mesh
-
IR Detector for in ear detection
-
-
Dieser Schritt ist noch nicht übersetzt. Hilf mit, ihn zu übersetzen!
-
Since the Google Pixel Buds are made of plastic and are glued together, the only way in was to cut into the Google Pixel Bud. This is a destructive teardown
-
Once in, we are able to get our first look at the Google Pixel Bud's electronics. The stack up the Google Pixel Bud is as follows:
-
Touch Sensor
-
Main Circuit board
-
Battery
-
Speaker
-
Microphones
-
Charging and in Ear IR Detectors (not shown)
-
-
-
Dieser Schritt ist noch nicht übersetzt. Hilf mit, ihn zu übersetzen!
-
View of the electronics when removed from the Google Pixel Bud Enclosure
-
Flex PCB based Touch Sensor
-
Main PCB. Contains MCU, Bluetooth Radio, Audio Processing, Power Management, and Sensors
-
Battery
-
MEMS Microphones
-
Speaker Coil, Speaker Magnet, and Speak Diaphragm.
-
Grounded metal grid sound channel cover
-
IR Detector for in ear detections
-
-
Dieser Schritt ist noch nicht übersetzt. Hilf mit, ihn zu übersetzen!
-
Closeup view of the Touch Sensor Flex PCB
-
-
Dieser Schritt ist noch nicht übersetzt. Hilf mit, ihn zu übersetzen!
-
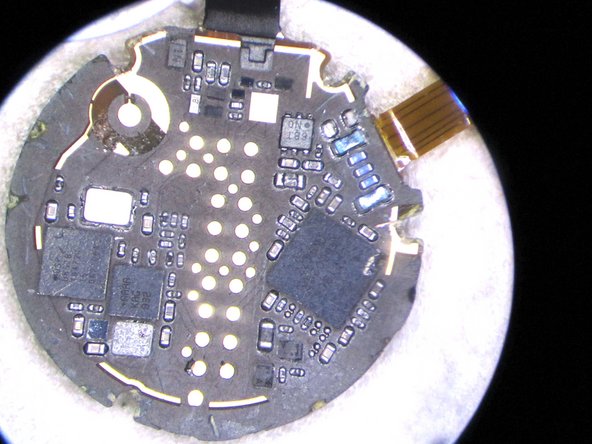
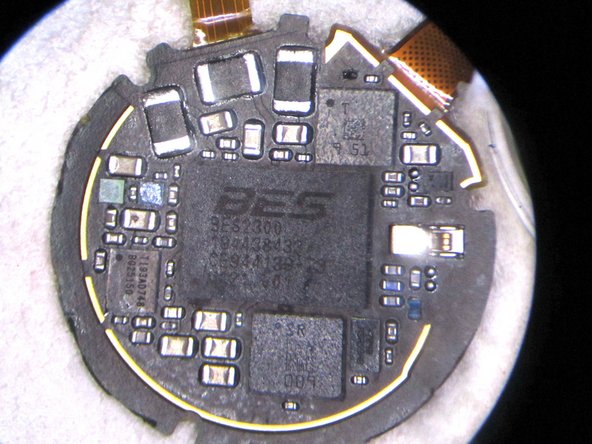
Closeup view of the bottom side of the Main PCB
-
Unknown component. Labelled "ix6". Please leave a comment if you happen to know this component
-
Programming Interface and test points. Looks to be the standard ARM 20 Pin connector layout.
-
Bluetooth Antenna. Runs around the outside of the Main PCB - Top and Bottom
-
-
Dieser Schritt ist noch nicht übersetzt. Hilf mit, ihn zu übersetzen!
-
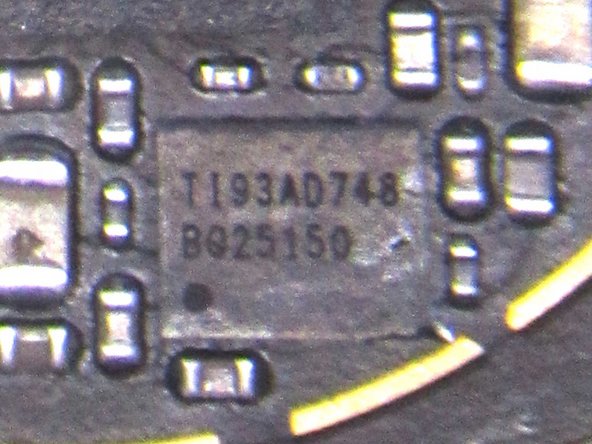
Closeup view of some of the components on the bottom side of the Main PCB
-
-
Dieser Schritt ist noch nicht übersetzt. Hilf mit, ihn zu übersetzen!
-
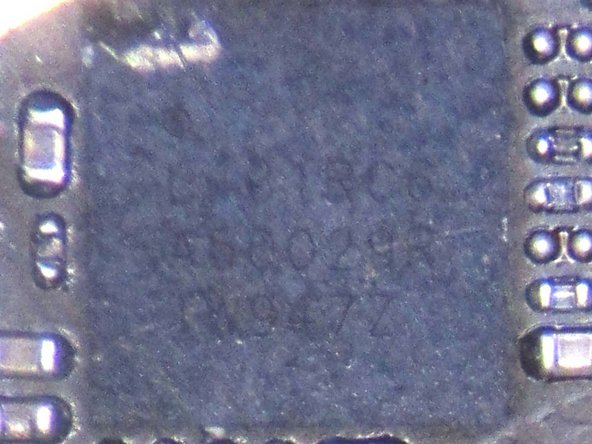
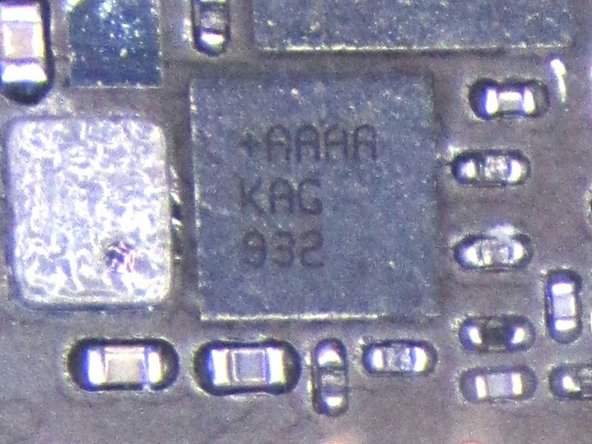
Closeup view of the top side of the Main PCB
-
Unknown Device - +7048/A5A59AB - May be the Accelerometer and Gyroscope used for voice detection. Please leave a comment if you know this device
-
Unknown Device - T 9 51 - Could be Flash Memory or RAM. Please leave a comment if you know this device
-
Unknown Device - SR 009 - Could be Flash Memory or RAM. Please leave a comment if you know this deviceNew line.
-
-
Dieser Schritt ist noch nicht übersetzt. Hilf mit, ihn zu übersetzen!
-
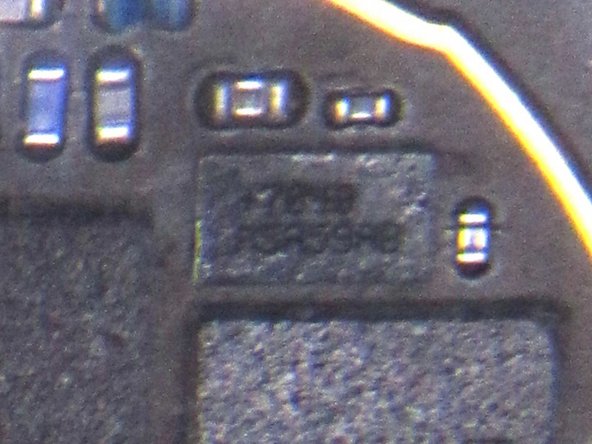
Closeup view some the components on the top side of the Main PCB
-
Unknown Device - +7048/A5A59AB - May be the Accelerometer and Gyroscope for voice detection. Please leave a comment if you know this device
-
-
Dieser Schritt ist noch nicht übersetzt. Hilf mit, ihn zu übersetzen!
-
Closeup view of the speaker Diaphragm
-
Speaker Coil with Speaker magnet removed
-
Speaker is ported to increase bass. Port area wraps around the outside of the speaker
-
-
Dieser Schritt ist noch nicht übersetzt. Hilf mit, ihn zu übersetzen!
-
MEMS Microphone
-
Could not cross reference the Microphone Part Number, but it appears to be a Goertek Part. Please leave a comment if you happen to know this component
-
-
Dieser Schritt ist noch nicht übersetzt. Hilf mit, ihn zu übersetzen!
-
Closeup view of the IR Detectors. Could not cross reference part numbers to a manufacture. Please leave a comment if you happen to know this component
-
IR Detectors are used to detect when the Bud is in the ear or in the charger
-
-
Dieser Schritt ist noch nicht übersetzt. Hilf mit, ihn zu übersetzen!
-
Closeup view of the Battery
-
Varta, CP1240 A3, Li-Ion 3.7V, 0.2Wh
-
-
Dieser Schritt ist noch nicht übersetzt. Hilf mit, ihn zu übersetzen!
-
Closeup view of the magnet that to holds the Bud in the charger. The magnet located is below the speaker in the sound chamber area
-
-
Dieser Schritt ist noch nicht übersetzt. Hilf mit, ihn zu übersetzen!
-
Teardown Exploded View of the Google Pixel Buds 2
-
Before and After
-


25 Kommentare
Great teardown, I can see the effort and finesse that it took., Great job.
Bru this is iFixit
I would also like to see teardown of the case.