Einleitung
Wir nehmen die Jura Impressa A9 auseinander – die preisgekrönte Kaffeemaschine für dein liebstes Heißgetränk.
Was ist schlimmer als morgens ins Büro zu kommen, sich auf einen schönen Latte Macchiato Doppio zu freuen – aber die Maschine mahlt die Bohnen nicht, brüht keinen Kaffee oder kann die Milch nicht aufschäumen? Jetzt ist der Moment, deine letzten Koffein-Reserven zu sammeln und die Quelle deines wachen Verstandes zu reparieren. Zeit für einen Teardown!
Was soll der Hype? Finde es raus, indem du uns bei Facebook folgst, und deine neuesten Reparaturgeschichten bei Instagram und Twitter teilst, um uns auf dem Laufenden zu halten!
Was du brauchst
-
-
Diese Maschine produziert beim
KnopfdruckDrücken des Displays Koffein in Massen. Hier sind einige der Höhepunkte direkt von Jura: -
Touchscreen Display
-
Zwölf Kaffee-Spezialitäten
-
Besonders effizientes Mahlwerk
-
Höhenverstellbarer Kombiauslauf mit Feinschaum-Technologie
-
-
-
Das Wichtigste zuerst: Bevor wir uns an die delikaten Innereien machen, beginnen wir mit den einfachen, vom Nutzer austauschbaren Teilen.
-
Das Entfernen der Tropfschale vorne und des Wassertanks hinten ist ein Kinderspiel.
-
-
-
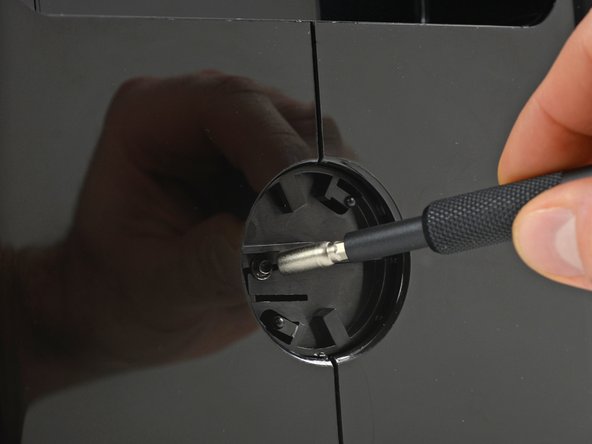
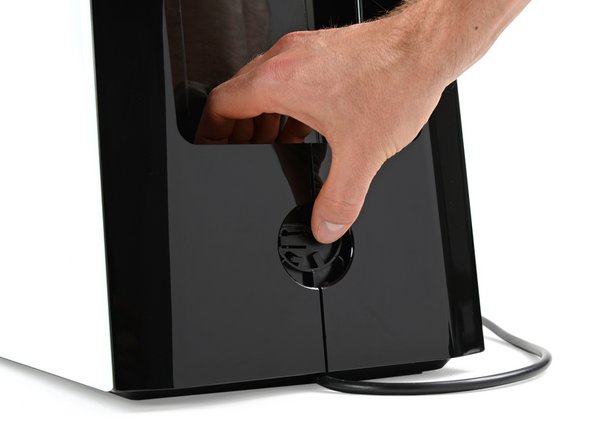
Weiter geht's mit einer Drehung der Jura-Abdeckkappe gegen den Uhrzeigersinn, wobei wir uns nach dem Entfernen in einer merkwürdigen Situation befinden...
-
Diese Ovalkopfschraube ist nicht einzigartig, aber definitiv eine Seltenheit. Wir durchsuchten unser 64 Bit und das Macro Bit Kit, bevor wir das passende Oval-Bit in unserem 2016 aktualisiertem Universal Bit Kit fanden. Falls du nur das einzelne Bit brauchst haben wir dies natürlich auch verfügbar.
-
Nach dem Entfernen der Sicherheitsschraube schieben wir die Verriegelung der Seitenwände nach oben und arbeiten uns tiefer in das Gerät.
I have A9 P.E.P. The Jura cover plate is flush. I can’ t grasp it enough (even with rubber gloves) to twist it. Afraid it will break if I pry it. How do I proceed?
Use two strips of sticky tape, align horizontally. Stick one at location of 12 o'clock on the face of Jura cover, and another one at 6 o'clock, in a way that you have extra length on each strips to pull the strips horizontally to spin the Jura cover counterclockwise.
Just one pull and the cover is released.
Will C -
There are very small slots located in the outermost ring of the Jura logo. You can put an electronics-sized flat head screwdriver into the slot hole and use that for leverage to rotate counterclockwise. Then, after removing the oval screw with an oval bit key, pull very firmly upwards on the horizontal plastic ledge inside the revealed plastic circle to “unlock” this back clip.
-
-
-
Sogar mit den gelösten Verschlüssen lassen sich die Seitenwände nicht bewegen, also wenden wir uns für einen anderen Weg der Oberseite des Gehäuses zu.
-
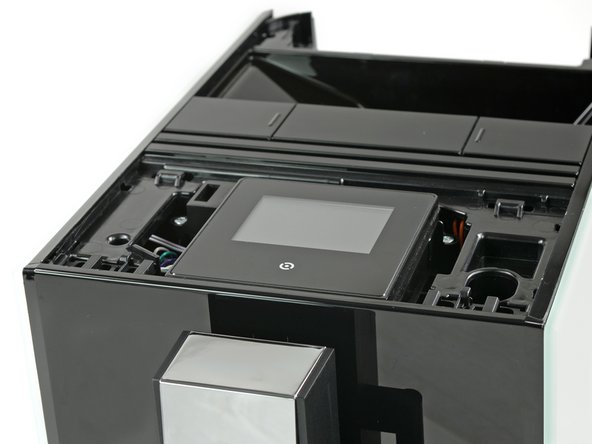
Unser dünner und stabiler Jimmy erweist sich als nützlich, den beidseitigen Mechanismus unter den Abdeckplatten zu lösen.
If you just plan on doing a repair inside, you need access to the screws hidden by this panel, but you do not have to remove the electronics.
To release the right side I slipped a thin screw driver in where the picture shows the jimmy, and pressed a release toward the middle. Then I repeated for the left side. After both sides are released slide the panel rearward to lift it up.
-
-
-
Als kurzes Intermezzo werfen wir einen Blick auf das Display, an dessen Seite sich scheinbar ein Service-Anschluss befindet, um im Falle einer Fehlfunktion Informationen auslesen zu können.
-
Wir drehen es um, entfernen zwei kleine Phillips Schrauben und entdecken das Gehirn hinter dieser modernen Kaffeetechnologie:
-
Renesas R5S72660W144FP 32-bit Mikrocontroller
-
Macronix MX25L12835F 128Mb serieller multi I/O NOR Flashspeicher
-
Unisonic Technology MC34063A Gleichspannungswandler
-
STMicroelectronics L7805CV 1,5 A Spannungsregler
-
Oszillator
Microphone? Are you sure it's a microphone? Looks like oscillator to me.
Thanks, we fixed it!
The microcontroller inside is a Renesas R5S72660W144FP#V0 I bet -- this is based on a SH2A SuperH RISC core. Bit of an oddball part, but it certainly has more than enough heft for controlling a coffee machine. Product folder: https://www.renesas.com/en-us/products/m...
-
-
-
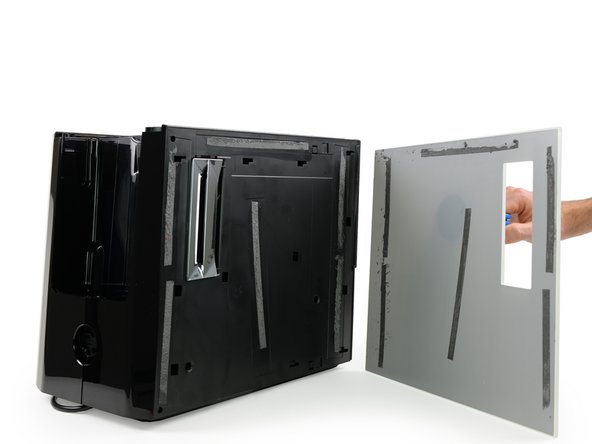
Nun müssen wir nur noch das Gerät zu greifen bekommen, den oberen und unteren Verschlussriegel gleichzeitig lösen und die Seitenwand nach hinten wegschieben. Oder?
-
Trotz aller Fummelei, Stocherei und "auf den Kopf stellen" lässt sich die Seitenwand nicht bewegen.
-
Wegen fehlender Alternativen greifen wir zu schwerem Gerät, um uns in das Gehäuse hinein zu argumentieren.
-
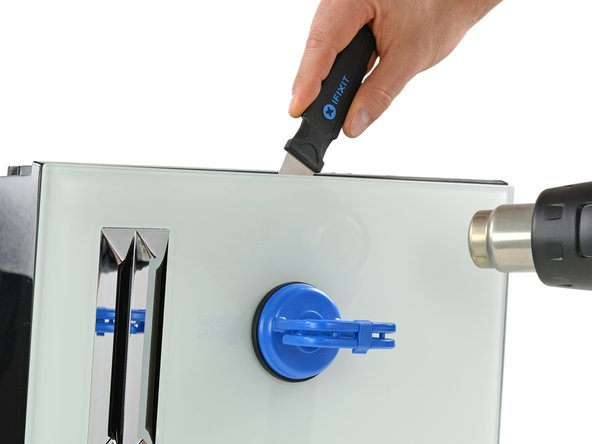
Unter Beschuss steht dieses Mal die Glasabdeckung und mit der richtigen Kombination aus Hitze und Kraft löst sie sich schließlich.
Which way should I be pulling? Got this far but this panel will not come off
This teardown is not a guide (just to clear things up ;) That being said, pulling towards the back will release the side. Take a look at the next step to get an idea of the procedure. It is not easy but with four hands a some patience I think you can do it. If this won’t work, you might want to try the same way we went with the first side (heat gun/hair dryer to loosen the glue and get the glass front off to see the latches).
The “official” way is not to disengage the glasspanel. As you can see in step 7 the panel is held by two locks. It´s really difficult, but you can open them using a very long screwdriver. Lay the device on one side, there are openings on the bottom in which you can insert the scrwedriver and hopefully find the two locks…
Remove the screws on top of the water reservoir. To get to these two locks, look for two small openings on the bottom and the top of the unit along the edge of the side panels. These holes are located closer to the front of the device. If you look through them on a piano white unit, you’ll see white ABS plastic tabs. These can be disengaged easily with a long screwdriver, I used a long Allen wrench. Then, as Tobias mentioned, pull towards the back. You will notice this piece starting to give much easier as soon as you disengage one of the two tabs. There also appears to be a plastic pull-away anchor that is normally under the control panel’s plastic U frame which may or may not play a role in removing the side panel.
-
-
-
-
Ohne die Glasabdeckung haben wir freie Sicht auf den Clip-Mechanismus und sehen genau, wo wir ansetzen müssen.
-
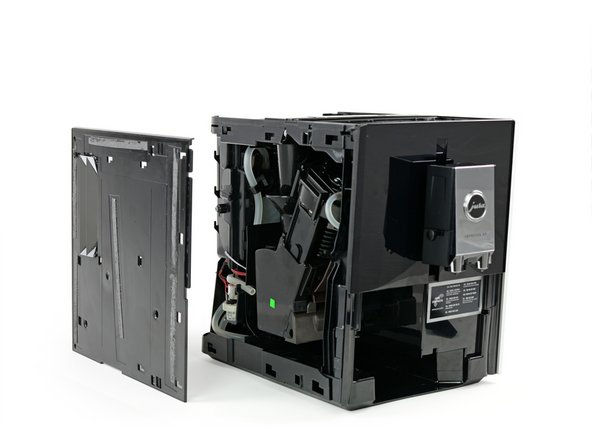
Beim zweiten Versuch zeigt unser vierhändiger Ansatz Wirkung und – Sesam, öffne dich! – die Abdeckung lässt sich entfernen.
-
Auf der anderen Seite diskutieren wir nicht lange rum, sondern nutzen unsere perfektionierte Technik. Tadaa! +1 auf der Fähigkeitenliste.
-
-
-
Nach der ganzen Aufregung sind wir erleichtert, eine Handvoll Torx Schrauben zu sehen, mit denen die Brüheinheit an der Seite des Gerätes befestigt ist, wo sich die Anschlüsse befinden.
Bonjour,
J'ai une Jura A5 qui a la même architecture mise à part les parroies latérales en aluminium et le pupitre de commande à boutons.
À cette étape numéro 8, contrairement à ce que vous citez, ce n’est pas le broyeur mais l'ensemble presseur de café / chambre d'infusion.
D'ailleurs, cet ensemble est démontable pour nettoyage et changement des joints… il y a quelques sous ensembles à l'intérieur.
Ma machine remplissait systématiquement le bac à Marc d'eau, et les quantité de liquide se voyaient à la baisse dans les tasses. Un nettoyage intégral après 3 ans d'utilisation n'étant pas un luxe…
Les dépôts de Marc se collent partout et ont un peu de mal à s'evacuer. Du coup l'étanchéité au niveau de la chambre d'infusion est altérée par ces dépôts et ne permettent plus un bon fonctionnement.
Bonjour David :) Merci beaucoup pour votre remarque. Vous avez entièrement raison. J’ai donc corrigé en utilisant le terme infuseur qui permet de rester fidèle à la longueur du texte d’origine. La prochaine fois, n’hésitez pas à corriger vous-même le texte en cliquant sur Traduire, en haut à droite de l’étape. J’espère que vous avez pu et démonté et nettoyé votre machine avec succès. Encore merci pour les yeux de lynx et bonnes réparations ! Claire
These are the first screws that use a finer twist than all the other parts in the machine, so take care not to mix them up with anything else. This part kind of works like an electric Aeropress - the long column-shaped small diameter gear on the brew group connects flush with the primary motor inside the Jura, a motor that pushes water through the grounds. You’ll observe the coffee grounds bowl will shift into a “drop into basket” position as you rotate the column and cause the coffee press to assume different positions. There’s a small plastic frame near the water flush you will also pull out. Otherwise it is pretty safe to handle.
-
-
-
Nachdem wir hinter dem Display das Hirn entdeckt haben, so finden wir hier nun das Herz der Maschine, die alle Komponenten mit Energie versorgt.
-
Nach dem Entfernen der bunten Anschlüsse und drei Torx Schrauben haben wir Zugriff auf den Verteiler.
-
STMicroelectronics L7805CV 1,5 A / 5 V Regler
-
ON Semiconductor (früher Fairchild Semiconductor) MOC3062M Optokoppler für die Triacs
I think you should highlight the brand names of capacitors and relays too, as well as other power components. These are often the parts that determine the quality and longevity of the finished product.
In this here coffee machine the relays are Matsushita (Panasonic) - a quality brand
The capacitors though are Su'scon - a typical no-name brand of questionable quality with some reports of them failng.
-
-
-
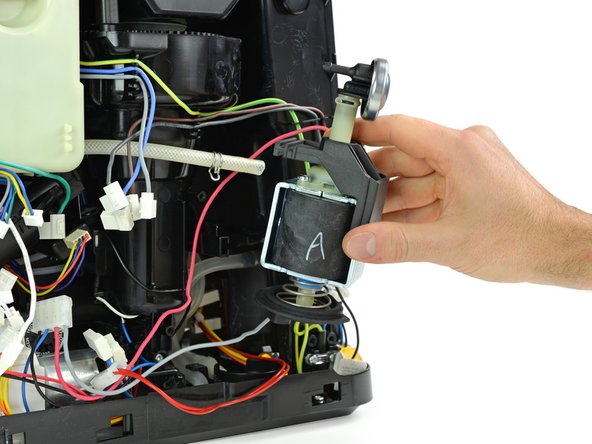
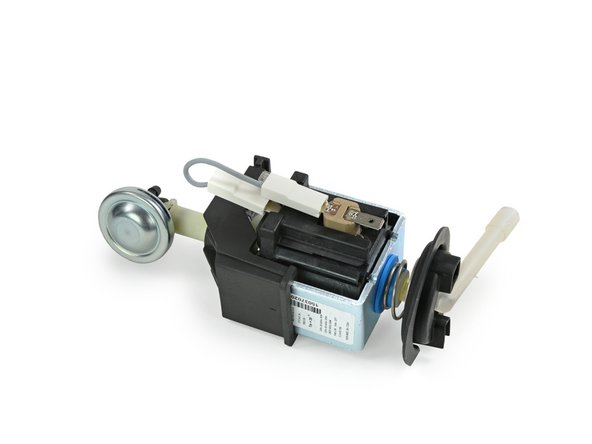
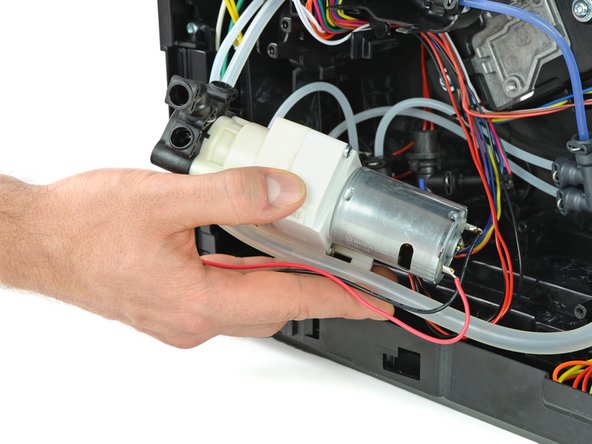
Als nächstes konzentrieren wir uns auf die Pumpe. Erst öffnen wir die Metallklemme, dann lösen wir den Wasserschlauch der von der Pumpe zum Thermoblock läuft.
-
Der Schlauch an der Unterseite lässt sich beim Entnehmen der Pumpeinheit einfach per Hand entfernen.
Comment se nomme la piece au dessus de la pompe et alimentant en eau le thermobloc? Merci
-
-
-
Wir machen direkt weiter mit dem Thermoblock, dessen Abdeckung sich nach dem Lösen kleiner Plastikklammern einfach entfernen lässt.
-
Der Thermoblock selbst kann nach einem kleinen Dreh entgegen dem Uhrzeigersinn entnommen werden – keine Schrauben für den kleinen Nautilus.
-
-
-
Als nächstes soll das Mahlwerk entnommen werden, doch zuerst müssen wir einen Blick auf die andere Seite des Geräts werfen.
-
Hier muss der Pulverschacht für bereits gemahlenen Kaffee – inklusive Trichter und Schachthalterung – entfernt werden.
-
-
-
Dahinter verbirgt sich ein kleiner Plastikrahmen, der nach oben geschoben werden muss, um das Mahlwerk zu entsichern.
Observe how the motor is positioned here with a void where the brew group’s gear column goes. You’ll want to make sure the brew group is seated as deep and neatly into this column void as possible when you put it back in. Put the screws into the brew group’s four holes first before putting it in.
-
-
-
Zurück auf
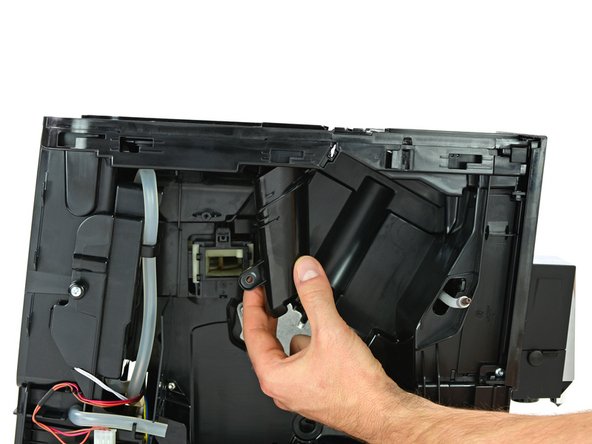
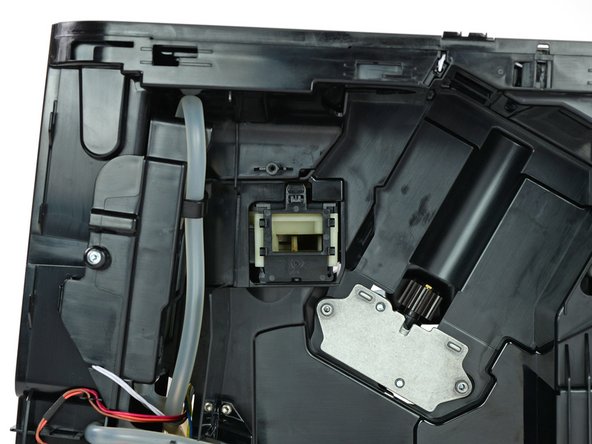
der dunklen Seite des Mondesder vollgepackten Seite des Geräts entfernen wir einen kleinen Bolzen und drei Torx Schrauben, um das Mahlwerk entnehmen zu können.
-
-
-
Der Antriebsmotor mit angehängtem Encoder ist mit nur zwei Torx Schrauben befestigt.
Another component that often leads to failure if it is of low quality - the motors. It would be cool if you showed the make and model of all motors. Especially the gear motor and grinder motor which are the most prone to failure.
The ceramic valve uses a mabuchi (Japan) RS-545SH-18150 motor with carbon brushes - A good product from a quality brand
The drainage motor is a Saia (Switzerland) stepper motor
-
-
-
Der Anschluss des Drainagemotors kann einfach ausgesteckt werden. Zwei weitere Torx Schrauben später ist der Motor gelöst und kann entnommen werden.
-
-
-
Das Keramikventil ist ein bisschen schwieriger zu entfernen. Wir müssen ein paar kleinere Schläuche abstecken, zwei Schrauben an der Unterseite entfernen und daneben ein Paar Plastikclips lösen.
-
-
-
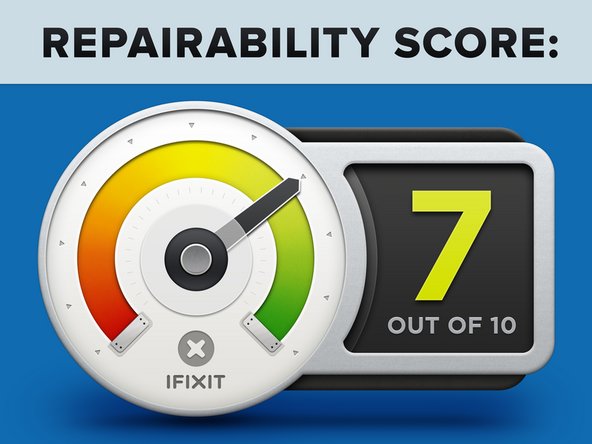
Nachdem alle Module entfernt sind und sich über unseren Tisch verteilen, verbleiben im Gerät nur ein paar Schläuche und Rohre. Wir haben uns eine Tasse Kaffee verdient und die Impressa A9 einen Reparierbarkeits-Index von 7 aus 10 (10 ist am einfachsten zu reparieren):
-
Die Kaffeemaschine ist mit modularen Komponenten gebaut, die einzeln gewartet und ausgetauscht werden können. Alle intern verwendeten Schrauben sind gewöhnliche Torx Schrauben.
-
Es wurden im Gerät selbst kein Klebstoff oder Clips verwendet, allerdings sind die Seitenwände mit kleinen – hinter Glasabdeckungen versteckten – Haken ein echter Spielverderber (sogar autorisierte Techniker könnten mit diesen ein Problem haben).
-
Die Ovalkopfschraube hinter der Jura-Abdeckkappe ist eine proprietäre Schraube zu viel. Ihr einziger Zweck liegt darin, dich aus dem Gerät auszusperren.
-
Es gibt keine offiziellen Reparaturanleitungen oder Informationen für die internen Komponenten.
-
Besonderer Dank geht an diese Übersetzer:innen:
95%
Diese Übersetzer:innen helfen uns, die Welt zu reparieren! Wie kann ich mithelfen?
Hier starten ›
13 Kommentare
I agree that its an oscillator / clock. The X1 screen printed on the PCB next to the item outlined in green, usually denotes X for Xtal (Crystal)
Thanks, we fixed it!
Amazing work, but I have the Jura ena9 model. Is it a similar rigmarole?
Vielen Dank für die sehr schöne und detailierte Beschreibung. Sie hat mit heute sehr dabei geholfen, die Brüheinheit auszubauen und zu reinigen.Im Wesentlichen, ihr überhaupt durch die Seitenwände 'auf die Pelle zu rücken'. Hätte ich ohne die Anleitung wohl nicht geschafft bzw. gewagt!!!
Hallo Bernd,
freut uns zu hören, dass dir der Teardown helfen konnte.
Hallo und Danke auch für diese Anweisung.
Ein wertvoller Tip wäre die Seitendeckel von vorne nach hinten wegschieben,
dies geht aber sehr schwer - also vorne an der Kante flach ein Stück Holz anlegen und mit einem Hammer nach hinten klopfen.
Das klappt dann wunderbar.
LG und viel Spaß
Amazing. thank you for the breakdown! My Jura Impressa A9 shuts off in the middle of a cup. The first time it happened I though I had tripped a breaker. Now it seems, I can make one cup but after that all attempts to use the machine results in it turning off. Not sure what part needs to be replaced or where to purchase it. Please advise
Thanks!
Seth
Mine was dispensing about 1/2 the requested coffee, and the other half in the drain. Milk and hot water seemed fine, so I thought there was a clogged coffee hose. This was after a dormant month (and it's in the tropics, where all machinery left sitting dies quickly). Within a week after my return, it went from 1/2 expected to zero coffee output.
Upon disassembly [thank you for these great instructions! ... I found another video that helped get the sides off: https://www.youtube.com/watch?v=fiy17KTY... which shows a ENA Micro, similar to an A9], there were no lines squirting coffee, nothing obviously plugged.
I ran the rinse cycle repeatedly looking. Best I could tell, the brew unit, when dispensing the puck, also released the water that wasn't coming out.
I also noticed that the hot water was "spitting" too, although seemed to dispense the correct amount.
I removed the hose above the pump, and started a rinse cycle, and it spit out there too: so am assuming it's the pump: 1/2 price unit at Amazon.
Corrections to the above: the pump was definitely an issue, but the brew group seems to be the main reason why it's only dispensing approximately half expected coffee beverages. In the YouTube video I mentioned above, he says "the brew group is the source for most problems".
Rebuilding the brew group is covered here: https://www.youtube.com/watch?v=m1DJ1dzH...
... the rebuild kit is about $20. I found a rebuilt brew group for $100 on EBay.
perhaps the power button micro switch?
https://www.jura-parts.com/Jura-A-C-E-D-...
Where is that exactly? I didn’t notice it in the video or on the teardown table
Thanks!
Nice tear down guide. Looks like good explanations and photos. But where is the service manual? This is alluded to at the beginning, but there isn’t a link.
Hello Lisa, thanks for pointing that out. Unfortunately we don’t have repair guides available for this device. The note at the beginning should read differently. I’ll forward your input.
Is there a coffee counter in the a9?

















I used this guide on an Jura Impressa A1 for a repair and I’ll post more comments below. Thanks for the nice guide!
Ben Berman - Antwort
Dear fellow Jura lovers ,
Your Teardown article was very helpful exactly at the time I needed guidance with my wonderful Jura , thanks
Gabriel Steinfeld - Antwort