Einleitung
Es ist ein Laptop! Es ist ein Tablet! Es ist ein Lablet! Es ist... es ist... Microsoft's Surface Windows 8 Pro, und damit geht es auf den Teardown Tisch.
Du willst mehr Super Gadget Innereien? Folge uns auf Twitter oder like uns auf Facebook.
Vielleicht können wir das eines Tages auch kombinieren und erhalten dann Facer oder Twitbook! Aber jetzt kümmern wir uns erstmal um Microsoft's neustes Tablet.
Was du brauchst
-
-
Hier liegt die zweite Version der Surface Geräte, das Microsoft Surface Pro
-
Nennenswerte Spezifikationen:
-
Windows 8, das echte, große.
-
10.6" ClearType HD Display (1920x1080 Pixel Auflösung) mit 10 Punkt Multitouch
-
Intel Core i5 Prozessor der 3. Generation mit Intel HD Graphics 4000 (dieselbe Grafikhardware wie in derzeitigen MacBook Air Laptops)
-
4 GB DDR3-1600 RAM
-
64 GB oder 128 GB Flash Speicher
-
Wi-Fi (802.11a/b/g/n) und Bluetooth 4.0
-
-
-
Obwohl der Name "Surface" nur eine Oberfläche impliziert, hat das Microsoft Surface Pro gleich mehrere Oberflächen! Diese Entscheidung könnte vielleicht zur Verwirrung der Nutzer gedacht gewesen sein, war aber eher notwendig, um unserer Wahrnehmung von drei Dimensionen entgegen zu kommen. Wenn wir uns die Oberflächen mit Ports ansehen finden wir:
-
Kopfhöreranschluss
-
Lautstärkewippe
-
Vollwertiger USB 3.0 Port
-
Auf der anderen Seite:
-
Mini Display Port
-
Magnetische Ladebuchse
-
MicroSDXC Kartenslot
-
-
-
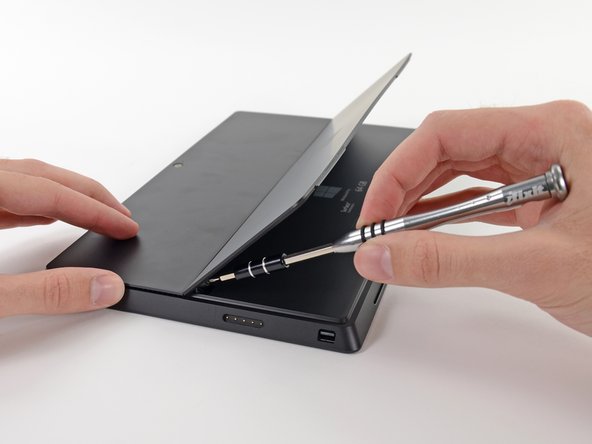
Wie letztes Mal, heben wir den Kickstand und entlocken dem Surface seine Geheimnisse.
-
Welche Weisheiten hält dieses Pro für uns bereit?
-
"Surface | 64 GB | Model 1514 | Made in China." Ebenso gute Neuigkeiten: Dieses Gerät hält Teil 15 der FCC Regeln ein. Gut zu wissen.
-
64 GB Speicherplatz? Wo wir hingehen, brauchen wir keinen Speicherplatz.
-
…was gut ist, da das Betriebssystem mehr als die Hälfte der 64 Gig beansprucht! (Mehr dazu später.)
-
Wir beginnen unsere Reise in das Land der zerlegten Geräte; wir benutzen zuerst unseren treuen T5 Torx Schraubendrehe, um zwei Schrauben zu entfernen, die den Kickstand an den Scharnieren befestigen.
-
-
-
Wir fangen an das alte Surface zu vermissen, als wir einen Barsch voll Kleber finden, der den Bildschirm fest hält.
-
Wir haben jede erdenkliche Methode ausprobiert, den Bildschirm frei zu bekommen, inklusive den Kleber zu zerschneiden, ohne Erfolg. Dieses Pro braucht eine Profi-Methode. Zum Glück haben wir eine. Die "Heize-und-Heble-Bis-Es-Tut-Was-Wir-Wollen" Methode. Zum Glück haben wir den notwendigen Fön und Plektren.
-
-
-
Nach einem langen Prozess des Heizens und Hebelns, werfen wir unseren ersten Blick hinein.
-
Nein, das klebrige schwarze Zeug ist nicht Teer, obwohl es in Funktion, Aussehen und Geruch dem sehr nahe kommt.
-
Es gab diesmal keinen Garantie Aufkleber, aber man braucht keinen, um zu erkennen dass das Tablett geöffnet war—der Kleber verrät alles.
-
-
-
Auf der Rückseite des LCD ist eine kleine Platine mit einem Wacom W9002 chip, von dem wir vermuten, dass er für das Wacom Electro Magnetic Resonance (EMR) Digitizer System verantwortlich ist.
-
Bei diesem von Wacom entwickelten System erzeugt ein Drahtgitter im Bildschirm Magnetfelder, die einen Strom in einer Spule in der Spitze des Tablet Stifts erzeugen, und so den Stift mit Strom versorgen und die Position im Gitter anzeigen. Der Stift gibt dann drahtlos diese Positionsdaten mit Druck- und Klick-Informationen zurück.
-
Wir haben auch den Bildschirmtreiber gefunden. Ein Samsung WiseView N52A2NE, ähnlich dem Treiber im iPad 2,
-
Hier ist die gigantische Version des LC Display Boards, damit du es in seiner ganzen Pracht sehen kannst.
-
-
-
Sehen wir der Sache ins Gesicht. Es gibt hier nicht viel zu sehen. Augenscheinlich fällt mir nichts Cleveres ein, wenn also jemand einen Riecher hat, was man über das Surface Pro mit abgenommenem Display sagen könnte, so mache er den Mund auf.
-
Schlechte Wortwitze beiseite; wir nehmen unseren Schraubendreher und entfernen diese 23 Schrauben, mit der die Plastikblende befestigt ist.
-
-
-
-
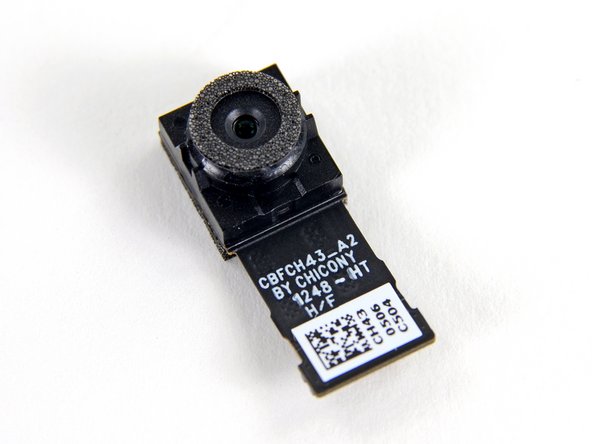
Der klebrige Plastikrahmen ist weg und wir erhalten so Zugang zu der Frontkamera.
-
Während es nicht viel zur 720p HD "LifeCam with TrueColor" zu sagen gibt, ist sie doch gleichauf mit den Frontkameras des MacBook Air und denen der iPads.
-
-
-
Oh... Das war viel einfacher als wir erwartet haben. Anscheinend hört unser Schraubendreher viel besser als ein verrückt gewordener Computer.
-
Obwohl es im Vergleich zu Kleber einfacher ist, Schrauben zu lösen, geht uns die Arbeit nicht aus. Diese beiden Metallplatten werden mit insgesamt 29 Schrauben festgehalten.
-
-
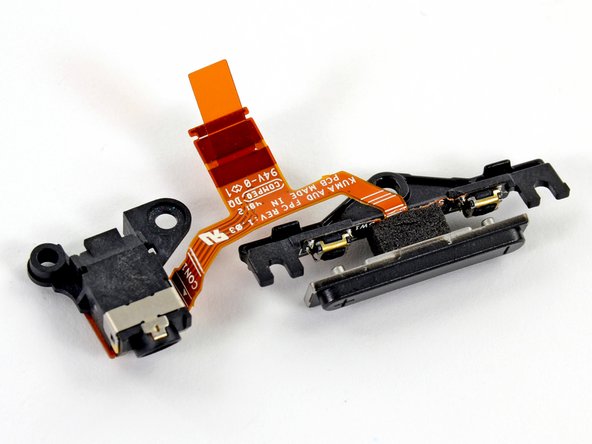
Wir benutzen unsere Pinzette mit elektrostatischer Schutzbeschichtung, um die Lautstärkewippe und Kopfhöreranschluss sicher zu entfernen, die durch ein Flachbandkabel schön beisammen gehalten werden.
-
Soviel also zum Anhören der Grammy Werbung für das Pro.
-
-
-
Wir haben das Surface geknackt (nur übertragen gesprochen—wir würden nie ein Gerät beschädigen...), aber wir graben tiefer mit unserem Spudger und Schraubendreher, bis wir das Motherboard und die SSD entfernen können.
-
-
-
Die Micron RealSSD C400 liefert 64 GB Speicherplatz. Sie liest 500 MB/s und schreibt 95 MB/s — all das in einem kleinen 1,8'' Formfaktor.
-
Graben wir tiefer, finden wir, dass ein Marvell 88SS9174 SSD Prozessor all die Micron Flash ICs am Laufen hält.
-
Anmerkung: Das Windows 8 Betriebssystem schluckt ein ganzes Stück des 64 GB Speicherplatzes. Davon gehen etwa 30+ GB für das Betriebssystem drauf, ebenso das komplette MS Office Suite, das du unter Umständen noch nicht einmal aktiviert hast sowie das Wiederherstellungs-Image. Insgesamt bleiben also ungefähr 29 GB nutzbarer Platz.
-
Besitzer der 128 GB Version kommen mit 89 GB freiem Platz davon. Ed Bott hat ein paar Tests durchgeführt und hat es mit dem 128 GB MacBook Air verglichen, was 99,5 GB freien Platz bietet.
-
-
Dieser Schritt ist noch nicht übersetzt. Hilf mit, ihn zu übersetzen!
-
This Pro is all party in the front, business in the back—cooling business that is. Two small fans help this Pro keep its cool.
-
How small, you ask? Here's how the Surface Pro fan compares to a 2011 MacBook Pro fan and FDR's face.
-
-
Dieser Schritt ist noch nicht übersetzt. Hilf mit, ihn zu übersetzen!
-
Checking out the top surface of the motherboard:
-
8x Micron 2LEI2 D9PXV 4 Gb RAM for a total of 4 GB RAM
-
Integrated Technology Express IT8519G
-
Atmel UC256l3U 256KB Flash, 32-bit AVR Microcontroller
-
ON NCP6132A 3 Phase Controller
-
Atmel MXT1386E Touchscreen Controller
-
3x Atmel MXT154E Touchscreen Controllers (the same controllers we found in the Surface RT)
-
Realtek ALC3230 Audio Codec
-
-
Dieser Schritt ist noch nicht übersetzt. Hilf mit, ihn zu übersetzen!
-
And tucked underneath, on the bottom:
-
Intel Mobile HM77 Express Chipset
-
Intel Core i5-3317U Processor
-
Marvell Avastar 88W8797 Wireless/Bluetooth/FM Radio Controller
-
Novatek NT96132QG46
-
2x Winbond 25X05CL Serial Flash
-
Winbond 25Q64FV Serial Flash
-
-
Dieser Schritt ist noch nicht übersetzt. Hilf mit, ihn zu übersetzen!
-
A few more flicks of the spudger and out come the stereo speakers.
-
Next up is the keyboard dock connector. The same type of port is used in both the Pro and non-Pro versions of the Surface, allowing the Type Cover keyboard to be cross-compatible.
-
-
Dieser Schritt ist noch nicht übersetzt. Hilf mit, ihn zu übersetzen!
-
More parts fly out of the Pro including the power connector and rear-facing camera.
-
The rear camera resolution is the same 720P as the front, so the Surface Pro may not be the best replacement for your Nikon D600 SLR.
-
The power connector clearly labels each pin with G, 12V, and DET.
-
Also making an appearance is the top-mounted microphone and its soft rubber enclosure, good for
FaceTimeSkype video calls.
-
-
Dieser Schritt ist noch nicht übersetzt. Hilf mit, ihn zu übersetzen!
-
The plastic top-rear bezel also doubles as a vent for the Pro's laptop-worthy hardware.
-
Two ports through the bezel act as venting ducts for the fans, directing hot air out the top. It appears that the Pro's fans draw ambient air in through the many vent holes spaced around the perimeter, then force that air over the heat sink's two radiators and out of the device, cooling the CPU and GPU.
-
-
Dieser Schritt ist noch nicht übersetzt. Hilf mit, ihn zu übersetzen!
-
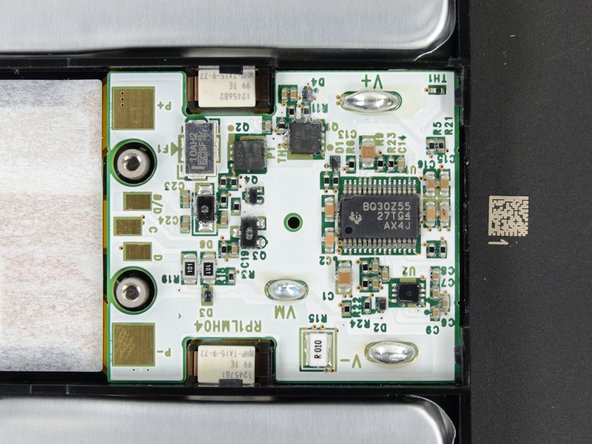
Microsoft spared no expense when it came to keeping the Surface Pro going. They sourced the Cadillac of batteries from LG: an Escalade 42 Wh unit. The battery is rated for 7.4 V and 5676 mAh.
-
Impressive specs? Note that the iPad 4 has a 43 Wh battery, albeit at 3.7 V.
-
And even with all this battery juice, the reported battery life of the Surface Pro is less than 5 hours.
-
-
Dieser Schritt ist noch nicht übersetzt. Hilf mit, ihn zu übersetzen!
-
Lesson learned about adhesive in this teardown—we go straight to the iOpener in order to get the battery out of its sticky cage.
-
As always, we are ignoring some kind of warning. This time, it tells us not to remove the battery from the back cover. Apparently, to safely replace your battery you will need a whole back cover assembly.
-
We don't understand the point of heavily-glued batteries. This kind of planned obsolescence is completely unnecessary.
-
-
Dieser Schritt ist noch nicht übersetzt. Hilf mit, ihn zu übersetzen!
-
Microsoft Surface Pro Repairability Score: 1 out of 10 (10 is easiest to repair)
-
The battery is not soldered to the motherboard, so at least no soldering is required to replace it.
-
The SSD is removable — but you risk killing your tablet by trying to open it.
-
There are over 90 screws inside this device. We're proponents of mechanical fasteners, but this number is a tad crazy.
-
The display assembly (comprising of a fused glass and LCD) is extremely difficult to remove/replace.
-
Tons of adhesive hold everything in place, including the display and battery.
-
Unless you perform the opening procedure 100% correctly, chances are you'll shear one of the four cables surrounding the display perimeter.
-


Besonderer Dank geht an diese Übersetzer:innen:
60%


Diese Übersetzer:innen helfen uns, die Welt zu reparieren! Wie kann ich mithelfen?
Hier starten ›
30 Kommentare
I wonder if you can upgrade the CPU to Haswell when it comes out...
Ah, nvm, looks like it will be LGA 1150 socket =(((((
Looks like this is going to be difficult to upgrade the 64GB SSD to a larger SSD. I can see that it is a standard size mSATA SSD card. But the hard part is the heating of the screen edges and prying the screen off in order to get access to the internals. Once it is taken apart, what kind of glue do you use to put the screen back on? The glue needs to be strong enough to be secure but also able to be removed again if needed.
You can test if the SSD works correctly without gluing it.Once it's okay,glue it.
I use B-7000 for phone and tablet repairs as it is a strong glue that gets soft when heated. If you are interested, here is the link for the glue: https://www.amazon.com/MMOBIEL-Multipurp...