Schritt 12 übersetzen
Schritt 12


-
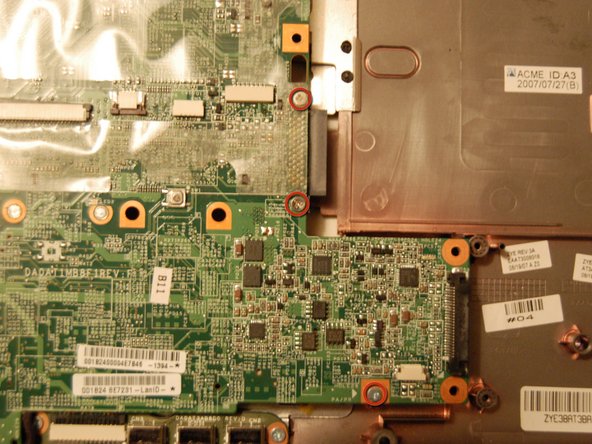
Remove these four screws, and pull the express card module away from the motherboard.
-
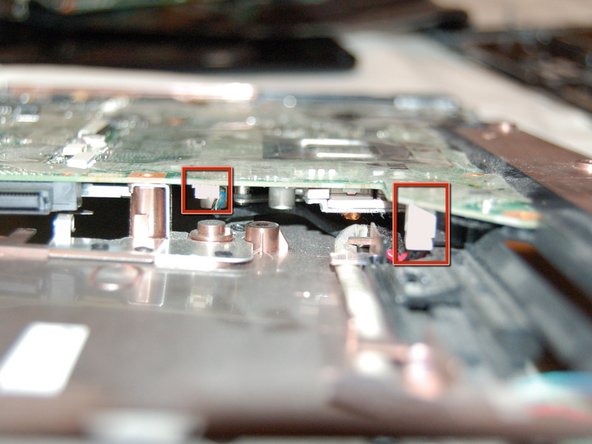
Remove these three screws, and then these clips, (you can get at them better after you remove the screws, and the larger of the two should come apart first) and lift the board away from the shell, taking care with the audio jack cable.
Deine Beiträge sind lizenziert unter der Open-Source Creative Commons Lizenz.