Zum Hauptinhalt wechseln

Garmin Vivosmart Teardown

Englisch
Deutsch
Schritt 4
Garmin Vivosmart Teardown, Remove the PCB Assembly: Schritt 0, Bild 1 von 3 Garmin Vivosmart Teardown, Remove the PCB Assembly: Schritt 0, Bild 2 von 3 Garmin Vivosmart Teardown, Remove the PCB Assembly: Schritt 0, Bild 3 von 3
Remove the PCB Assembly
  • To remove the electronics from the hard plastic base we need to dig out a lot more sealant.

  • I first pried up the end of the PCB near the USB interface.

  • Notice the spring contacts coming from the 4 USB conductor pads - these come in contact with pads on the PCB.

  • Finally (pic 2) the electrical assembly is free! Three rigid boards connected by flex.

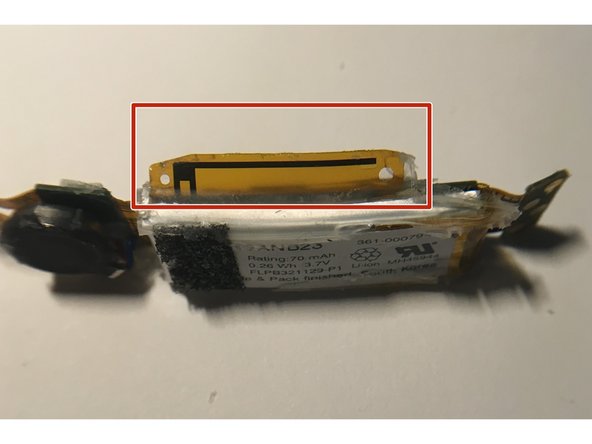
  • Check out the antenna built into the flex circuitry - looks like a PIFA.

  • You can keep prying and release the

  • 70mAh Li-ion battery

  • and buzzer.

Hier Übersetzung einfügen

Hier Übersetzung einfügen

Hier Übersetzung einfügen

Hier Übersetzung einfügen

Hier Übersetzung einfügen

Hier Übersetzung einfügen

Hier Übersetzung einfügen

Hier Übersetzung einfügen

Deine Beiträge sind lizenziert unter der Open-Source Creative Commons Lizenz.