Einleitung
It's All Hallows' Eve, the ghosts are out, and there's a spooky chill in the—nope, that's just Apple's latest ghoul, the iPad Air. Time to gut our new toy and carve it into a bone-chilling Apple-lantern.
While our cobbers down under don't celebrate Halloween quite like we do, they do live in the future, meaning they get all the fun stuff before us. So we packed a port and headed over to visit our good friends at '''MacFixit Australia''' for some teardown shenanigans. We also called on the stunning insight of our buddies from '''Chipworks''' to help identify all the fun things we found inside! We put our skulls together to show you just what confers the power of lightness.
Check our Facebook for repair treats, get a kick out of our Instagram tricks, and show off your haul on Twitter.
Was du brauchst
Einführungsvideo
-
-
Eerie dimensional changes are afoot: the Air is 20% thinner, 28% lighter, and 24% reduced in volume from the 4th-gen iPad. And there are more good scares lurking under its otherworldly skin:
-
9.7-inch, in-plane-switching LCD with 2,048 x 1,536 resolution at 264 ppi
-
Dual-core A7 CPU with 64-bit architecture
-
M7 motion-tracking coprocessor
-
5-megapixel rear iSight camera capable of recording 1080p video; 1.2-megapixel 720p front-facing camera
-
802.11n dual-antenna MIMO Wi-Fi
-
Support for 14 LTE bands, DC-HSPA+, UMTS, GSM/EDGE, CDMA, and EVDO
-
16, 32, 64, or 128 GB storage
-
-
-
There doesn't seem to be a bewitching levitation feature on this tablet, despite the picture on the box.
-
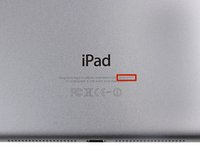
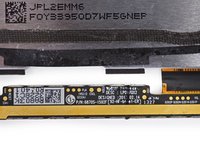
New iPad, new model number: This iPad Air can be identified by the model number A1475.
-
-
-
Lightning Port? Check. Speaker grilles? Check. Camera? Check. Buttons? All the hallmarks of a
jack-o-lanterntablet are in place. -
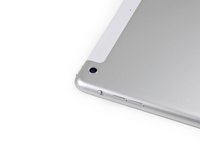
The top edge now sports a dual mic; never again will you be haunted by background noise.
-
Volume is now adjusted by two separate buttons, a minor revision from the rocker switch on the previous full-size iPad.
-
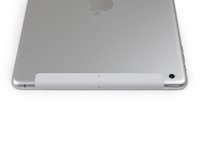
The speakers have gone stereo and moved to either side of the Lightning connector, à la iPad Mini. It didn't bring a costume, but this bro can morph.
-
-
In diesem Schritt verwendetes Werkzeug:iOpener$17.99
-
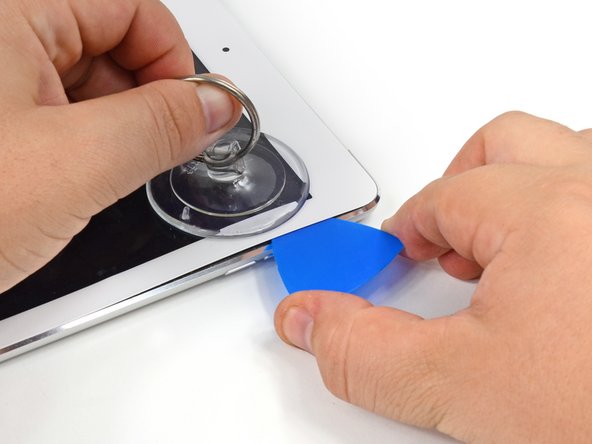
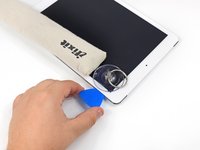
Trick or treat? How about we pull out our little bag of tricks and treat this iPad to some iOpening?
-
As usual, Apple has secured the digitizer glass in place with more than ample amounts of adhesive.
-
Getting into this iPad is a bigger pain in the neck than a date with a vampire—but no amount of iPad blood can spook our stalwart iOpener.
-
-
-
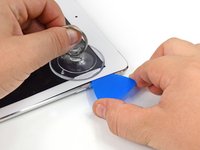
Pop pop! Oh the glorious sound of an iPad popping open, with a mysterious coin for mysterious scale.
-
A twenty-cent coin! They don't have those in the U.S.!
-
You're right, astute teardown reader! That is, in fact, an Australian coin. If you hadn't noticed, this whole teardown has been upside-down, courtesy of our favorite minion Walter, who survived the arduous trek down under.
-
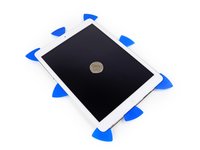
Alright, enough clowning around! It's time to open this iPad up (like a book of scary stories).
-
-
-
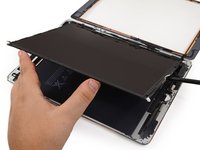
Double, double, boil and brew, with a witch's cackle we remove that screw.
-
Eye of newt and toe of frog, this LCD's connected—but not for long.
-
-
-
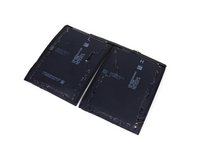
The curtains go up, and it's a monster (battery) mash:
-
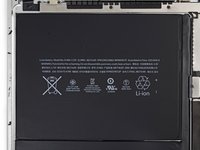
The Air's 3.73 V, 32.9 WHr, two-cell power plant is decidedly less monstrous than the previous iPad's 43 WHr, three-cell behemoth.
-
Despite the iPad's skeletal slim-down Apple claims that, due to an increase in efficiency, you can still watch the Great Pumpkin at least 20 times in a row.
-
Ogle all you want, but this battery isn't coming out…yet.
-
-
-
-
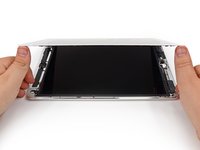
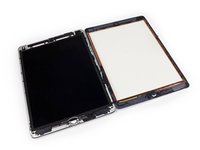
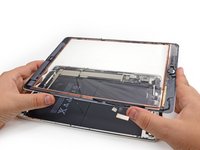
The 9.7" display's specs remain unchanged from the iPad's previous outing, but Apple claims an uncanny 20% reduction in panel thickness.
-
Our display, model LP097QX2, was supplied by LG.
-
The LCD remains separate from the front panel glass. Is there a spirit of repairability lurking in this otherwise dauntingly difficult device?
-
-
-
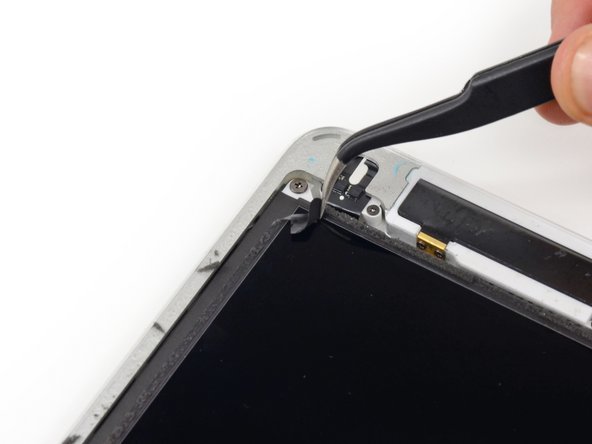
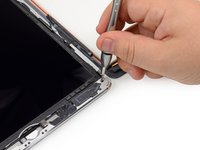
What looks like a ZIF, and quacks like a ZIF, but isn't quite a ZIF connector? We don't know, but that's what we've got on our hands with this home button ribbon cable.
-
Although unidentified, it shows more design consideration than Dr. Frankenstein.
-
-
-
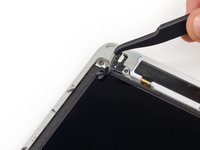
Is it a window to the underworld or a digitizer/front glass assembly? Probably the latter, but we're not taking any chances; we set it gingerly aside.
-
Despite the new cable dressing up this home button, Apple's Touch ID fingerprint sensor is nowhere to be found; it remains exclusive to the iPhone 5s…for now.
-
-
In diesem Schritt verwendetes Werkzeug:iOpener$17.99
-
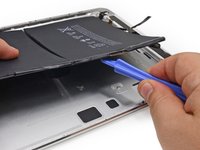
For the second time tonight, we pull out our iOpener for some crazy glue-busting action.
-
We're hoping that this trend won't stand the test of time, and that glued-in batteries will become phantoms of the past.
-
In the meantime, it's nuke, heat, scrape, repeat.
-
-
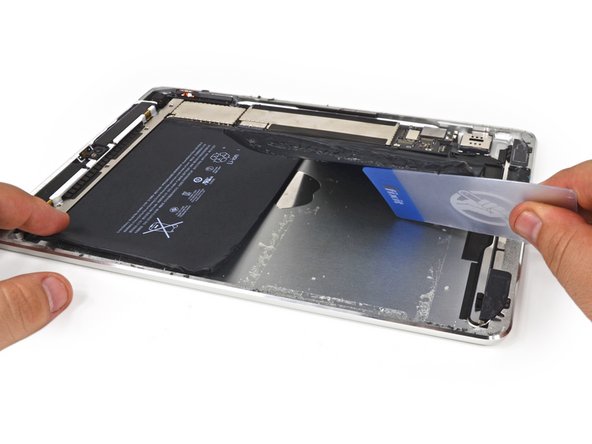
In diesem Schritt verwendetes Werkzeug:Plastic Cards$2.99
-
Grab your grave-robbing
shovelsplastic cards, 'cause it's time to exhume this sucker—er, battery. -
What is this devilry? The battery is pinned by some form of dark magic—or maybe a stray screw?
-
Stateside, we get this one, last, coherent message before strings of expletives:
-
[7:29:22] Walter Galan: It's the worst battery ever.
-
Not even removing this mysterious screw helps. It's almost enough to make us cry for our mummy!
-
-
-
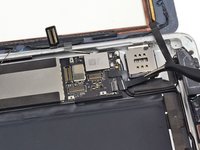
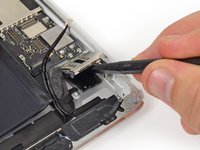
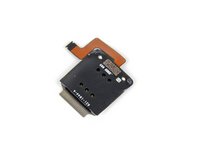
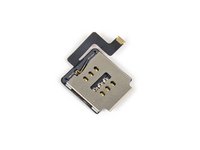
We employ a little black
magicspudger to extract the SIM card tray. -
Yesteryear's micro-SIM has given way to this year's nano-SIM. Next year: pico-SIMs?
-
And while it is glued in (boo), we are happy to see it as a modular component, separate from the logic board.
-
-
-
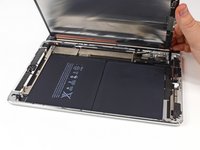
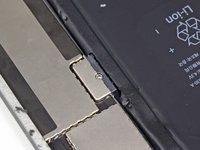
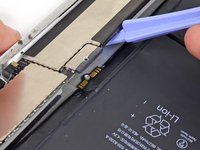
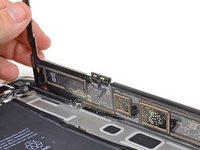
We resume the quest to liberate the battery, and under the logic board we find the culprit in the curious case of the trapped time bomb (commonly known as a battery).
-
Spring contacts on the logic board clamp down on the corresponding tab on the battery, effectively trapping it and complicating any future repair.
-
This battery is super frustrating; we're not Li-ion.
-
-
-
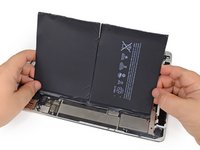
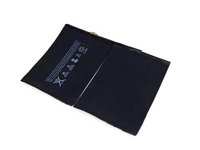
This battery creaks worse than the door to a haunted mansion as we ease it out of the case.
-
In the process, the battery warps to a state resembling the Grimm Reaper's scythe.
-
-
-
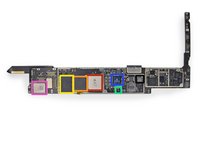
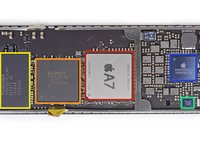
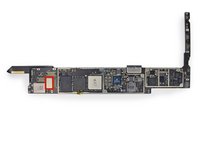
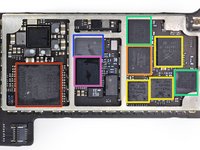
We leave the boring backside in favor of the green PCB fields of the front. Planted in this logic board patch are:
-
Apple APL5698 A7 Processor—a slightly different version from the APL0698 in the iPhone 5s
-
Elpida F8164A1MD 1 GB LPDDR3 SDRAM
-
Toshiba THGBX2G7B2JLA01 16 GB NAND Flash
-
NXP LPC18A1 (Apple M7 Motion Co-Processor)
-
Apple 343S0655-A1—from our friends at Chipworks, this looks to be a Dialog Power Management IC
-
USI 339S0213 Wi-Fi Module
-
Apple 338S1116 Cirrus Audio Codec, also found in the iPhone 5c
-
-
-
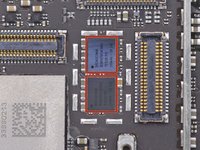
A quick peek under a sneaky EMI shield near the USI Wi-Fi module...
-
...Reveals a pair of Broadcom BCM5976C1KUB6G Touch Screen Controllers, similar to the BCM5976A0KUB2G found in the trackpads of various MacBooks.
-
-
-
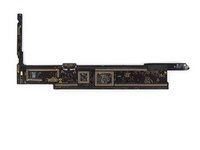
It wouldn't be an oversized iPhone without the phone parts—this end of the logic board sports all of the RF components.
-
Qualcomm M9615M LTE Processor with 1 Gb (128 MB) of DRAM
-
TriQuint TQF6514 RF Power Amplifier Module—similar to the 6414 in the iPhone 5s
-
Three Skyworks SKY77-series LTE RF Power Amplifier/Duplexer Modules
-
Two Avago A79-series LTE RF Power Amplifier/Duplexer Modules
-
227 LG—likely a Murata Antenna Switch/Filter Module
-
Qualcomm WTR1605L LTE/HSPA+/CDMA/EDGE/GPS Transceiver
-
Qualcomm PM8018 PMIC
-
-
-
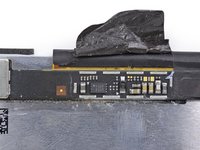
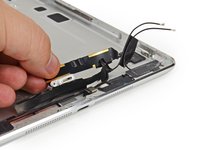
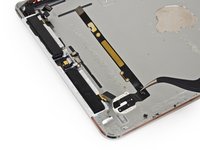
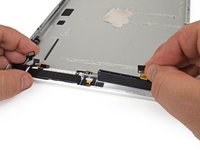
Just when we think there's no hope for this werewolf of a device, it shows its human face. Finally, a modular part: the Lightning connector. (Not that it was easy to get to.)
-
Before the thunder even rolls, the Lightning port is gone.
-
On a roll of our own, we remove what appear to be the Wi-Fi and Bluetooth antennas from the rear case.
-
-
-
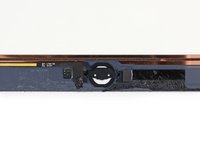
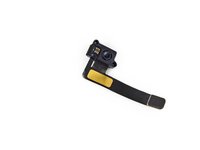
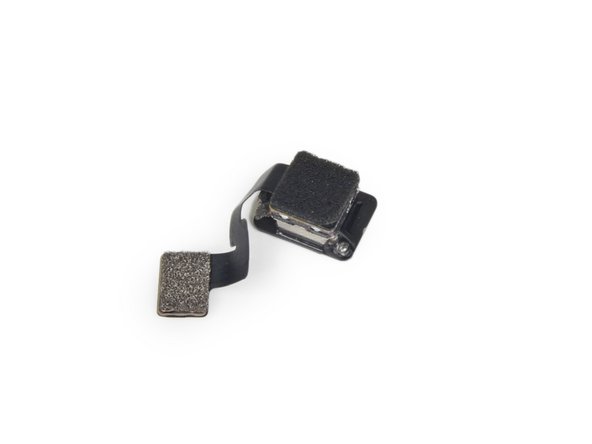
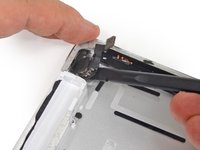
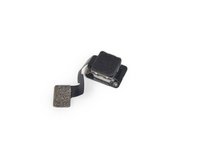
For our next trick, we magic away the front-facing camera. You'll have to take your costume pics the old fashioned way.
-
Ho, hum: The 1.2-megapixel, 720p FaceTime camera fails to send any shivers down our spine.
-
-
-
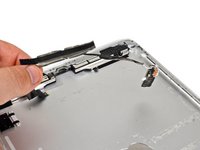
More fun-sized treats:
-
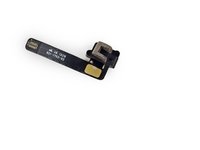
What's this? We carve the headphone jack(-o-lantern) out.
-
Catch these cell antennas while you can—you won't find them in the strictly Wi-Fi version. They're a huge phone exclusive.
-
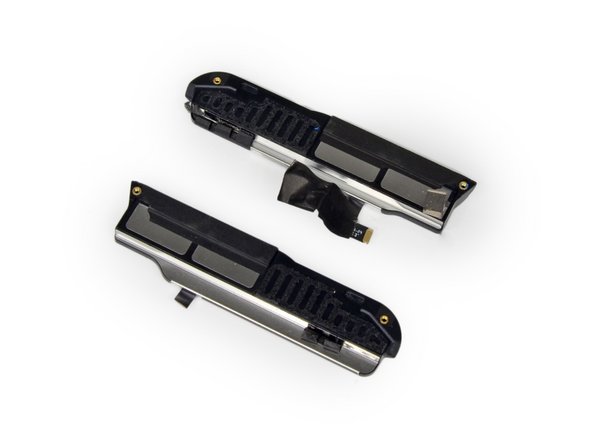
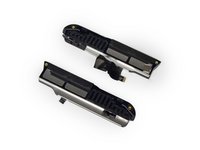
A quick 180º, and the speakers become our next victim. Shrouded in mystery, Apple calls these speakers "built-in," opting to leave the maker unspecified.
-
-
-
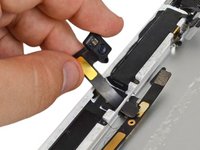
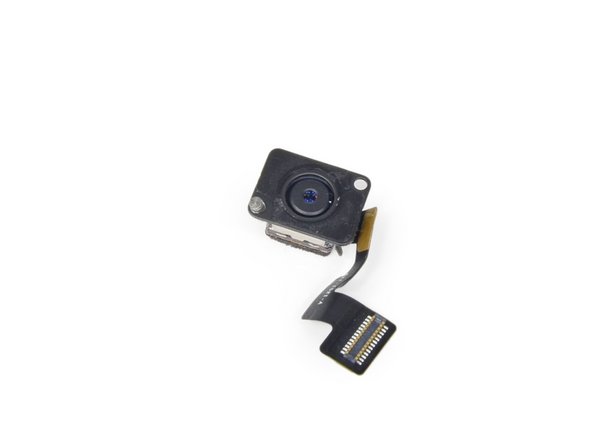
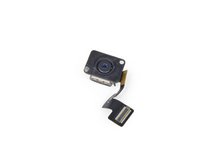
We're bobbing for apples!
-
Sticking our spudger in for a dunk, we come up with another camera. This time it is the 5MP rear-facing camera.
-
-
-
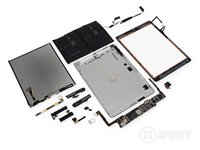
iPad Air Repairability Score: 2 out of 10 (10 is easiest to repair)
-
The LCD is easy to remove once the front panel is taken off the iPad.
-
The battery is not soldered to the logic board. We'll give it that.
-
Just like in previous iPads, the front panel is glued to the rest of the device, greatly increasing the chances of cracking the glass during a repair.
-
Gobs, gobs, and goblins of adhesive hold everything in place. This is the most difficult battery removal procedure we've seen in an iPad.
-
The LCD has foam sticky tape adhering it to the front panel, increasing chances of it being shattered during disassembly.
-
You can't access the front panel's connector until you remove the LCD.
-


22 Kommentare
Try soaking the rear case with the battery attached in a freezer for 30 minutes prior to the battery removal. This will help make the tape bond less sticky and removal will be easier and significantly safer. Heat actually makes removal harder and more dangerous.
what company supplies the accelerometer and the gyro?
You all should realise that Apple does not care about self or third party serviceability. Neither should you care. Just use the product and get Apple to fix if it breaks down . The reason why sites like iFixit cry foul over non-serviceability is because it ruins their business!
Yes pitching a 500 dollar device in the landfill because the battery is bad is always Smart Thinking .... All because of a battery with a 2 year average lifespan when the rest of the hardware should last 10 easily
Great for Sales, not so much for the environment .... All because of a Marketing Gimmick, it's an 1/8" thinner ... Big F-ing deal
But on the bright side, the new Air is thinner and smaller and takes up less room in the landfill .....
@John Russel
If you bring it back to Apple it will be carefully recycled, not thrown in a land fill.
And you as user get a new iPad, that could be worse...
And for Christ's sake, 'the device has 10 year life span.' Yeah sure, do you still use you Sony Ericson from 2004?
klaas123 -