Schritt 5 übersetzen
Schritt 5


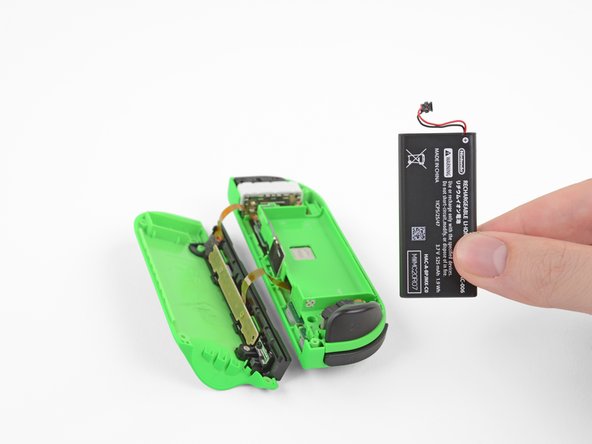


Remove the battery
-
Insert an opening pick between the battery and the Joy-Con housing. Gently pry out the battery, which is lightly taped in place.
Deine Beiträge sind lizenziert unter der Open-Source Creative Commons Lizenz.