Hinweis: Du bearbeitest eine grundständige Anleitung. Alle Änderungen, die du vornimmst, betreffen auch die Anleitung, die diese beinhaltet.
Schritt 3 übersetzen
Schritt 3

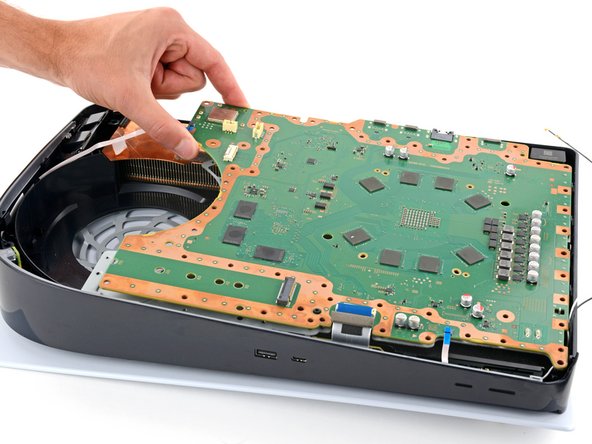


Separate the main board
-
Gently lift the edge of the motherboard with the large cutout to partially separate it from the bottom shield plate.
-
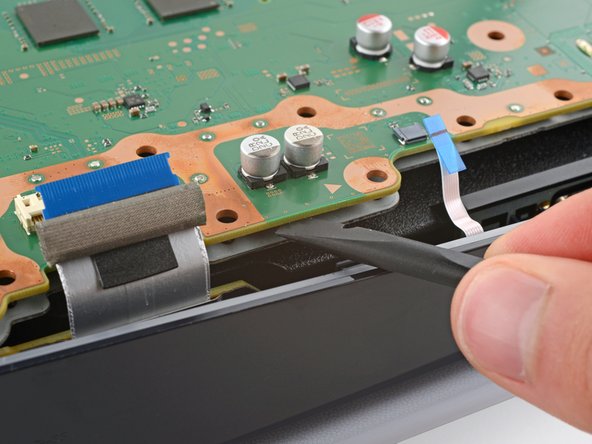
With the board lifted, insert the flat end of a spudger between the board and the bottom shield plate and gently twist to separate them. Work your way around the perimeter of the board.
Deine Beiträge sind lizenziert unter der Open-Source Creative Commons Lizenz.