Zum Hauptinhalt wechseln

Fairphone 2 Teardown

Englisch
Deutsch
Schritt 9
Fairphone 2 Teardown: Schritt 0, Bild 1 von 2 Fairphone 2 Teardown: Schritt 0, Bild 2 von 2
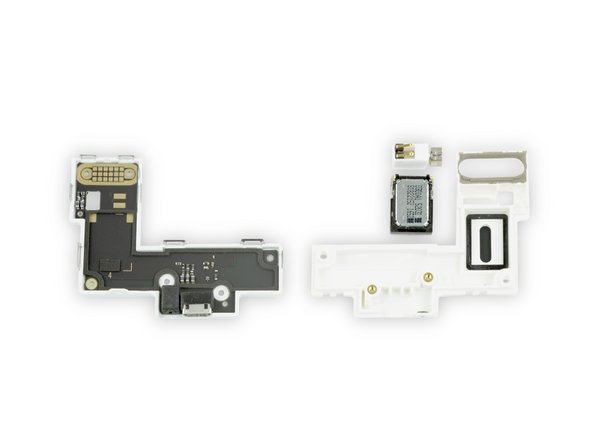
  • One last module to crack open—while it's only marked with a microphone icon, there are actually quite a few components in here.

  • The vibration motor and loudspeaker are connected by spring contacts—more easily removed parts, yay!

  • The USB port and microphone are soldered to the board—not necessarily a bad thing, as a USB port requires some extra rigidity, and has significantly more pins than a speaker.

Ein letztes Modul, das geöffnet werden muss – obwohl es nur mit einem Mikrofonsymbol gekennzeichnet ist, sind dennoch recht viele Komponenten darin untergebracht.

Der Vibrationsmotor und der Lautsprecher sind über Federkontakte verbunden – noch mehr Teile, die man leicht entfernen kann, Hurra!

Der USB-Anschluss und das Mikrofon sind auf die Platine gelötet – nicht unbedingt eine schlechte Sache. Der USB Anschluss benötigt die zusätzliche Stabilität und hat deutlich mehr Kontakte als ein Lautsprecher.

Deine Beiträge sind lizenziert unter der Open-Source Creative Commons Lizenz.