Hinweis: Du bearbeitest gerade eine grundständige Anleitung, die Teil der Anleitung ist, die du eben angeschaut hast. Alle Änderungen, die du vornimmst, betreffen alle 3 Anleitungen, die diese grundständige Anleitung beinhalten.
Schritt 5 übersetzen


-
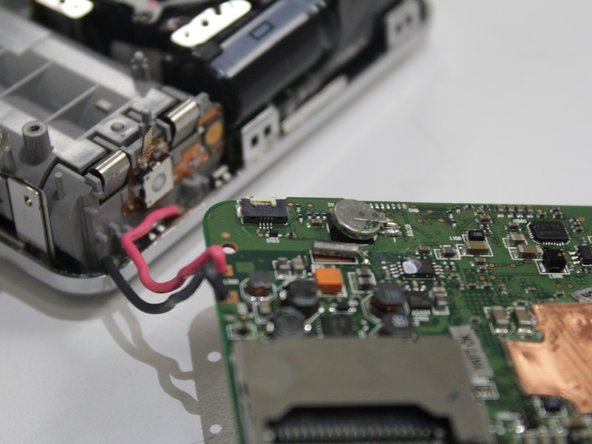
Separate the motherboard from the case by pulling directly upward. Some resistance is normal; the board is loosely held in place by plastic notches and grooves. It will still be connected via a pair of red and black wires and a fourth small ribbon cable.
-
Locate the fourth ribbon cable on the underside of the motherboard where the red and black wires connect to the battery compartment. Unlike the previous ribbon cables, the clamp is white and the connector is black. Use tweezers to loosen the white clamp before disconnecting the ribbon cable.
-
To completely remove the board, use a soldering iron to desolder the red and black wires connecting the motherboard to the battery compartment. Note the black wire goes to the terminal closest to the memory card slot.
Deine Beiträge sind lizenziert unter der Open-Source Creative Commons Lizenz.