Diese Übersetzung wurde maschinell erstellt und noch nicht von einer Person überprüft. Sprichst du diese Sprache? Schau es dir an.
Einleitung
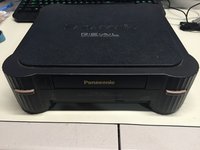
Heute nehmen wir die Panasonic-Version der R.E.A.L. 3DO Interactive Multiplayer Spielkonsole auseinander. Die 3DO kam 1993 auf den Markt und war als einer der frühen Vorreiter für CD-basierte Spiele sowie für ihre Fähigkeit bekannt, Fotos anzuzeigen und Musik abzuspielen.
Was du brauchst
-
-
-
Hier ist die Vorderansicht des FZ-1 3DO.
-
Beachte die Anschlüsse auf der Rückseite des Geräts. Das FZ-1 verfügt über RF-, S-Video- und Composite-Ausgänge sowie einen Erweiterungsanschluss auf der Rückseite.
-
Ein größerer zweiter Erweiterungssteckplatz befindet sich auf der rechten Seite des Geräts.
 Frag FixBot
-
-
-
Drehe das Gerät um, sodass die Unterseite des Gehäuses zu dir zeigt und die vier Gehäuseschrauben sichtbar sind.
-
Entferne die vier #2 Kreuzschlitzschrauben aus dem Gehäuse.
-
Drehe das Gerät nach dem Entfernen der Schrauben wieder zurück, während du die Ober- und Unterseite des Gehäuses zusammenhältst.
-
-
-
Entferne den oberen Teil des Gehäuses, um die internen Komponenten freizulegen.
-
-
-
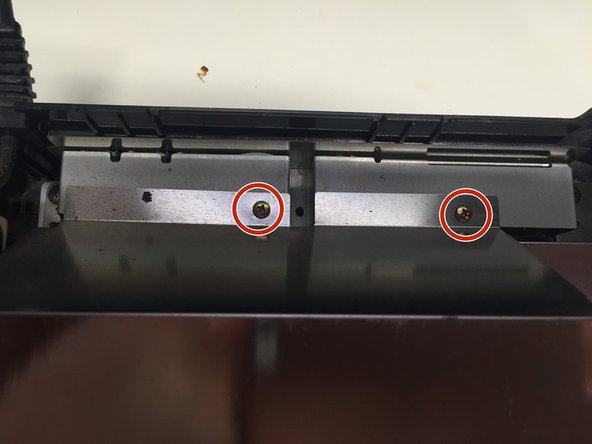
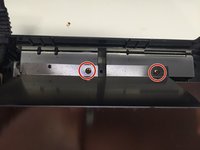
Entferne die 2 Kreuzschlitzschrauben (#1) von der Rückseite der Abdeckung des optischen Laufwerks.
-
Hebe die vier Metalllaschen mit einem Spudger vorsichtig an, um die Abdeckung des optischen Laufwerks zu entfernen.
-
Entferne die 4 Kreuzschlitzschrauben (#2).
-
Entferne die Abdeckung des optischen Laufwerks und die zwei Stangen, die du gerade herausgedreht hast.
-
-
-
-
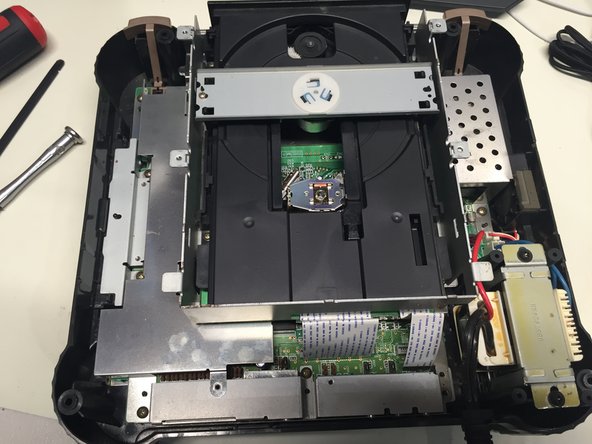
Entferne die 5 #1 Kreuzschlitzschrauben, die das CD-Laufwerk am Motherboard sichern.
-
Zieh vorsichtig die zwei Flachbandkabel ab, die das CD-Laufwerk mit dem Motherboard verbinden.
-
Du kannst das CD-Laufwerk nun sicher aus dem Gehäuse nehmen.
-
-
-
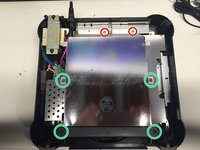
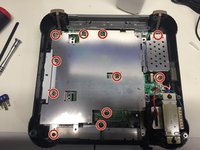
Entferne die elf Kreuzschlitzschrauben, die die Metallabdeckung mit dem Motherboard verbinden.
-
Entferne die Metallabdeckung.
-
Entferne die Metallabdeckung vom Erweiterungsanschluss.
-
-
-
Entferne die #1-Kreuzschlitzschraube von der Abdeckung des rückseitigen Anschlusses und nimm dann die Abdeckung ab.
-
-
-
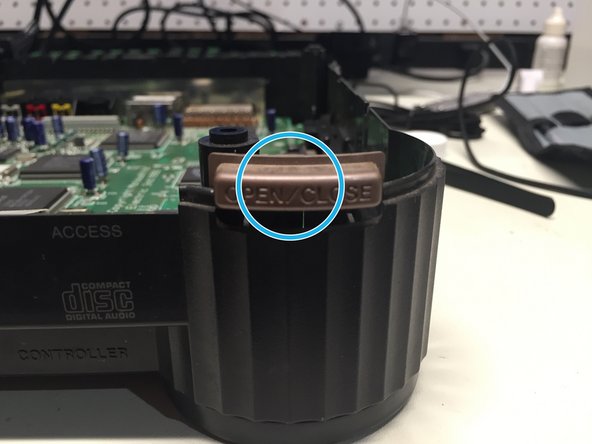
Entferne die Kunststoffabdeckung, den Power-Button und die Auswurf-Taste an der Vorderseite des Geräts.
-
-
-
Ziehe die Strom- und Lüfterkabel vom Motherboard ab.
-
Entferne die 2 #2 Kreuzschlitzschrauben, mit denen das Netzteil am Gehäuse befestigt ist.
-
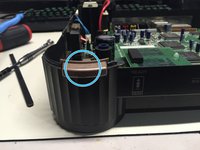
Entferne das Netzteil und den Lüfter aus dem Gehäuse.
-
-
-
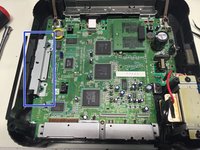
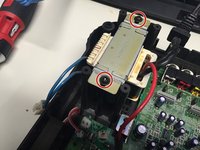
Zieh das Flachbandkabel ab, das das Motherboard mit der Controller-Anschlussplatine verbindet.
-
Entnimm die Controller-Platine und das Motherboard.
-
-
-
Entferne das Metallschild am Boden des Gehäuses. Mission erfüllt!
-
-


Um dein Gerät wieder zusammenzubauen, folge den Schritten dieser Anleitung in umgekehrter Reihenfolge.
Rückgängig: Ich habe diese Anleitung nicht absolviert.
8 weitere Personen haben diese Anleitung absolviert.
Besonderer Dank geht an diese Übersetzer:innen:
100%

Translation Bot hilft uns, die Welt in Ordnung zu bringen! Wie kann ich mithelfen?
Hier starten ›

2 Kommentare zur Anleitung
Can you tell me what size the screws are? I need to order a replacement set for my FZ-1
I thought I couldn't fix this old appliance in my house. Until I came across this site! Thank you. :)