Zum Hauptinhalt wechseln
Gemeinsam reparieren - Jetzt registrieren

Astro Mixamp Motherboard Replacement

Was du brauchst

    1. Astro Mixamp Motherboard Replacement, Panel Dial: Schritt 1, Bild 1 von 2 Astro Mixamp Motherboard Replacement, Panel Dial: Schritt 1, Bild 2 von 2
      • Grip the dial tightly and pull straight off the device.

      • Repeat for the second dial

      Frag FixBot

      Kommentar hinzufügen

    2. Astro Mixamp Motherboard Replacement: Schritt 2, Bild 1 von 2 Astro Mixamp Motherboard Replacement: Schritt 2, Bild 2 von 2
      In diesem Schritt verwendetes Werkzeug:
      Tweezers
      $4.99
      • Using tweezers, remove the spacer nuts and washers from each dial post.

      Frag FixBot

      Kommentar hinzufügen

    1. Astro Mixamp Motherboard Replacement, Outer Casing: Schritt 3, Bild 1 von 2 Astro Mixamp Motherboard Replacement, Outer Casing: Schritt 3, Bild 2 von 2
      • Before opening your device, ensure the device is not on or connected to the charging cable.

      • Insert a plastic opening tool into the seam between the rubber foot and plastic casing.

      • Pull the rubber foot free of the plastic casing.

      Frag FixBot

      Kommentar hinzufügen

    2. Astro Mixamp Motherboard Replacement: Schritt 4, Bild 1 von 1
      • Use a screwdriver to remove the screw from the rear casing.

      Frag FixBot

      Kommentar hinzufügen

    3. Astro Mixamp Motherboard Replacement: Schritt 5, Bild 1 von 1
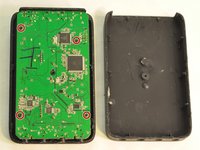
      • Gently lift the rear casing from the device.

      Frag FixBot

      Kommentar hinzufügen

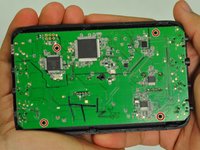
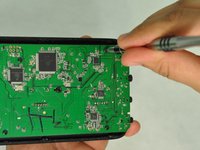
    1. Astro Mixamp Motherboard Replacement, Motherboard: Schritt 6, Bild 1 von 3 Astro Mixamp Motherboard Replacement, Motherboard: Schritt 6, Bild 2 von 3 Astro Mixamp Motherboard Replacement, Motherboard: Schritt 6, Bild 3 von 3
      • Remove the four screws that hold the motherboard in place.

      • Only touch the edges of the motherboard. Touching the surface can damage the motherboard.

      Frag FixBot

      Kommentar hinzufügen

    2. Astro Mixamp Motherboard Replacement: Schritt 7, Bild 1 von 1
      • Gently pull the motherboard from the front cover.

      Frag FixBot

      Kommentar hinzufügen

Abschluss

To reassemble your device, follow these instructions in reverse order.

Rückgängig: Ich habe diese Anleitung nicht absolviert.

Eine weitere Person hat diese Anleitung absolviert.

0 Kommentare zur Anleitung

Kommentar hinzufügen

Seitenaufrufe:

Letzte 24 Stunden: 1

Letzte 7 Tage: 11

Letzte 30 Tage: 35

Insgesamt: 2,901