Einleitung
The following instructions will guide you through the replacement of your Contixo V9 Motherboard. You can troubleshoot the device here before starting this guide to identify its exact issue. The replacement of the Motherboard should allow the device to function like normal. This task does not require any special skills but please reference the guides found in the steps that may be viewed as difficult. Lastly, be careful as some of the parts may be fragile.
Was du brauchst
-
-
Find the separation line between the front and back side of the device on the outer edge of the tablet.
-
Use the plastic opening tool to pry apart the tablet, lifting the face off.
-
-
-
Remove the three screws along the perimeter of the motherboard using the Phillips #000 screwdriver to unscrew.
-
-
-
-
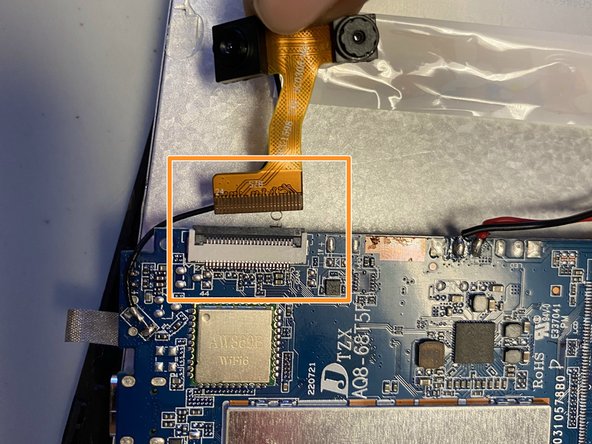
Locate the three golden ribbons along the perimeter of the motherboard.
-
There are two dark tabs; pull each away from the cream connection port. Once tabs are in open position remove the gold ribbon.
-
Flip up the dark tab and pull the gold ribbon away.
-
-
-
Locate the battery on the opened tablet.
-
Use the spudger or one of the blue iFixit tools to lift the battery from the base of the tablet.
-
-
-
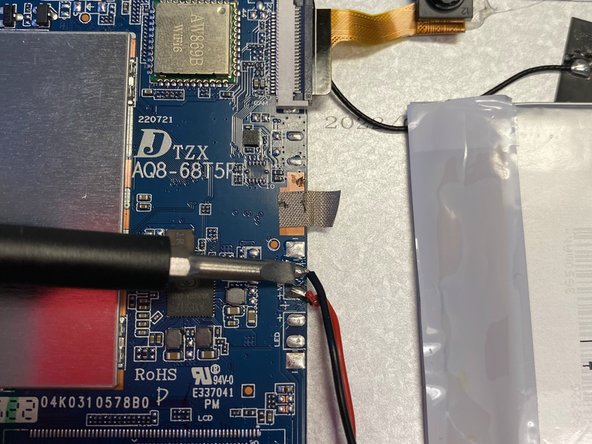
Detach the motherboard from the battery by pressing the soldering tip tool to each of the three connection points.
-


To reassemble your device, follow these instructions in reverse order.
To reassemble your device, follow these instructions in reverse order.
Team

University of North Texas, Team 3-4, Coppersmith Fall 2023 Mitglied von University of North Texas, Team 3-4, Coppersmith Fall 2023
UNT-COPPERSMITH-F23S3G4
4 Mitglieder
5 Anleitungen geschrieben