Einleitung
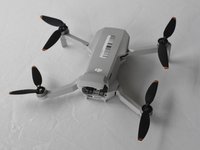
Diese Anleitung zeigt, wie die Hauptplatine im Inneren der DJI Mini 2 ausgetauscht wird.
Die Hauptplatine steuert alle Vorgänge auf der Drohne. Wenn sie kaputt ist funktioniert die Drohne nicht mehr oder kann keine Verbindung zur Steuereinheit herstellen. Weitere Informationen findest du auf der Troubleshooting-Seite für dieses Gerät.
Benutze ESD-sicheres Werkzeug, damit die Elektronik keinen Schaden nimmt.
Nach dem Austausch der Hauptplatine muss die Drohne neu kalibriert werden. Einige Arbeiten dazu kann mit der DJI Fly Mobile App erledigt werden, aber einige Punkte, z.B. das Kalibrieren des Gimbal, erfordern eine eigene Software. Das Kalibrieren des Gimbal wird in diesem Video gezeigt.
Was du brauchst
Einführungsvideo
-
-
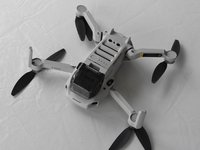
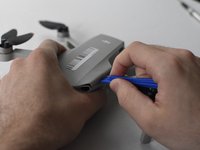
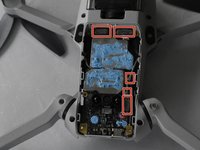
Lege die DJI Mini 2 so vor dir hin, dass die Ladebuchsen zu dir zeigen.
-
Öffne die Rückabdeckung mit den Fingern.
-
-
-
Drücke auf die Verriegelung, so dass sie sich öffnet.
-
Ziehe den Akku aus dem Akkufach heraus.
-
-
-
Klappe die Flügel der Drohne auf.
-
Lege die Drohne aufrecht auf die Arbeitsfläche.
-
-
-
-
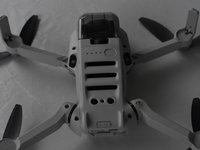
Drehe die Drohne um.
-
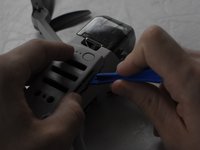
Setze ein geeignetes Werkzeug in die Naht an der oberen Abdeckung und heble sie ab.
-
-
-
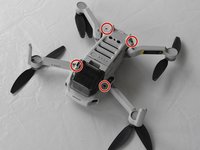
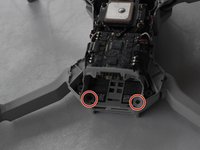
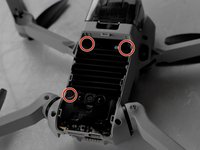
Entferne die beiden 5 mm langen J000 Schrauben im Akkufach nahe bei den Anschlüssen an der Rückseite der Drohne.
-
-
-
Drehe die Drohne wieder um.
-
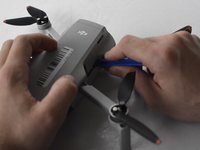
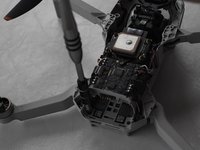
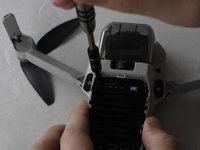
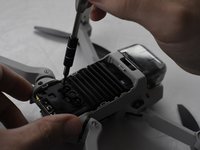
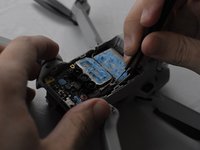
Heble die untere Abdeckung mit einem Öffnungswerkzeug ab.
-
-
In diesem Schritt verwendetes Werkzeug:Tweezers$4.99
-
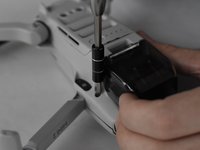
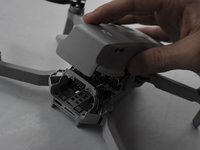
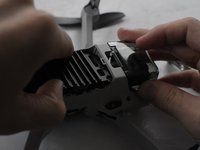
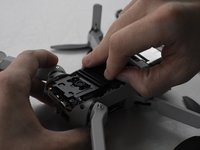
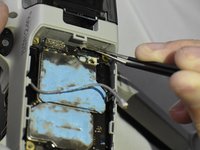
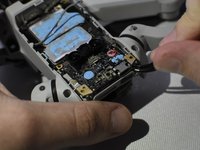
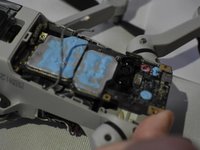
Nimm eine ESD-sichere stumpfe Pinzette und trenne die fünf Kabel von der Hauptplatine ab.
-


Um dein Gerät wieder zusammenzubauen, folge den Schritten in umgekehrter Reihenfolge.
Um dein Gerät wieder zusammenzubauen, folge den Schritten in umgekehrter Reihenfolge.
Rückgängig: Ich habe diese Anleitung nicht absolviert.
2 weitere Personen haben diese Anleitung absolviert.
Besonderer Dank geht an diese Übersetzer:innen:
100%
VauWeh hilft uns, die Welt in Ordnung zu bringen! Wie kann ich mithelfen?
Hier starten ›

Team

UMass Dartmouth, Team F-1, Gurgel Spring 2022 Mitglied von UMass Dartmouth, Team F-1, Gurgel Spring 2022
UMASSD-GURGEL-S22SFG1
2 Mitglieder
15 Anleitungen geschrieben
2 Kommentare
I found this mini 2 post interesting, even if i want to do somthing
different.
my goal is to install the old motherboard in newer hardware...
gimbal. IMU board barometer/compass busted after the super
90 deg DJI off function, because of a gust... crash,'i really
LOVE DJI.....NOT!"
then I ask to buy parts from them, then they babble
about warranty.... nope bro we are not selling parts
forget it we want to repair it.... forget it, it's my drone
i rather sledge hammer it on YouTube.
so this is last resort transplanting a board with old
firmware, I don't want to use a new bird with more stupid
chiness software, that has no real bearing of local aeronautical
laws.
not using them otherwise. goodbye DJI
Do never buy a Chinese drone! From crappy company
might look here again
Great advice, thank you.