Einleitung
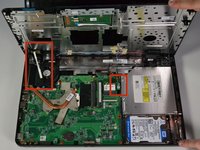
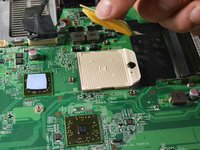
In this guide, you will learn how to replace the processor in the Dell Inspiron M5030. To remove, clean off, and replace the thermal paste in order to remove the heat sink, please refer to the Applying Thermal Paste Guide.
Was du brauchst
-
-
Remove all fourteen Phillips #0 7/16" screws from the bottom of the laptop.
-
Remove the two Phillips #0 5/16" screws from the bottom of the laptop.
-
-
-
Turn the laptop over and open the lid.
-
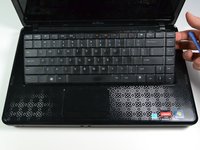
Locate the three tabs above the first row of keys on the top of the keyboard, found above the F1, F6, and PrntScr keys.
-
With one of your hands, push the leftmost tab down with the plastic opening tool (above the F1 key). With your other hand, lift the left side of the keyboard.
-
Push the middle tab down with the plastic opening tool and continue lifting from the left side of the keyboard to the right side (above the F6 key).
-
Push the rightmost tab down with the plastic opening tool and continue lifting from the left side of the keyboard to the right side (above the PrntScr key). The keyboard should be loosened from the laptop after these steps.
for your last bullet, maybe clarify saying "push the next to tabs with the plastic opening tool…"
-
-
-
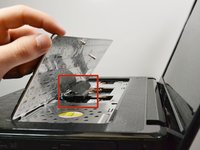
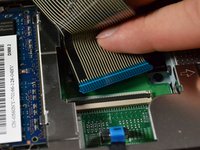
Pull up the bottom side of the keyboard and locate the ribbon connecting the keyboard to the motherboard.
-
Locate the blue end of the ribbon which is connected to the motherboard.
-
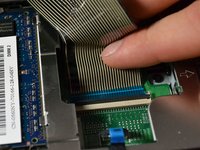
Lift up the black flap on the connector and gently pull the ribbon away from the connector which is parallel to the motherboard.
-
Lift the keyboard up and off of the motherboard. Detach the blue end of the ribbon from the connector.
-
-
-
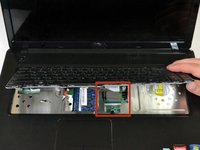
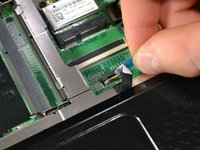
Disconnect the blue tab located just above the touch pad of the laptop.
how do you disconnect speaker cable from it’s connector do those tabs lift up push down or do you just pull them out never seen connectors like them before and i am a bit concerned i might break connector.
Garry
-
-
-
-
Lift the black locking tab a small way up, away from the Green PCB, until a click is heard. Before pullinh on blue tab.
-
-
-
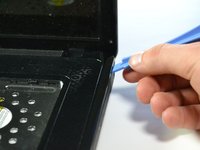
Use a plastic opening tool to pry up the plastic covering of the laptop by wedging it underneath one side of the covering and lift up.
-
-
-
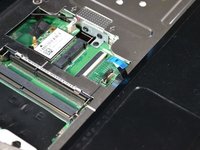
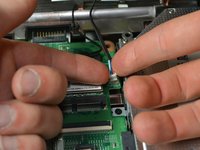
Disconnect the white block of wires which is the right-most wire connecting the covering to the laptop.
-
-
-
Disconnect the wire with the blue tab which is the left-most wire connecting the covering to the laptop.
-
You can now remove the plastic covering.
-
-
-
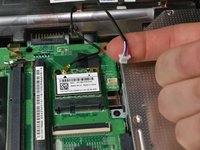
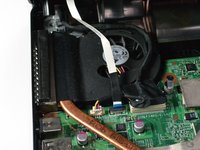
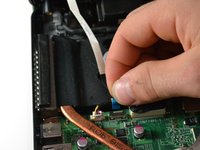
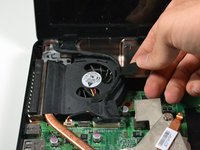
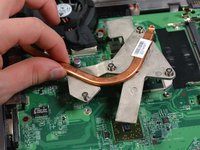
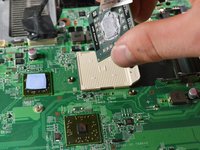
Remove the tape from the fan, but do not remove the tape from the wire.
-
Move the wire away from the fan.
-
-
-
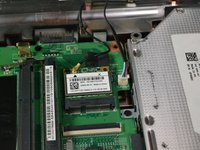
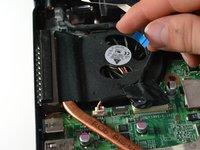
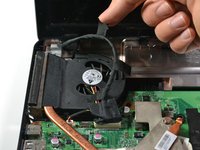
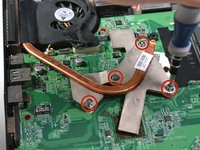
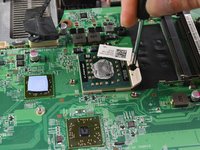
Locate the yellow/black/red wires and find the white plastic block where they end.
-
-
-
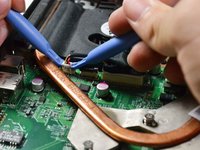
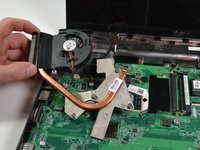
Using two fingers (one on either side of the block) or two plastic opening tools (one on either side of the block), pinch the bottom of the block and lift up to remove the block.
-
-
-
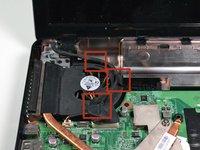
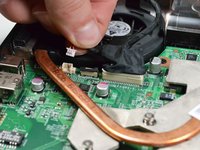
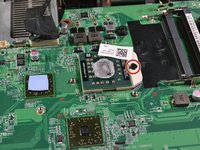
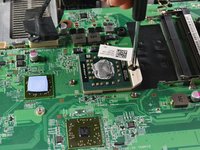
Remove the the black screw above the processor with a flathead screwdriver.
maybe circle the processor in the first picture for this step. i am not familiar with what the mother boards of computers look like and had no idea what the processor was in this image!
-
-
-
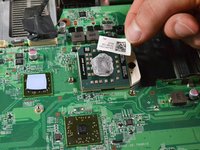
Grab the sides of the processor with your thumb and forefinger to remove the processor.
would that make the computer not turn on afterwards?
I would not prevent the computer from starting up, however it could prevent effective cooling causing damage. You should be using some kind of grounding device when touching the cpu.
Easy, peazy thanks to the excellent verbal description and pics! Many thanks.
-


To reassemble your device, follow these instructions in reverse order.
To reassemble your device, follow these instructions in reverse order.
Rückgängig: Ich habe diese Anleitung nicht absolviert.
6 weitere Personen haben diese Anleitung absolviert.
Team

Cal Poly, Team 3-44, Maness Spring 2014 Mitglied von Cal Poly, Team 3-44, Maness Spring 2014
CPSU-MANESS-S14S3G44
4 Mitglieder
6 Anleitungen geschrieben
Ein Kommentar
Is this the right part number for a cpu replacement for a dell inspiron m5030: PART # 3PDDV?
If you are removing only the keyboard, you only need to remove two screws.
1 - Remove the screw to the immediate right of the INSPIRON M5030 label.
2 - To the top left of the INSPIRON M5030 label, there are two screws. Remove the left one.
===
I marked the two screw locations with green, for clarification.
- https://ibb.co/nz4rNG
- https://postimg.org/image/67kinagal/
Robert Johnson - Antwort