Zum Hauptinhalt wechseln

Dell Studio 1537 RAM Replacement

Was du brauchst

  1. Dell Studio 1537 RAM Replacement, Battery: Schritt 1, Bild 1 von 2 Dell Studio 1537 RAM Replacement, Battery: Schritt 1, Bild 2 von 2
    • Ensure the laptop is turned off and unplugged before attempting to remove any piece.

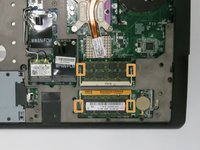
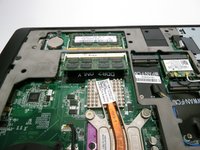
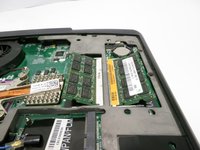
    • Place the laptop lid down so the underside is visible.

    • Pull battery release switch and gently pull the battery directly away from the switch.

  2. Dell Studio 1537 RAM Replacement, Back Cover: Schritt 2, Bild 1 von 1
    • Identify the back cover of the laptop.

  3. Dell Studio 1537 RAM Replacement: Schritt 3, Bild 1 von 1
    • Unscrew and remove all of the 6.0mm screws with a Phillips #1 screwdriver.

  4. Dell Studio 1537 RAM Replacement: Schritt 4, Bild 1 von 1
    • Lift the back cover off of the laptop.

  5. Dell Studio 1537 RAM Replacement, RAM: Schritt 5, Bild 1 von 2 Dell Studio 1537 RAM Replacement, RAM: Schritt 5, Bild 2 von 2
    • Pull outwards on both of the tabs for one of the RAM slots.

    • The RAM stick should pop up at an angle after this.

  6. Dell Studio 1537 RAM Replacement: Schritt 6, Bild 1 von 2 Dell Studio 1537 RAM Replacement: Schritt 6, Bild 2 von 2
    • Pull the RAM stick out of the slot.

    • Repeat with the remaining RAM stick.

Abschluss

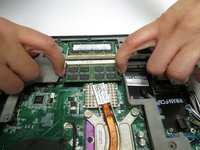
To reassemble your device, follow these instructions in reverse order.

2 weitere Nutzer:innen haben diese Anleitung absolviert.

Zach Dylag

Mitglied seit: 03/24/15

575 Reputation

4 Anleitungen geschrieben

Team

Baylor, Team 6-2, Shaver Spring 2015 Mitglied von Baylor, Team 6-2, Shaver Spring 2015

BU-SHAVER-S15S6G2

3 Mitglieder

4 Anleitungen geschrieben

0 Kommentare

Kommentar hinzufügen

Seitenaufrufe:

Letzte 24 Stunden: 0

Letzte 7 Tage: 0

Letzte 30 Tage: 3

Insgesamt: 928