Einleitung
If the tablet has out of focus pictures or doesn't take them at all, this guide will show you how to replace the camera. Tools that are needed will include a Phillips Head screwdriver with a #00 3mm screw, spudger, plastic opening tool, as well as a pair of tweezers to properly remove the broken equipment.
Was du brauchst
-
-
-
Use a Phillips 00 bit to remove two 3mm screws from the bottom of the tablet.
 Frag FixBot
-
-
-
Insert the nylon spudger into the bottom of the tablet, and gently slide it up the side.
-
Pull apart the two sides of the tablet, exposing the circuit board, battery, and other components of the tablet.
-
-
-
-
-
-
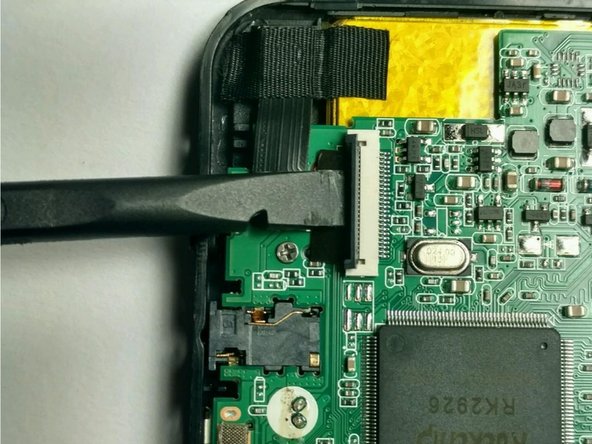
Using the spudger to raise the zero insertion force (ZIF) connector to freely release the ribbon.
-
-
In diesem Schritt verwendetes Werkzeug:Tweezers$4.99
-
Using tweezers gently pull the ribbon off of the enclosure.
-
Remove the camera.
-
-




To reassemble your device, follow these instructions in reverse order.

Team

USF Tampa, Team 2-5, Blackwell Fall 2016 Mitglied von USF Tampa, Team 2-5, Blackwell Fall 2016
USFT-BLACKWELL-F16S2G5
4 Mitglieder
18 Anleitungen geschrieben
