Zum Hauptinhalt wechseln
Gemeinsam reparieren - Jetzt registrieren

Epson PowerLite 83+ Projector Lens Replacement

Was du brauchst

    1. Epson PowerLite 83+ Projector Lens Replacement, Motherboard: Schritt 1, Bild 1 von 3 Epson PowerLite 83+ Projector Lens Replacement, Motherboard: Schritt 1, Bild 2 von 3 Epson PowerLite 83+ Projector Lens Replacement, Motherboard: Schritt 1, Bild 3 von 3
      • Remove the eight 5mm Phillips #2 screws securing the projector's bottom cover.

      • A long shank Phillips #2 screwdriver is required to reach the screws.

      Frag FixBot

      Kommentar hinzufügen

    2. Epson PowerLite 83+ Projector Lens Replacement: Schritt 2, Bild 1 von 3 Epson PowerLite 83+ Projector Lens Replacement: Schritt 2, Bild 2 von 3 Epson PowerLite 83+ Projector Lens Replacement: Schritt 2, Bild 3 von 3
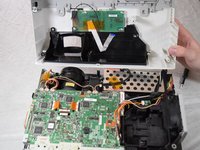
      • Flip the projector over and lift the top cover from the rear of the projector.

      • Two cables are connected at the front that prevent full removal.

      • Disconnect the slide cover JST connector. Grip the connector and rock it back and forth while apply gentle pressure.

      Frag FixBot

      Kommentar hinzufügen

    3. Epson PowerLite 83+ Projector Lens Replacement: Schritt 3, Bild 1 von 2 Epson PowerLite 83+ Projector Lens Replacement: Schritt 3, Bild 2 von 2
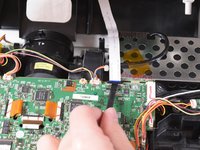
      • Using a spudger, lift the ribbon cable's locking tab along the length of the cable.

      • Remove the ribbon cable from the connector and place the projector's top cover aside.

      Frag FixBot

      Kommentar hinzufügen

    4. Epson PowerLite 83+ Projector Lens Replacement: Schritt 4, Bild 1 von 3 Epson PowerLite 83+ Projector Lens Replacement: Schritt 4, Bild 2 von 3 Epson PowerLite 83+ Projector Lens Replacement: Schritt 4, Bild 3 von 3
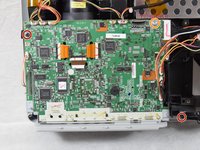
      • Remove the two 6 mm Phillips #2 screws.

      • Remove the single silver 5 mm Phillips #2 screw.

      Frag FixBot

      Kommentar hinzufügen

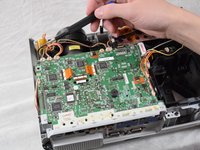
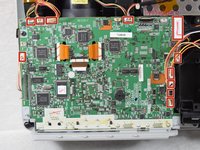
    5. Epson PowerLite 83+ Projector Lens Replacement: Schritt 5, Bild 1 von 3 Epson PowerLite 83+ Projector Lens Replacement: Schritt 5, Bild 2 von 3 Epson PowerLite 83+ Projector Lens Replacement: Schritt 5, Bild 3 von 3
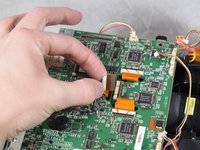
      • Using your fingernails or a spudger, remove the eleven JST connectors attached to the motherboard.

      Frag FixBot

      Kommentar hinzufügen

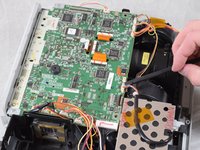
    6. Epson PowerLite 83+ Projector Lens Replacement: Schritt 6, Bild 1 von 2 Epson PowerLite 83+ Projector Lens Replacement: Schritt 6, Bild 2 von 2
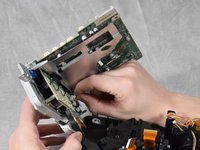
      • Using a spudger, flip up the plastic locking tabs and gently remove the three ribbon cables from their connectors.

      Frag FixBot

      Kommentar hinzufügen

    7. Epson PowerLite 83+ Projector Lens Replacement: Schritt 7, Bild 1 von 2 Epson PowerLite 83+ Projector Lens Replacement: Schritt 7, Bild 2 von 2
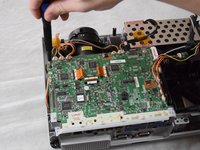
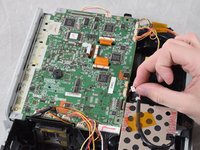
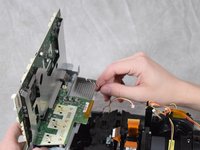
      • Ensure all JST connectors are clear of the motherboard and that the ribbon cables freely move in their motherboard cutouts.

      • Lift the motherboard from the front side of the projector to clear the ribbon cables.

      • Disconnect the speaker's JST connector on the underside of the motherboard using your fingernails.

      • Remove the motherboard from the case.

      Frag FixBot

      Kommentar hinzufügen

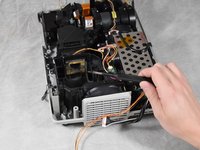
    1. Epson PowerLite 83+ Projector Lens Replacement, Projector Lens: Schritt 8, Bild 1 von 3 Epson PowerLite 83+ Projector Lens Replacement, Projector Lens: Schritt 8, Bild 2 von 3 Epson PowerLite 83+ Projector Lens Replacement, Projector Lens: Schritt 8, Bild 3 von 3
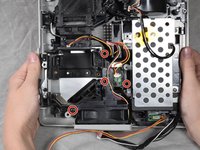
      • Remove the four 6 mm Phillips #2 screws securing the fan bracket.

      • Remove the fan bracket by pulling straight up and set it aside.

      Frag FixBot

      Kommentar hinzufügen

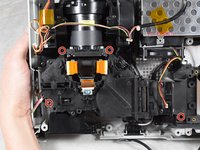
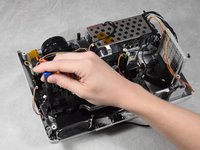
    2. Epson PowerLite 83+ Projector Lens Replacement: Schritt 9, Bild 1 von 3 Epson PowerLite 83+ Projector Lens Replacement: Schritt 9, Bild 2 von 3 Epson PowerLite 83+ Projector Lens Replacement: Schritt 9, Bild 3 von 3
      • Remove the four 6 mm Phillips #2 screws securing the projector lens.

      Frag FixBot

      Kommentar hinzufügen

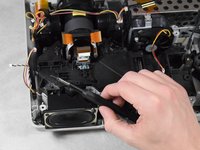
    3. Epson PowerLite 83+ Projector Lens Replacement: Schritt 10, Bild 1 von 2 Epson PowerLite 83+ Projector Lens Replacement: Schritt 10, Bild 2 von 2
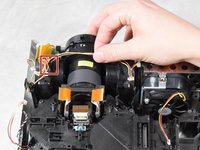
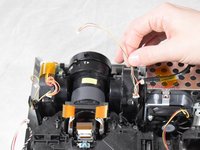
      • Unhook the JST connector wire from wire stay and move it aside.

      • Remove the projector lens from the base.

      Frag FixBot

      Kommentar hinzufügen

Abschluss

To reassemble your device, follow these instructions in reverse order.

Rückgängig: Ich habe diese Anleitung nicht absolviert.

Team

Clemson, Team 2-4, Hunter Spring 2022 Mitglied von Clemson, Team 2-4, Hunter Spring 2022

CLEM-HUNTER-S22S2G4

4 Mitglieder

18 Anleitungen geschrieben

1 Kommentar zur Anleitung

source for a replacement lens? I surely need one.

christopher wanko - Antwort Teilen

Kommentar hinzufügen

Seitenaufrufe:

Letzte 24 Stunden: 1

Letzte 7 Tage: 4

Letzte 30 Tage: 24

Insgesamt: 926