Diese Anleitung enthält neuere Änderungen. Wechsel zur neuesten unüberprüften Version.
Einleitung
This guide involves further disassembly of the clock radio and will require using several different tools and techniques, including using a soldering iron. If you need help on how to use a soldering iron, consult this iFixit guide: Wie man Lötverbindungen herstellt und entlötet
Was du brauchst
-
-
Find the battery compartment on the bottom of the clock radio.
-
Using your thumb, push the compartment cover latch toward the battery.
-
With the latch pushed in, pull the compartment cover upward to remove it..
-
-
-
Lift the battery from the compartment.
-
Pull the battery up and gently disconnect it from the battery connector.
-
-
-
Using a Phillips #00 Screwdriver, unscrew the six 12mm screws from around the bottom of the clock radio.
-
-
-
-
Lift the top off. Two gray, plastic internal pieces will fall out when you do this; set them aside.
-
-
-
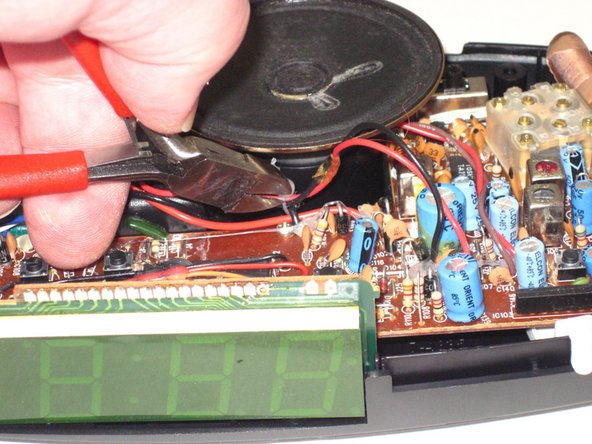
Using the wire cutters, carefully cut the plastic wire tie.
-
-
-
Locate the two 6mm screws on the PCB.
-
Using a Phillips #0 Screwdriver, unscrew the two 6 mm screws from the PCB.
-
-
-
Raise the PCB to expose the AM-FM switch dial screw.
-
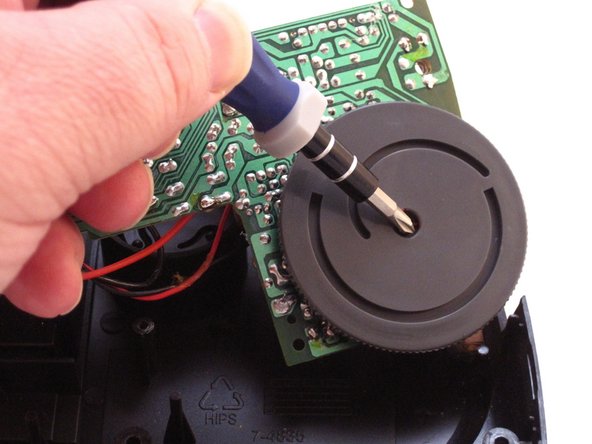
Using a Phillip's #01 Screwdriver, unscrew the one 3mm screw from the middle of the AM-FM switch dial.
-
-
-
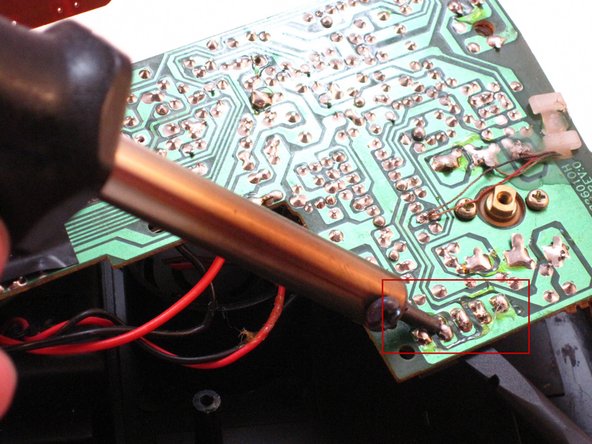
Locate the AM-FM pins on the PCB.
-
Carefully apply the hot soldering iron to the solder on top of the AM-FM pins.
-
Gently and firmly push on the pins with the Spudger to remove the switch from the underside of the PCB.
-


To reassemble your device, follow these instructions in reverse order.
To reassemble your device, follow these instructions in reverse order.