Zum Hauptinhalt wechseln
Gemeinsam reparieren - Jetzt registrieren

GoPro Hero+ LCD MicroSD/Micro USB Port Assembly Replacement

Was du brauchst

    1. GoPro Hero+ LCD MicroSD/Micro USB Port Assembly Replacement, Back Panel: Schritt 1, Bild 1 von 2 GoPro Hero+ LCD MicroSD/Micro USB Port Assembly Replacement, Back Panel: Schritt 1, Bild 2 von 2
      • Be sure to power off the GoPro before you start disassembly.

      • Pop up and pull back on the clip to remove the screen cover and expose the back panel with the touchscreen.

      Frag FixBot

      Kommentar hinzufügen

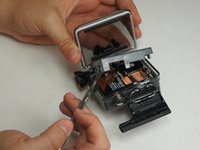
    2. GoPro Hero+ LCD MicroSD/Micro USB Port Assembly Replacement: Schritt 2, Bild 1 von 2 GoPro Hero+ LCD MicroSD/Micro USB Port Assembly Replacement: Schritt 2, Bild 2 von 2
      • Use the metal spudger to pry around the perimeter of the panel.

      • Pry the panel upwards by inserting the metal spudger into the corner crease between the panel and camera shell.

      Frag FixBot

      Kommentar hinzufügen

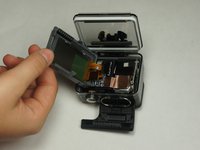
    3. GoPro Hero+ LCD MicroSD/Micro USB Port Assembly Replacement: Schritt 3, Bild 1 von 2 GoPro Hero+ LCD MicroSD/Micro USB Port Assembly Replacement: Schritt 3, Bild 2 von 2
      • Pry around the panel to ensure it is not attached to the device.

      • Move the panel to the side so you can access the internal components.

      • The panel is still attached to the rest of the device with a ribbon cable, so be sure to not tear or damage the cable.

      Frag FixBot

      Kommentar hinzufügen

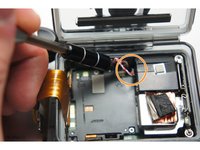
    1. GoPro Hero+ LCD MicroSD/Micro USB Port Assembly Replacement, Battery: Schritt 4, Bild 1 von 1
      • Peel back the rear panel ribbon cable that is adhered to the battery until it is completely separated from the battery.

      • Be careful of metal contacts on strip; they can be sharp.

      Frag FixBot

      Kommentar hinzufügen

    2. GoPro Hero+ LCD MicroSD/Micro USB Port Assembly Replacement: Schritt 5, Bild 1 von 1
      In diesem Schritt verwendetes Werkzeug:
      Tweezers
      $4.99
      • Using tweezers, peel off the copper tape on the right side of the battery.

      Frag FixBot

      Kommentar hinzufügen

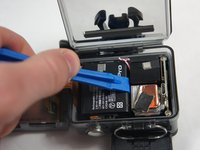
    3. GoPro Hero+ LCD MicroSD/Micro USB Port Assembly Replacement: Schritt 6, Bild 1 von 2 GoPro Hero+ LCD MicroSD/Micro USB Port Assembly Replacement: Schritt 6, Bild 2 von 2
      • Place the plastic opening tool at one of the edges of the battery then pry until the battery is removed from the GoPro.

      Frag FixBot

      Kommentar hinzufügen

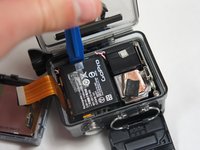
    4. GoPro Hero+ LCD MicroSD/Micro USB Port Assembly Replacement: Schritt 7, Bild 1 von 1
      • Use a pair of tweezers to disconnect the battery connector from the motherboard.

      • Gently pull the battery off the motherboard. Pulling vertically off the motherboard will give a clean release.

      Frag FixBot

      Kommentar hinzufügen

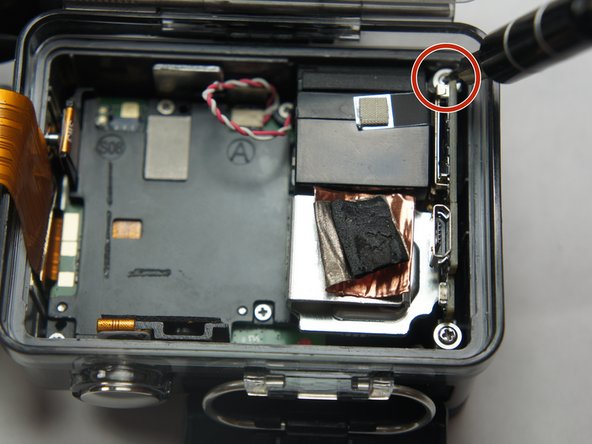
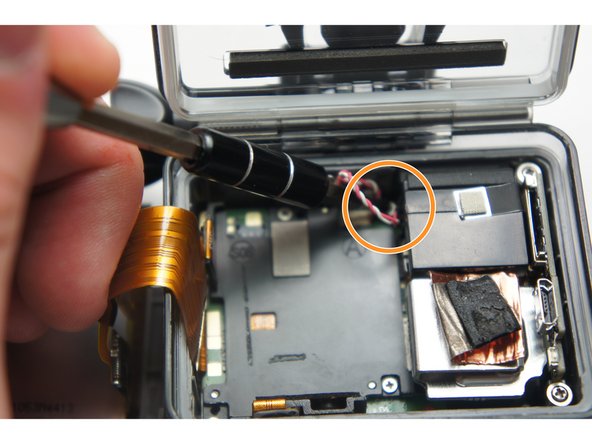
    1. GoPro Hero+ LCD MicroSD/Micro USB Port Assembly Replacement, MicroSD/Micro USB Port Assembly: Schritt 8, Bild 1 von 3 GoPro Hero+ LCD MicroSD/Micro USB Port Assembly Replacement, MicroSD/Micro USB Port Assembly: Schritt 8, Bild 2 von 3 GoPro Hero+ LCD MicroSD/Micro USB Port Assembly Replacement, MicroSD/Micro USB Port Assembly: Schritt 8, Bild 3 von 3
      • Remove the two 6 mm Phillips #00 screws.

      • Remove the single 4 mm Phillips #000 screws.

      Frag FixBot

      Kommentar hinzufügen

    2. GoPro Hero+ LCD MicroSD/Micro USB Port Assembly Replacement: Schritt 9, Bild 1 von 1
      • Remove the image sensor from the camera.

      • You do not have to unplug the black box to remove the USB/SD chip.

      Frag FixBot

      Kommentar hinzufügen

    3. GoPro Hero+ LCD MicroSD/Micro USB Port Assembly Replacement: Schritt 10, Bild 1 von 1
      In diesem Schritt verwendetes Werkzeug:
      Tweezers
      $4.99
      • Grab the edge of the ribbon cable with the tweezers and gently pull until the cable is disconnected from the motherboard.

      • Be careful when removing the ribbon cable. You must pull gently or you can rip the ribbon off of its contacts.

      Frag FixBot

      Kommentar hinzufügen

    4. GoPro Hero+ LCD MicroSD/Micro USB Port Assembly Replacement: Schritt 11, Bild 1 von 1
      • Gently lift the microSD/Micro USB assembly up and out of the device.

      Frag FixBot

      Kommentar hinzufügen

Abschluss

To reassemble your device, follow these instructions in reverse order.

Rückgängig: Ich habe diese Anleitung nicht absolviert.

5 weitere Personen haben diese Anleitung absolviert.

Team

USF Tampa, Team 2-4, Blackwell Fall 2015 Mitglied von USF Tampa, Team 2-4, Blackwell Fall 2015

USFT-BLACKWELL-F15S2G4

4 Mitglieder

20 Anleitungen geschrieben

2 Kommentare zur Anleitung

Hi were can i buy the microSD/Micro USB port assembly in your GoPro Hero+ LCD.

Hector - Antwort Teilen

Very helpful guide

Ninigo Marine Contractor - Antwort Teilen

Kommentar hinzufügen

Seitenaufrufe:

Letzte 24 Stunden: 0

Letzte 7 Tage: 6

Letzte 30 Tage: 37

Insgesamt: 4,241