Einleitung
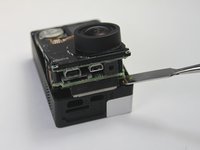
The image sensor is an optical device used to capture light and store the visual data into digital storage. This guide will help take apart the camera and replace the sensor.
Was du brauchst
-
-
-
Start by removing the silver plastic face from the camera using a plastic opening tool. Insert the plastic opening tool into the middle of each edge and lift up the tabs that keep the camera face on.
-
The seven plastic tab locations are marked in red.
 Frag FixBot
-
-
-
-
-
Remove the three 8 mm Phillips #000 screws on each corner of the camera.
-
Remove the single 4 mm Phillips #000 screw on the bottom left corner of the camera.
-
-
-
-
To remove the motherboard assembly from the camera casing, use the plastic opening tool on the lens side of the camera to pry the motherboard assembly out of the camera housing.
-
To avoid breaking the plastic on the lens side of the camera (see photo), pry along the edges near the corners.
-
-
-
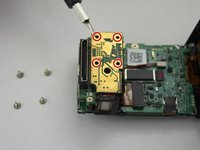
Remove the four 8 mm Phillips #000 screws securing the camera sensor assembly.
-
-
-
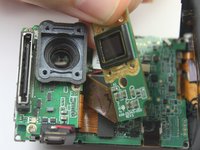
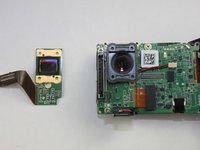
To remove the sensor assembly, simply peel off the lens towards the attached ribbon cable.
-
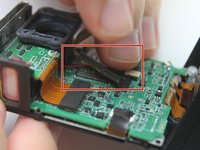
The sensor has ribbon cables running to the motherboard via a black rectangular connector.
-
To remove the sensor, use the spudger to pry up each side, Then, lift the connector straight up from its socket.
-
With the old camera sensor assembly removed, you can now replace it with a new sensor.
-
-


To reassemble your device, follow these instructions in reverse order.
Rückgängig: Ich habe diese Anleitung nicht absolviert.
11 weitere Personen haben diese Anleitung absolviert.
Team

USF Tampa, Team 2-1, Blackwell Fall 2015 Mitglied von USF Tampa, Team 2-1, Blackwell Fall 2015
USFT-BLACKWELL-F15S2G1
4 Mitglieder
20 Anleitungen geschrieben
3 Kommentare zur Anleitung
Did GoPro make an updated version of the sensor, or are all the ones sold on the web just the same as the one that keeps failing in the cameras? Do you have a part number for the sensor that is supposed to work better? No point replacing the sensor with the same one the camera came with as it will likely fail withing a year just like the original one. Please advice.
thanks for the instructions - easy to understand and carry out. my GoPro 4 is now up and running again