Einleitung
This guide will instruct a user on how to replace the cooling system on HP EliteBook x360 830 G6. A faulty cooling system can result in overheating and can potentially harm other components to the laptop. Be sure to turn off the computer before opening the laptop.
Problems that you’re encountering that would permit you to follow this guide include;
- Computer shuts off itself
- Computer fan is too loud
- Computer is overheating
Was du brauchst
-
-
Use a Torx T5 screwdriver to loosen the five captive screws holding the back cover.
-
-
-
Insert an opening pick between a corner of the back corner and the chassis, near a hinge.
-
Pry upward to release the retaining clips.
-
Repeat this process for the opposite corner.
-
-
-
Insert your opening pick between the back cover and chassis, along the edge of the cover between the hinges.
-
Pry up to release the additional retaining clips.
-
-
-
-
Grab the cover by the corners next to the hinges.
-
Swing the cover open and away from you.
-
Lift and remove the back cover from the laptop body.
-
-
-
Use the point of a spudger to push the sides of the battery connector out of its socket.
-
Push on alternate sides to "walk" the connector out.
-
-
-
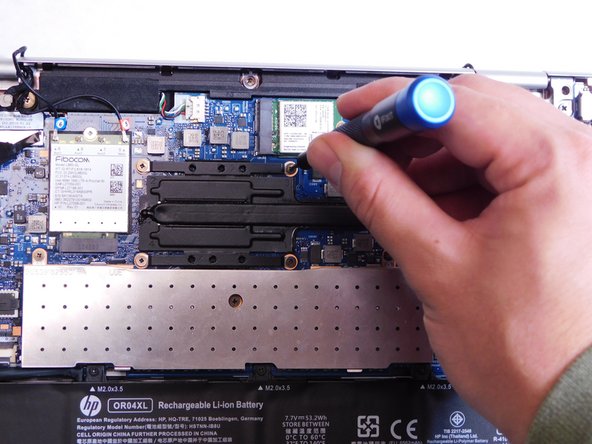
Using the Phillips #0 screwdriver, remove the seven 3 mm screws from the cooling system.
-
-
-
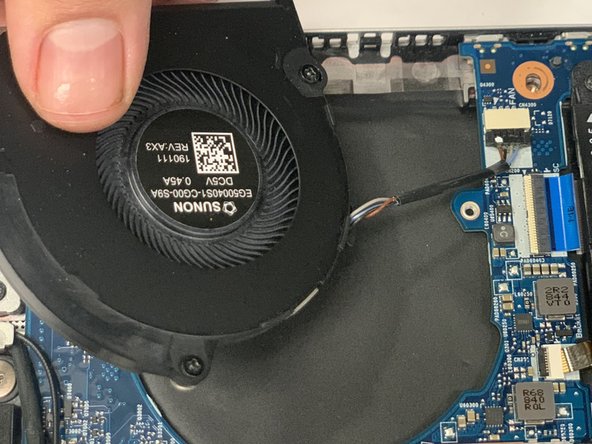
Remove the three 3mm captive screws from the fan using the Philips 0 screwdriver.
-
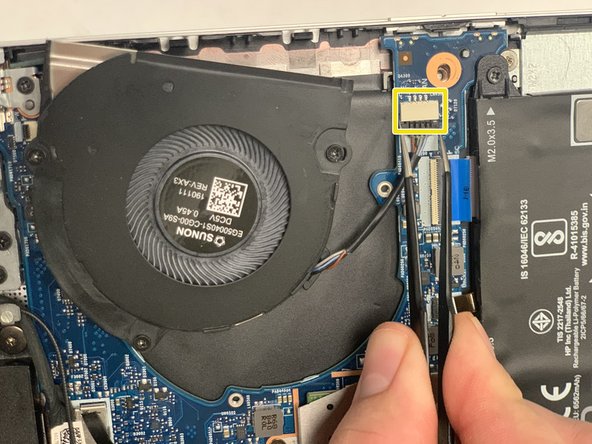
Using needle nose tweezers, gently grab the base of the connection and pull to disconnect.
-


To reassemble your device, follow these instructions in reverse order.
Take your e-waste to an R2 or e-Stewards certified recycler.
Repair didn’t go as planned? Try some basic troubleshooting, or ask our HP EliteBook community for help.
To reassemble your device, follow these instructions in reverse order.
Take your e-waste to an R2 or e-Stewards certified recycler.
Repair didn’t go as planned? Try some basic troubleshooting, or ask our HP EliteBook community for help.

Team

Gateway, Team 1-2, Saknee Fall 2021 Mitglied von Gateway, Team 1-2, Saknee Fall 2021
GCC-SAKNEE-F21S1G2
4 Mitglieder
6 Anleitungen geschrieben