Diese Version enthält möglicherweise inkorrekte Änderungen. Wechsle zur letzten geprüften Version.
Was du brauchst
-
Dieser Schritt ist noch nicht übersetzt. Hilf mit, ihn zu übersetzen!
-
Slide the battery lock tab toward the center of the battery to the unlock position.
-
-
Dieser Schritt ist noch nicht übersetzt. Hilf mit, ihn zu übersetzen!
-
Slide the battery release switch to the right until the battery pops out.
-
-
Dieser Schritt ist noch nicht übersetzt. Hilf mit, ihn zu übersetzen!
-
Grabbing the top edge of the battery, rotate it toward you and then lift upward to relieve the battery from its slot.
-
-
Dieser Schritt ist noch nicht übersetzt. Hilf mit, ihn zu übersetzen!
-
With the battery removed, remove both black plastic covers with a plastic opening tool. Unscrew both 7.5 mm screws from the tabs, using a PH1 screw driver. Using a plastic opening tool, pry off both covers.
-
-
-
Dieser Schritt ist noch nicht übersetzt. Hilf mit, ihn zu übersetzen!
-
Remove all 16 of the 3.5 mm screws with a PH1 screwdriver and pry/slide the CD drive out of laptop.
-
-
Dieser Schritt ist noch nicht übersetzt. Hilf mit, ihn zu übersetzen!
-
With the CD drive removed, unscrew the two 2mm silver screws with a PH00.
-
-
Dieser Schritt ist noch nicht übersetzt. Hilf mit, ihn zu übersetzen!
-
Using a plastic opening tool, begin to pry edge of case away from the laptop. Work around the edges until all sides, except back, are open.
-
-
Dieser Schritt ist noch nicht übersetzt. Hilf mit, ihn zu übersetzen!
-
On the back side of the laptop, where the battery is, there are 12 black plastic clips. Use a plastic opening tool and pry all of these clips, unlatching them from the case.
-
Once clips are free, open the laptop. Rotating the case off, around the hinges, works best to remove the case.
-
-
Dieser Schritt ist noch nicht übersetzt. Hilf mit, ihn zu übersetzen!
-
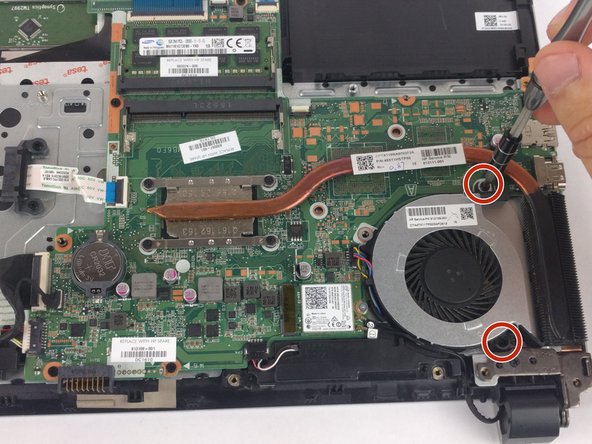
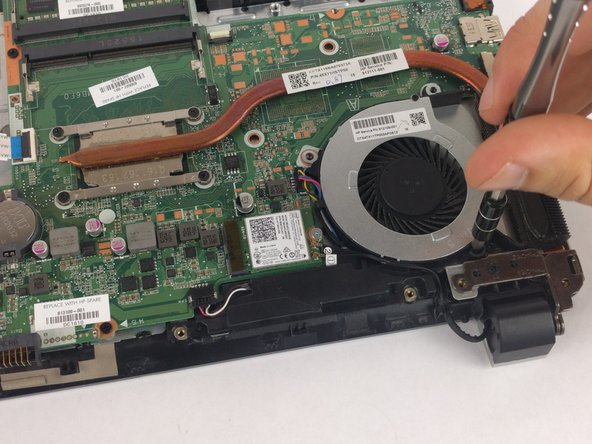
Use a PH00 screw driver to remove the two 3.5 mm screws holding the fan in place.
-
-
Dieser Schritt ist noch nicht übersetzt. Hilf mit, ihn zu übersetzen!
-
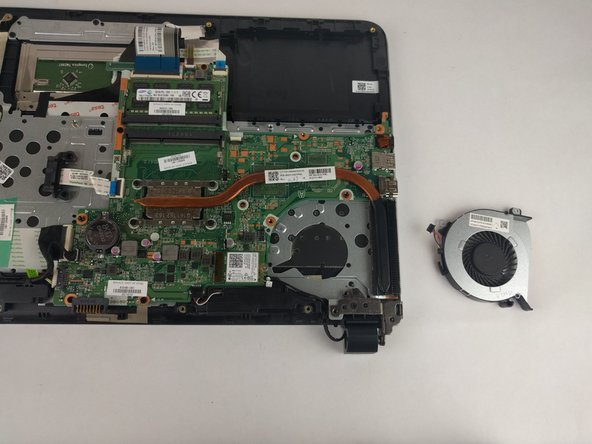
Use long nose tweezers to remove connector. Fan will lift out.
-


Rückgängig: Ich habe diese Anleitung nicht absolviert.
2 weitere Nutzer:innen haben diese Anleitung absolviert.

Team

USF Tampa, Team S6-G3, Eyestone Spring 2018 Mitglied von USF Tampa, Team S6-G3, Eyestone Spring 2018
USFT-EYESTONE-S18S6G3
3 Mitglieder
7 Anleitungen geschrieben