Einleitung
Follow this guide to replace the head strap on your HTC Vive Pro.
Power off and unplug your headset before you begin your repair.
Was du brauchst
-
-
Remove the All-In-One Cable from the cable guides along the left side of the head strap.
-
-
-
Separate the top strap from itself where the velcro secures it.
-
-
-
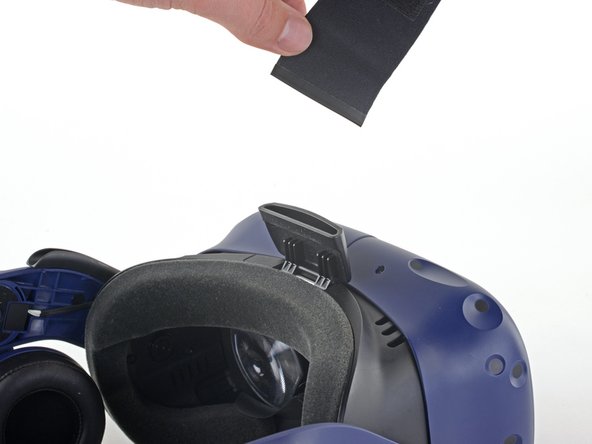
Peel back the Velcro securing the rear of the top strap.
-
Feed the top strap out through the head strap to remove it.
-
-
-
-
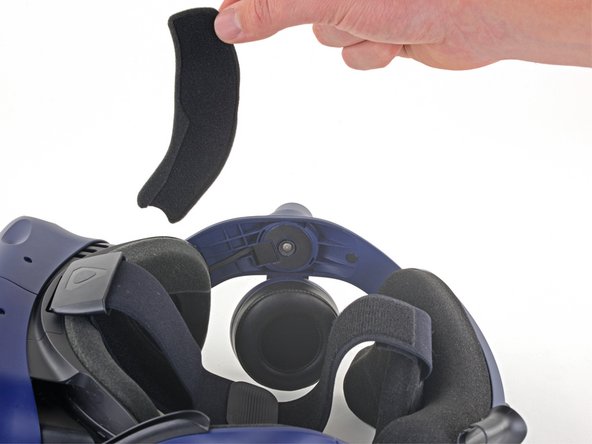
Peel off both front side foam pads to uncover the speaker wires.
-
-
-
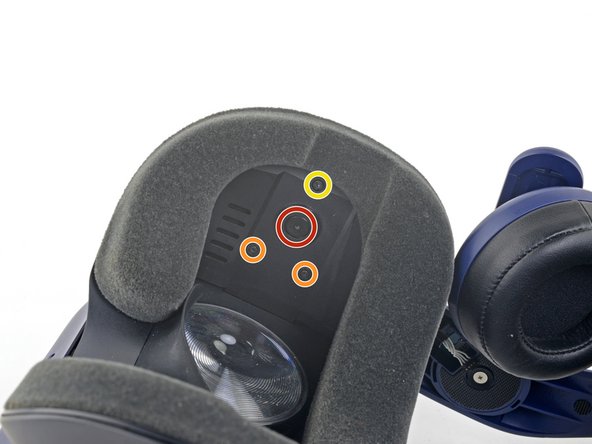
Insert the pointed end of your spudger behind the square rubber spacer next to each headphone screw.
-
Gently pry the rubber spacers out of the head strap.
-
-
-
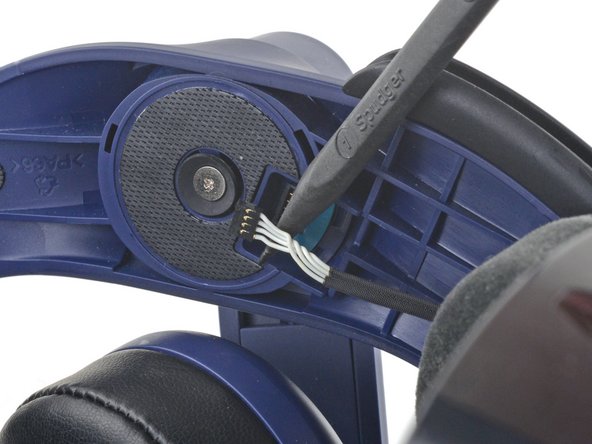
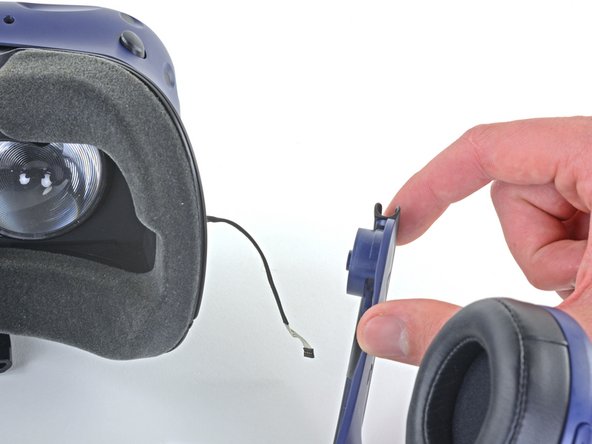
Use the pointed end of your spudger to pry up and disconnect both the left and right headphone speaker wires.
-
-
-
Use a T6 Torx screwdriver to remove the two 12.1 mm screws (one on each side) securing the head strap to the headset.
-
Use a T5 Torx screwdriver to remove the following screws securing the head strap to the headset:
-
Four 3.9 mm screws (two on each side)
-
Two 4.1 mm screws (one on each side)
-
-
-
Remove the two plastic spacers underneath the previously removed screws from the headset.
-
-
-
Transfer all foam pads from the old head strap to the new one.
-


Compare your new replacement part to the original part—you may need to transfer remaining components or remove adhesive backings from the new part before installing.
To reassemble your device, follow the above steps in reverse order.
Take your e-waste to an R2 or e-Stewards certified recycler.
Repair didn’t go as planned? Try some basic troubleshooting, or ask our Valve Index Answers community for help.

Ein Kommentar
There is a missing step. The replacement part doesn't contain anything to connect the audio wires to. You will have to remove a screw and pry up the little board that has the headphone connector on it. The spudger works well for this. Be aware that in addition to the screw, this little audio connector board is also held on with adhesive, so you will need to peel it off. The adhesive isn't too strong, so you can get it up pretty easily. When putting the audio connectors into the replacement head strap you'll want to be sure to peel off the backing on the adhesive before seating the board on it.