Einleitung
Wenn du über diese Anleitung gestolpert bist, verhält sich Ihr Nintendo Switch Pro-Controller wahrscheinlich etwas seltsam. Vielleicht bewegt sich deine Spielfigur dadurch in eine ganz andere Richtung als du willst. Vielleicht bewegt sie sich von alleine, ohne dass du den Controller auch nur berührt hast! Wenn dies der Fall ist, erlebst du etwas, das Videospiel-Enthusiasten als „Joystick-Drift“ bezeichnen, was normalerweise auf Schmutz und Ablagerungen zurückzuführen ist, die sich im Joystick verfangen.
Das Videospiel macht keinen Spaß , wenn dein Controller gegen dich arbeitet. Am liebsten würdest du den Controller wegwerfen und einen neuen kaufen, aber ein Nintendo Switch Pro Controller hat einen UVP von ca 70,00 €!
Glücklicherweise gibt es eine relativ einfache Lösung für das Abdriften des Joysticks. Die Lösung besteht darin, den Controller auseinanderzunehmen, um das Innere der Joysticks zu reinigen. Diese Anleitung zeigt, wie du das sicher und schnell erledigen kannst.
Was du brauchst
-
-
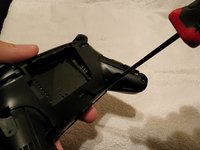
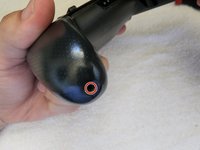
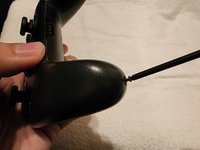
Entferne die beiden schwarzen PH0-Kreuzschlitzschrauben an den unteren Enden des Controllers.
-
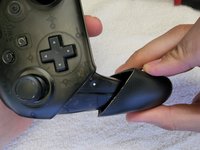
Ziehe die Handgriffe von den unteren Kanten des Controllers ab.
-
-
-
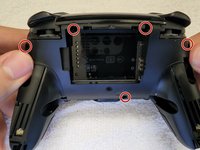
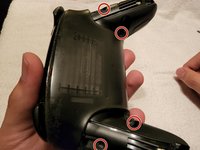
Entferne die vier silbernen PH0-Kreuzschlitzschrauben von der Rückseite des Controllers.
-
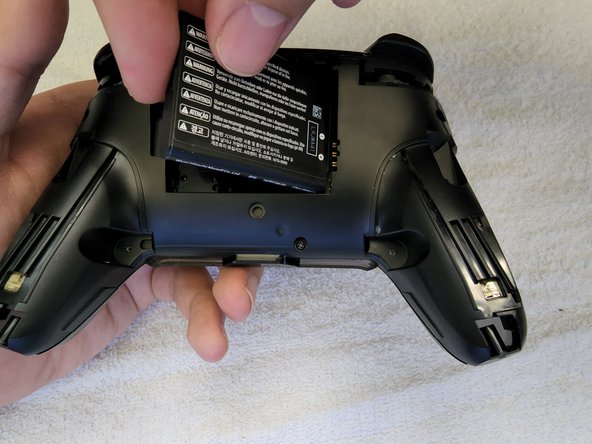
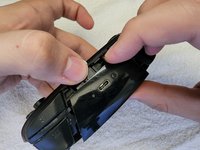
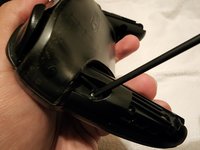
Halte den Controller, wie im dritten Bild dargestellt, mit den Daumen auf der Oberseite des Controllers. Hebele die Rückplatte mit deinen Daumen vom Rest des Controllers ab.
When reassembling, don't forget to put the battery back in. I know it seems stupid, but I have taken apart many pro controllers and constantly set the battery to the side, just to forget about and scratch my head and wonder why the controller isn't working.
-
-
-
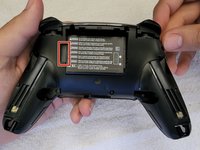
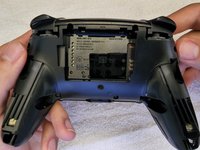
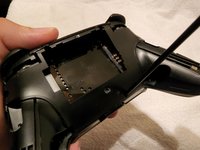
Lege einen Finger in die Lücke links neben dem Akku.
-
Entferne den Akku mit Hilfe der kleinen Lasche seitlich am Akku.
-
-
-
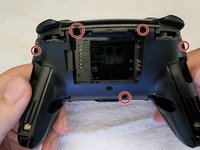
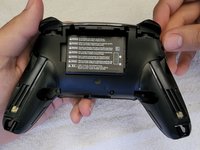
Entferne die fünf schwarzen PH0-Kreuzschlitzschrauben von der Rückseite des Controllers.
-
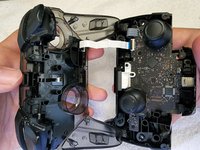
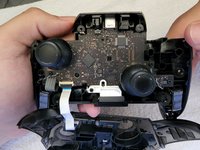
Lege einen Finger zwischen die Blende und den Rest des Controllers und ziehe beide Hälften des Controllers auseinander, um sie zu trennen.
I couldn't get the middle top-right screw even with the Flex Extension and using wire cutters to nibble away some of the plastic. My son found a way, though. The bit could get in there, but neither holder. He set the Phillips #00 bit on the screw, pushed it down with a finger, then used needle nosed pliers to turn the bit.
-
-
-
-
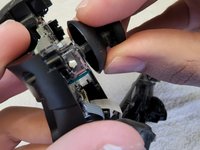
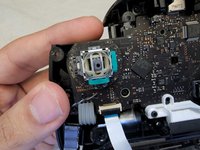
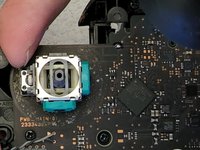
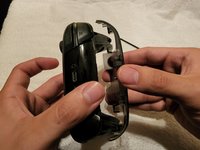
Greife die Rückseite des Controller-Teils (mit den Joysticks) mit der Hand. Greife mit der anderen Hand die Gummikappe des Joysticks und ziehe sie vom Joystick ab.
-
-
-
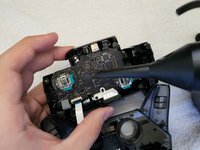
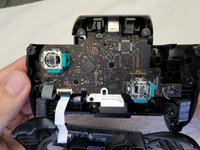
Entferne den Schmutz rund um die Joysticks mit Druckluft aus der Dose.
You may also want to use contact cleaner on the sticks.
In my case just using compressed air did not fix the drift, I also had to use contact cleaner, after which the drift was completely fixed.
-
-
-
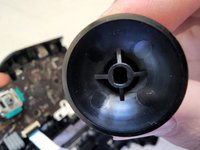
Setze die Gummikappen mit etwas Druck wieder auf die Joysticks.
-
-
-
Richte beide Hälften des Controllers aus und drücke sie zusammen. Sie sollten sich leicht zusammenfügen lassen.
-
Schraube die fünf schwarzen PH0-Kreuzschlitzschrauben auf der Rückseite des Controllers wieder ein .
-
-
-
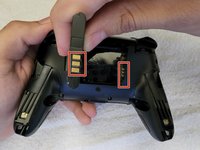
Setze den Akku in das Akkufach ein und verbinde die Anschlüsse des Akkus mit den Kontakten auf der rechten Seite des Akkufachs.
-
-
-
Richte die Rückseite des Controllers wie im Bild gezeigt aus und lasse sie einrasten.
-
Drehe die vier silbernen PH0-Kreuzschlitzschrauben wieder ein.
-
-
-
Schiebe die Handgriffe wieder auf die Enden des Controllers auf.
-
Schraube die beiden schwarzen PH0-Kreuzschlitzschrauben an der Unterseite der Handgriffe wieder ein.
-


Nachdem du diese Schritte ausgeführt hast, ist dein Controller jetzt viel sauberer als zuvor. Er sollte jetzt driftfrei sein und genauso gut funktionieren wie jeder andere 70,00 € -Controller!
Wenn er immer noch driftet, liegt ein physischer Defekt des Joysticks vor. In diesem Fall kannst du den Joystick selbst ersetzen. Du kannst Ersatzteile online finden, aber wahrscheinlich musst du lernen, wie man lötet, um den Ersatz-Joystick zu installieren.
Rückgängig: Ich habe diese Anleitung nicht absolviert.
58 weitere Personen haben diese Anleitung absolviert.
Besonderer Dank geht an diese Übersetzer:innen:
100%


Diese Übersetzer:innen helfen uns, die Welt zu reparieren! Wie kann ich mithelfen?
Hier starten ›
Team

CSU Los Angeles, Team 4-67, Briggs Spring 2022 Mitglied von CSU Los Angeles, Team 4-67, Briggs Spring 2022
CSULA-BRIGGS-S22S4G67
1 Mitglied
8 Anleitungen geschrieben
13 Kommentare
Excellent. Really clear guide. Thank you so much
Worked like a charm! Thank you!
My controller has been having this issue, I've been opening it up and dusting the stick, but that only temporarily fixes this issue. I am considering replacing the stick module, although I am a bit worried that something else is causing drift. Its possible that the shell or upper stick part has worn out or has some sort of opening which is allowing dust and other particles to get into the stick. Any advice?
This is the first thing I have used my iFixit kit to try and fix and it worked perfectly. Thanks for a very helpful and clear to follow guide.
I was lucky and had a very long ph00 lying around that came with a toy from the dollar store I bought over 15 years ago. My usual repair kit couldn’t reach the deep screws next to the battery, but that screwdriver saved the day. Excellent guide regardless.
This was the first time I used Ifixit. It worked perfectly, thanks a lot, saved my money, better repair than buy something new!
Merci beaucoup, j'ai pu régler le problème :)
My controller has gone from 'almost unusable' to 'most accurate controller I've ever seen'. It's absolutely brand-new again.
兄弟, 十分感谢。这个攻略干货十足。
I dropped some 90% iso into the boxes after opening, moved the sticks around, and then used compresses air to blow the alcohol and anything left out. After that, I got some silicone grease spray I had lying around (said it's safe on plastics, let's hope) and sprayed a little inside the boxes. Let the controller sit over night and reassembled. Seems to be working now, drift is gone. Thanks for the guide.
Merci mille fois Raul! Grâce à toi j'ai pu réparer ma manette sans difficulté.
Je te souhaite la meilleure vie qui soit!
Ludiquement.
Domi
If you use the shark mako kit at #4, a warning two you, the screw driver will not go in there. You will get a long one to go there in there. If you try At #4 you will suffer the consequences. Those black screws can strip easily and you might damage what you are trying to fix. This guide was used to clean my pro controller thanks!
Phillips #0 screwdriver did not fit into the screw and stripped it. #00 worked on the other screw, but now I'm unable to continue the teardown.
Mitchell Harding - Antwort
The screws are screwed in too tight by the factory that put it together, it can't be undone by hand, because all it did was strip the screw entirely. Need a powered tool to undo the screws.
Alkaris - Antwort
These are JIS #00 screws! DO NOT USE PHILIPS else you get stripped heads. Like me. Get a JIS screwdriver set for this breakdown.
Christian Manahan - Antwort
@christianma5187, thanks for the tip! I wish I'd read your comment and understood the difference between phillips and jis before I tried using the ph #00 and completely stripped one of the screws. I couldn't find a screw extractor small enough, and in the end I had to cut off the entire hand grip sleeve and get a new one. I hope nobody else makes the same mistake!
Mike - Antwort