Zum Hauptinhalt wechseln

Karcher Rotary Floor Cleaner 17833080 2017 Vacuum Motor Replacement

Was du brauchst

  1. Karcher Rotary Floor Cleaner 17833080 2017 Vacuum Motor Replacement, Remove the tank: Schritt 1, Bild 1 von 2 Karcher Rotary Floor Cleaner 17833080 2017 Vacuum Motor Replacement, Remove the tank: Schritt 1, Bild 2 von 2
    • Before you begin, make sure to power off and unplug the device.

    • Lift the tank by the handle and remove it from the device.

  2. Karcher Rotary Floor Cleaner 17833080 2017 Vacuum Motor Replacement, Remove the transport wheels: Schritt 2, Bild 1 von 3 Karcher Rotary Floor Cleaner 17833080 2017 Vacuum Motor Replacement, Remove the transport wheels: Schritt 2, Bild 2 von 3 Karcher Rotary Floor Cleaner 17833080 2017 Vacuum Motor Replacement, Remove the transport wheels: Schritt 2, Bild 3 von 3
    • Press the yellow button near each wheel base to release the wheels.

    • Remove both wheels from their sockets.

  3. Karcher Rotary Floor Cleaner 17833080 2017 Vacuum Motor Replacement, Remove the pump cover: Schritt 3, Bild 1 von 1
    • Use a T20 driver to remove the three screws securing the pump cover.

  4. Karcher Rotary Floor Cleaner 17833080 2017 Vacuum Motor Replacement: Schritt 4, Bild 1 von 3 Karcher Rotary Floor Cleaner 17833080 2017 Vacuum Motor Replacement: Schritt 4, Bild 2 von 3 Karcher Rotary Floor Cleaner 17833080 2017 Vacuum Motor Replacement: Schritt 4, Bild 3 von 3
    • Remove the pump cover.

  5. Karcher Rotary Floor Cleaner 17833080 2017 Vacuum Motor Replacement, Unplug the motor: Schritt 5, Bild 1 von 2 Karcher Rotary Floor Cleaner 17833080 2017 Vacuum Motor Replacement, Unplug the motor: Schritt 5, Bild 2 von 2
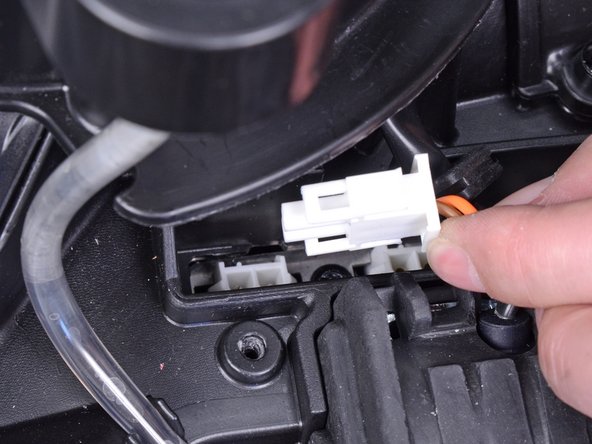
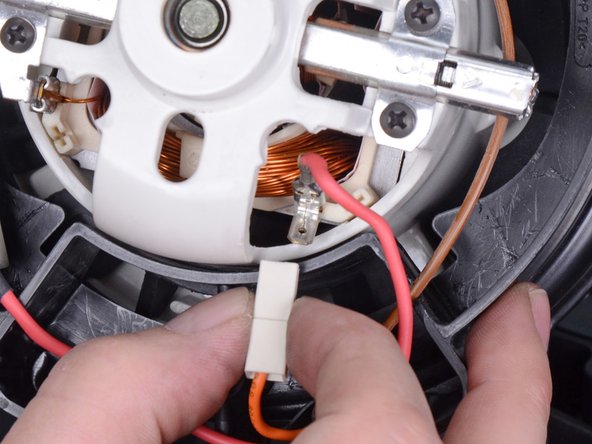
    • Squeeze the left plug by the edges and pull it out of its socket.

    • During reassembly, make sure that all plugs are firmly seated in their sockets.

  6. Karcher Rotary Floor Cleaner 17833080 2017 Vacuum Motor Replacement, Remove the vacuum cover: Schritt 6, Bild 1 von 1
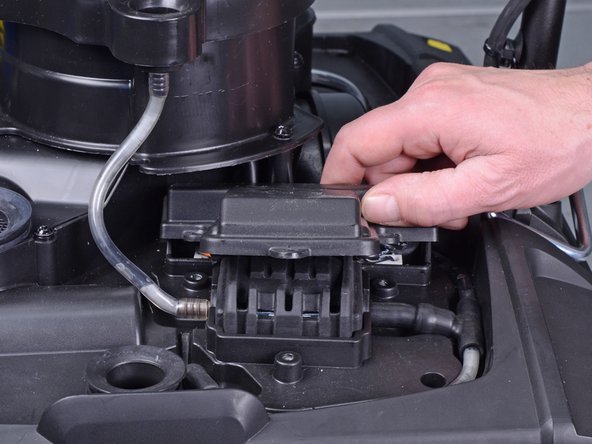
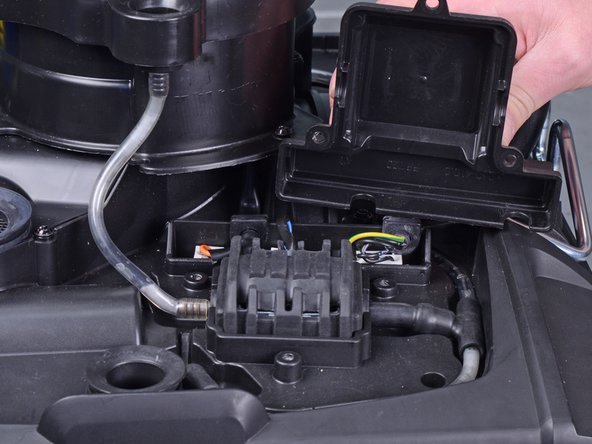
    • Use a T20 driver to remove the two screws securing the vacuum cover.

  7. Karcher Rotary Floor Cleaner 17833080 2017 Vacuum Motor Replacement: Schritt 7, Bild 1 von 1
    • Remove the vacuum cover.

  8. Karcher Rotary Floor Cleaner 17833080 2017 Vacuum Motor Replacement: Schritt 8, Bild 1 von 2 Karcher Rotary Floor Cleaner 17833080 2017 Vacuum Motor Replacement: Schritt 8, Bild 2 von 2
    • Pull the clear hose off the vacuum cover.

  9. Karcher Rotary Floor Cleaner 17833080 2017 Vacuum Motor Replacement, Reassembly tip: Schritt 9, Bild 1 von 1
    • Reassembly tip: Use this photo as a reference on how to route the motor wires in the vacuum housing.

  10. Karcher Rotary Floor Cleaner 17833080 2017 Vacuum Motor Replacement, Disconnect the motor wires: Schritt 10, Bild 1 von 3 Karcher Rotary Floor Cleaner 17833080 2017 Vacuum Motor Replacement, Disconnect the motor wires: Schritt 10, Bild 2 von 3 Karcher Rotary Floor Cleaner 17833080 2017 Vacuum Motor Replacement, Disconnect the motor wires: Schritt 10, Bild 3 von 3
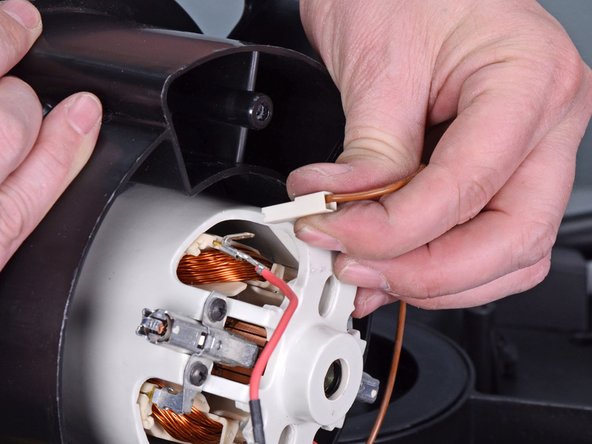
    • Disconnect the two motor wires by pulling the plugs off their spade sockets.

  11. Karcher Rotary Floor Cleaner 17833080 2017 Vacuum Motor Replacement, Remove the vacuum housing: Schritt 11, Bild 1 von 1
    • Use a T20 driver to remove the five screws securing the vacuum housing.

  12. Karcher Rotary Floor Cleaner 17833080 2017 Vacuum Motor Replacement: Schritt 12, Bild 1 von 3 Karcher Rotary Floor Cleaner 17833080 2017 Vacuum Motor Replacement: Schritt 12, Bild 2 von 3 Karcher Rotary Floor Cleaner 17833080 2017 Vacuum Motor Replacement: Schritt 12, Bild 3 von 3
    • Lift the vacuum housing to remove it.

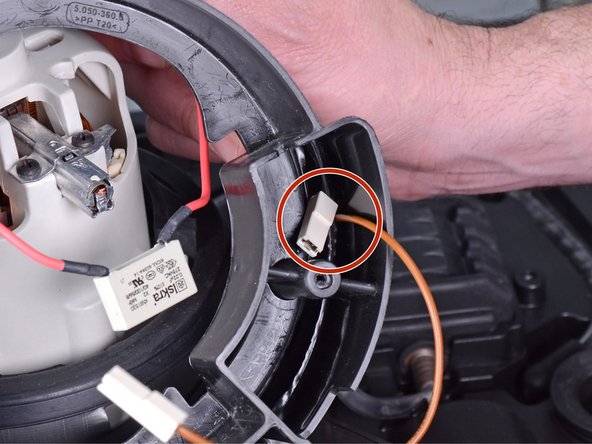
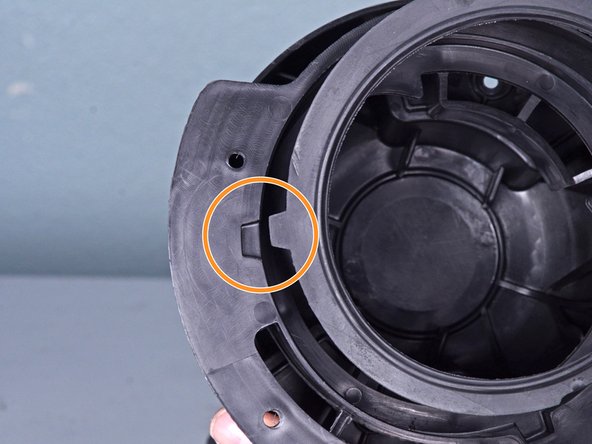
    • Reassembly tip: During reassembly, be sure to thread the motor wires through cutout on the side of the vacuum housing.

    • Reassembly tip: Be sure to properly align the vacuum housing to the rubber motor seal.

  13. Karcher Rotary Floor Cleaner 17833080 2017 Vacuum Motor Replacement, Remove the motor: Schritt 13, Bild 1 von 1
    • Lift the vacuum motor from the device to remove it.

  14. Karcher Rotary Floor Cleaner 17833080 2017 Vacuum Motor Replacement, Remove the lower seal: Schritt 14, Bild 1 von 1
    • Peel the lower rubber seal from the motor and transfer it to the replacement part.

  15. Karcher Rotary Floor Cleaner 17833080 2017 Vacuum Motor Replacement, Remove the upper seal: Schritt 15, Bild 1 von 2 Karcher Rotary Floor Cleaner 17833080 2017 Vacuum Motor Replacement, Remove the upper seal: Schritt 15, Bild 2 von 2
    • Peel the upper rubber seal from the motor and transfer it to the replacement part.

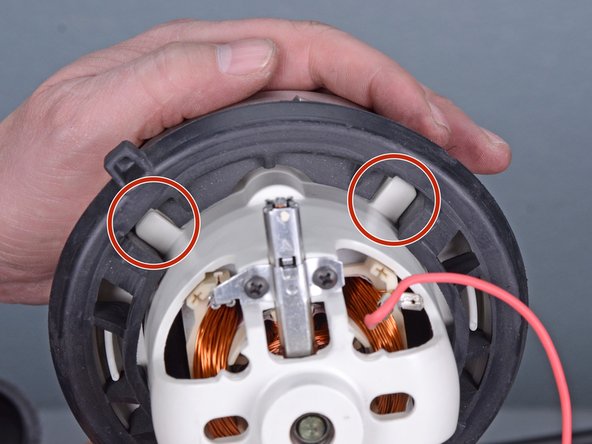
    • The upper seal is keyed to the motor. Be sure to properly align it during assembly.

Abschluss

To reassemble your device, follow these instructions in reverse order.

Ein:e weitere:r Nutzer:in hat diese Anleitung absolviert.

Arthur Shi

Mitglied seit: 01/03/18

252.842 Reputation

526 Anleitungen geschrieben

Team

iFixit Mitglied von iFixit

Staff

135 Mitglieder

16.817 Anleitungen geschrieben

0 Kommentare

Kommentar hinzufügen

Seitenaufrufe:

Letzte 24 Stunden: 1

Letzte 7 Tage: 2

Letzte 30 Tage: 8

Insgesamt: 276