Zum Hauptinhalt wechseln

LG WM3050CW Electrical Noise Filter Replacement

Was du brauchst

  1. LG WM3050CW Electrical Noise Filter Replacement, Safety Precautions: Schritt 1, Bild 1 von 2 LG WM3050CW Electrical Noise Filter Replacement, Safety Precautions: Schritt 1, Bild 2 von 2
    • Before you begin your repair, perform the following:

    • Turn off the main water supply

    • Unplug your washer

    • Disconnect all water connections at the rear of your washer

  2. LG WM3050CW Electrical Noise Filter Replacement, Unfasten the top panel: Schritt 2, Bild 1 von 3 LG WM3050CW Electrical Noise Filter Replacement, Unfasten the top panel: Schritt 2, Bild 2 von 3 LG WM3050CW Electrical Noise Filter Replacement, Unfasten the top panel: Schritt 2, Bild 3 von 3
    • Use a Phillips driver to remove the two bottom 16.5 mm-long screws securing the top panel brackets.

  3. LG WM3050CW Electrical Noise Filter Replacement, Remove the top panel: Schritt 3, Bild 1 von 2 LG WM3050CW Electrical Noise Filter Replacement, Remove the top panel: Schritt 3, Bild 2 von 2
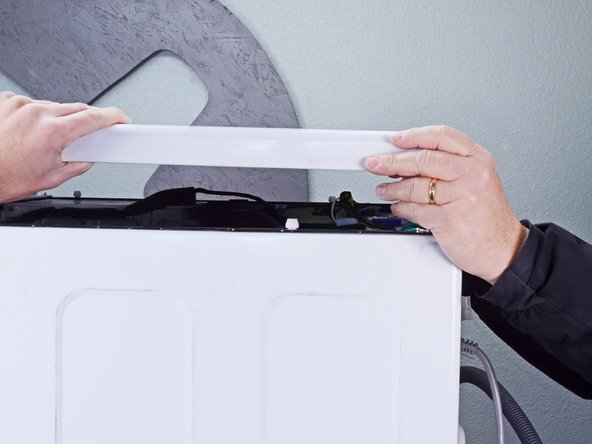
    • Slide the top panel 1-2 inches towards the rear of the device to disconnect its clips.

  4. LG WM3050CW Electrical Noise Filter Replacement: Schritt 4, Bild 1 von 2 LG WM3050CW Electrical Noise Filter Replacement: Schritt 4, Bild 2 von 2
    • Tilt the top panel upward to completely disconnect it from the chassis.

    • Remove the top panel.

  5. LG WM3050CW Electrical Noise Filter Replacement, Disconnect the noise filter: Schritt 5, Bild 1 von 3 LG WM3050CW Electrical Noise Filter Replacement, Disconnect the noise filter: Schritt 5, Bild 2 von 3 LG WM3050CW Electrical Noise Filter Replacement, Disconnect the noise filter: Schritt 5, Bild 3 von 3
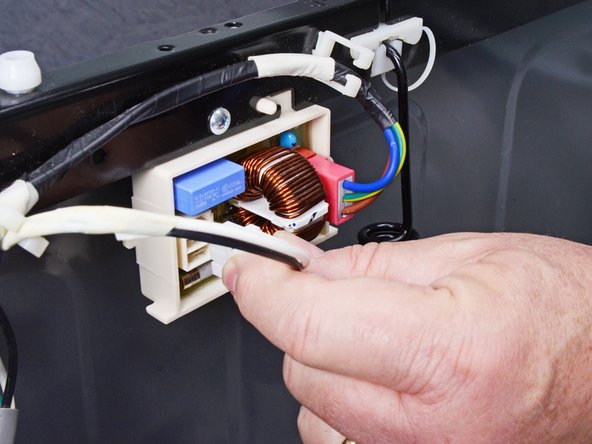
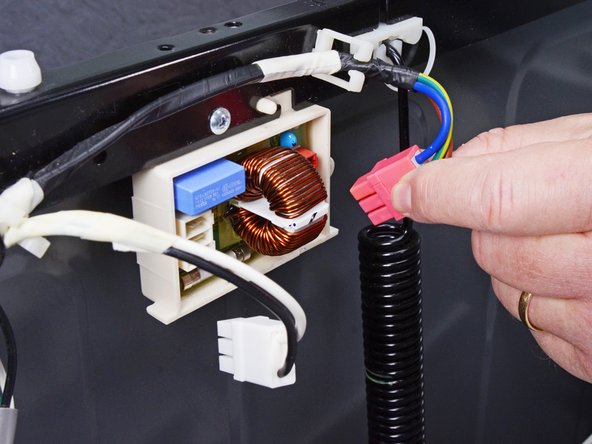
    • Disconnect the two spade connectors attached to the noise filter.

    • Always grip cables by their connectors and not the wires themselves.

  6. LG WM3050CW Electrical Noise Filter Replacement, Unfasten the noise filter: Schritt 6, Bild 1 von 1
    • Use a Phillips driver to remove the 12.5 mm-long screw securing the noise filter.

  7. LG WM3050CW Electrical Noise Filter Replacement, Remove the noise filter: Schritt 7, Bild 1 von 3 LG WM3050CW Electrical Noise Filter Replacement, Remove the noise filter: Schritt 7, Bild 2 von 3 LG WM3050CW Electrical Noise Filter Replacement, Remove the noise filter: Schritt 7, Bild 3 von 3
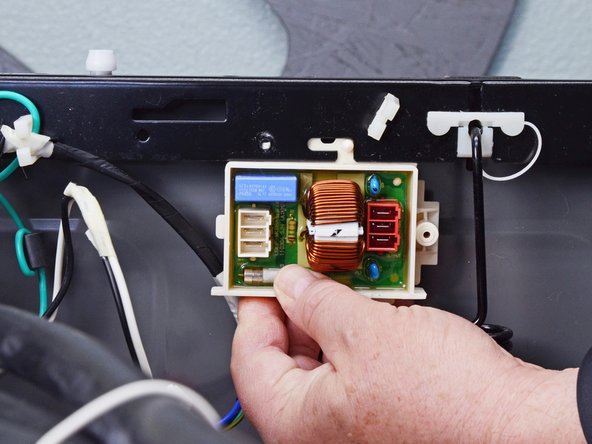
    • Slide the noise filter towards the front of the device to unclip it from the chassis.

    • Pull the filter downward to completely separate it from the device.

    • Remove the filter.

Abschluss

To reassemble your device, follow these instructions in reverse order.

Take your e-waste to an R2 or e-Stewards certified recycler.

Repair didn’t go as planned? Ask our Answers community for help.

Eine weitere Person hat diese Anleitung absolviert.

Bill Gilbert

Mitglied seit: 06/30/22

30.797 Reputation

213 Anleitungen geschrieben

Team

iFixit Mitglied von iFixit

Staff

140 Mitglieder

18.085 Anleitungen geschrieben

0 Kommentare

Kommentar hinzufügen

Seitenaufrufe:

Letzte 24 Stunden: 0

Letzte 7 Tage: 1

Letzte 30 Tage: 8

Insgesamt: 93